What is Arduino?
Arduino is a combination of software and hardware that turns input into output. Using the computer software, you can write programs for the physical board. On the board, you have different stimuli and reactions. For example, you can use buttons and sensors to light an LED, turn a motor, or other things.
Series and Parallel Circuits
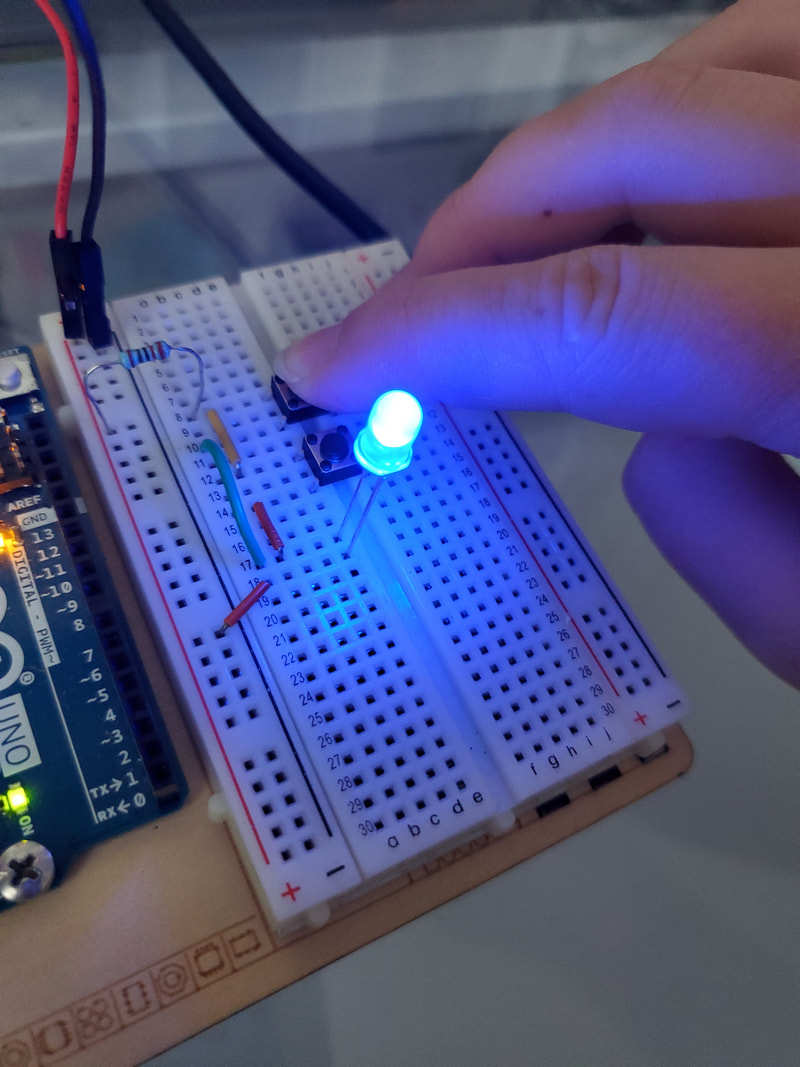
For the first two projects, we had to create two circuits, one series and one parallel. These exist entirely on the board, so there are no sketch screenshots. As you can see, the series circuit needs both buttons pressed because that is the only path for the energy. In the parallel circuit however, there's a second loop, so either button can be pressed.
|
|
|
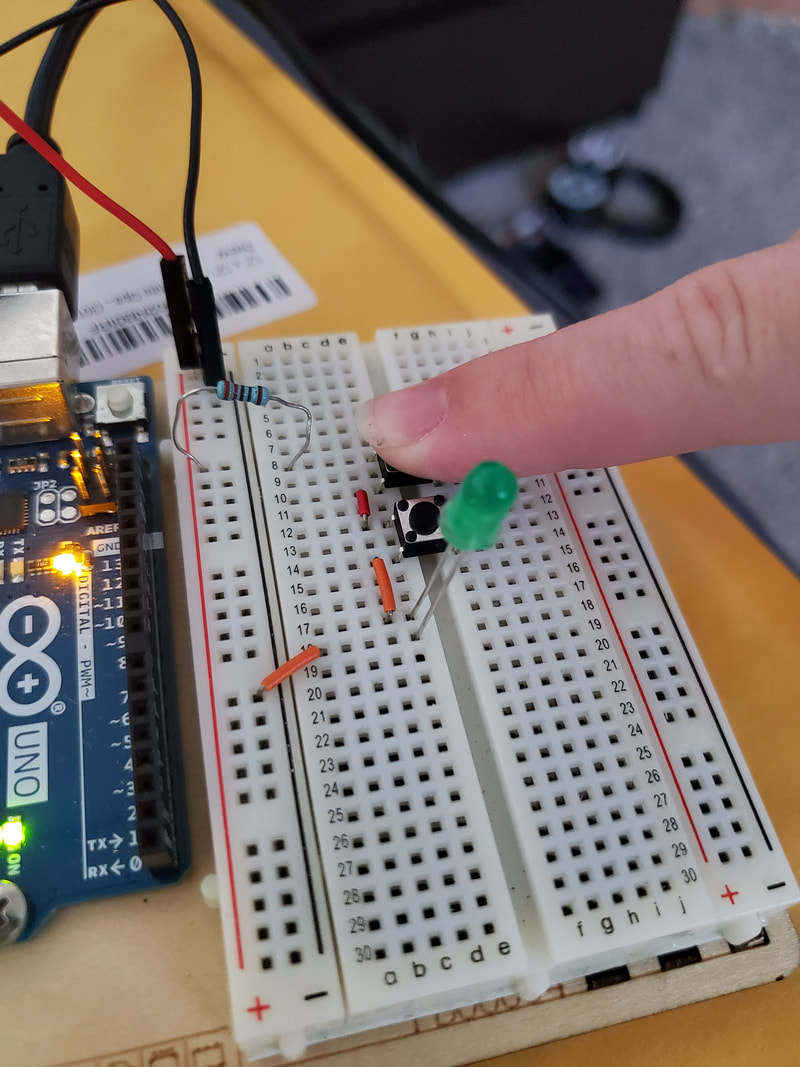
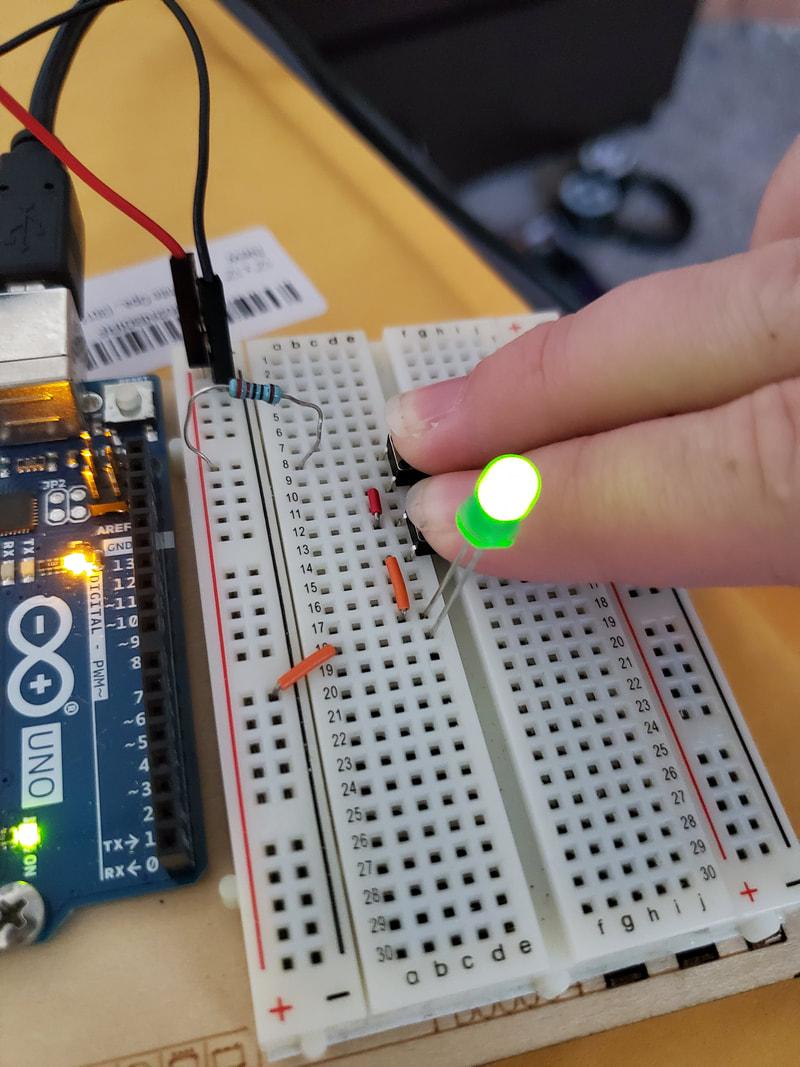
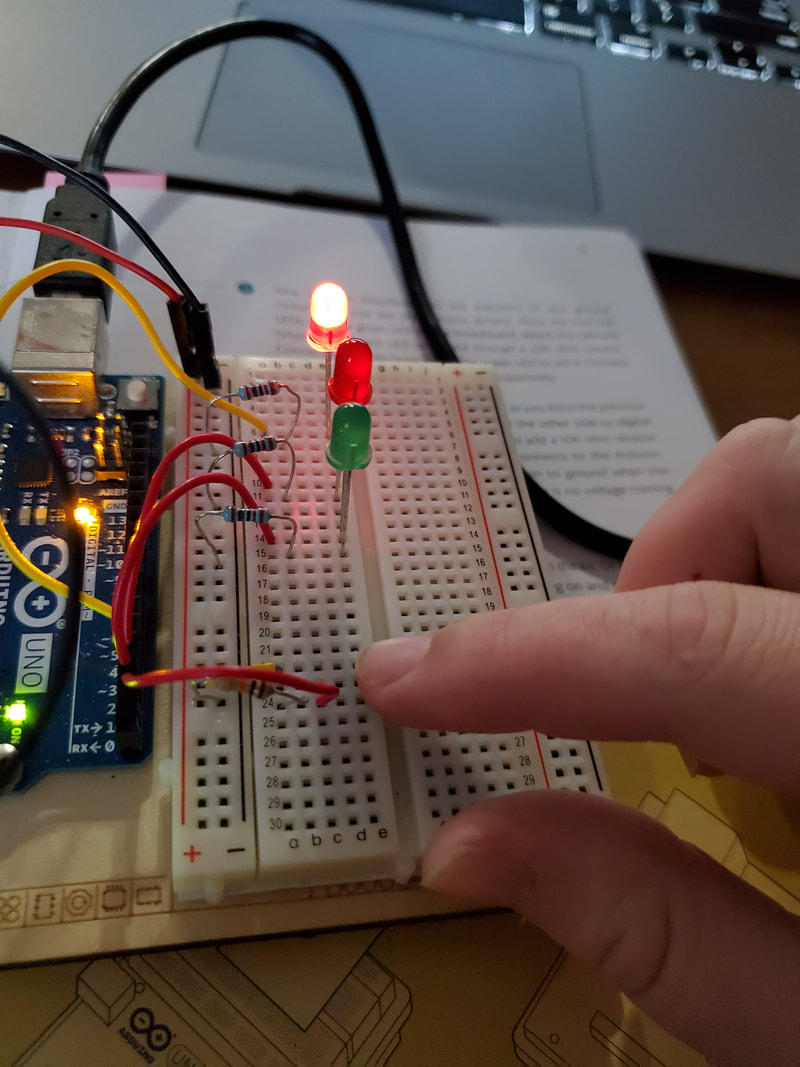
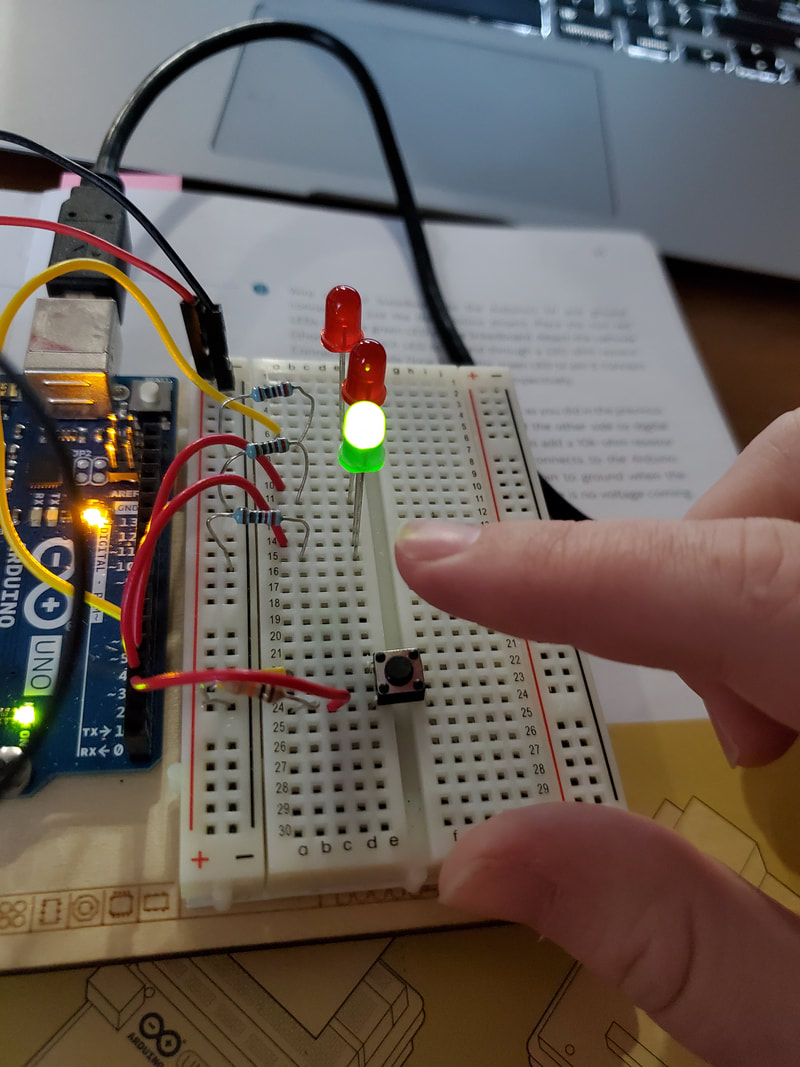
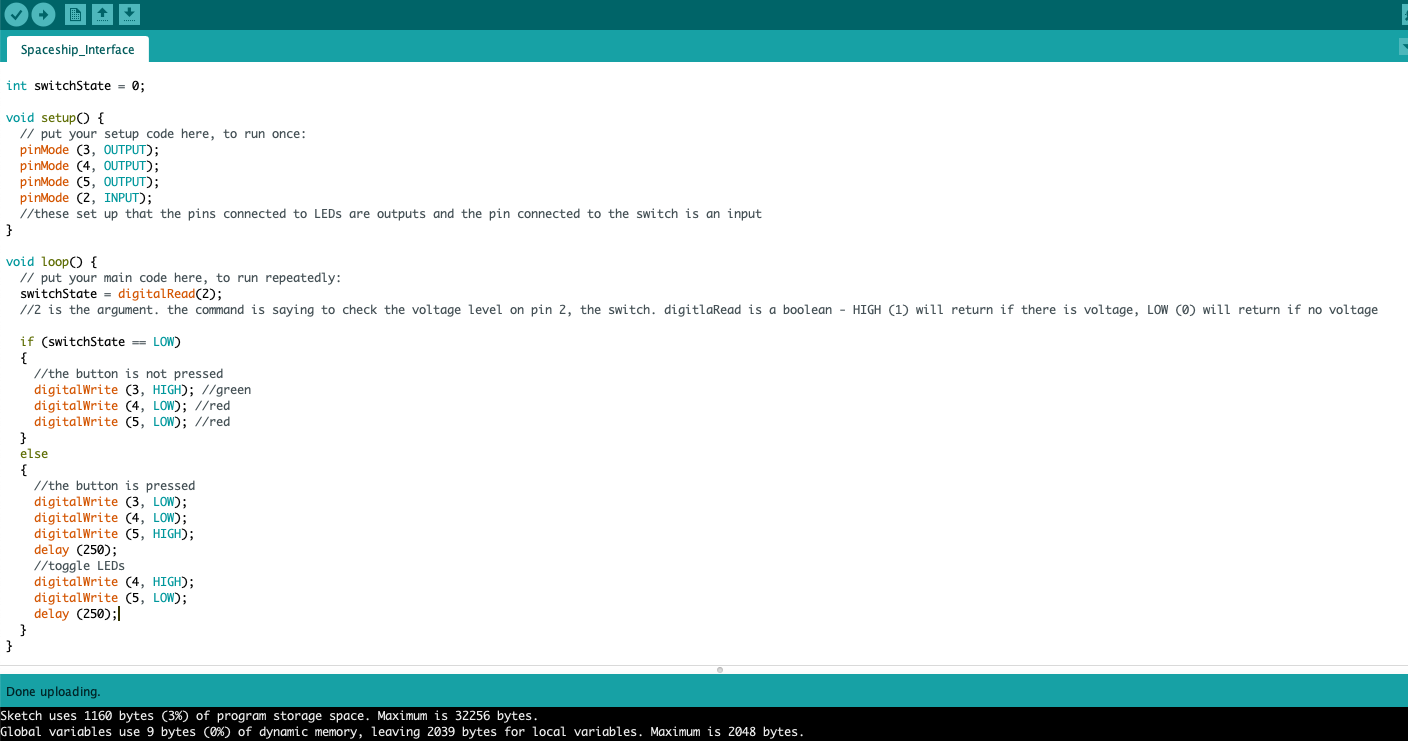
Spaceship Interface
Spaceship Interface has you create a circuit that lights up a green light until a button is pushed, at which point two red lights flash at alternating intervals. The sketch for this assignment is included, as well as a video of how it works.
|
|
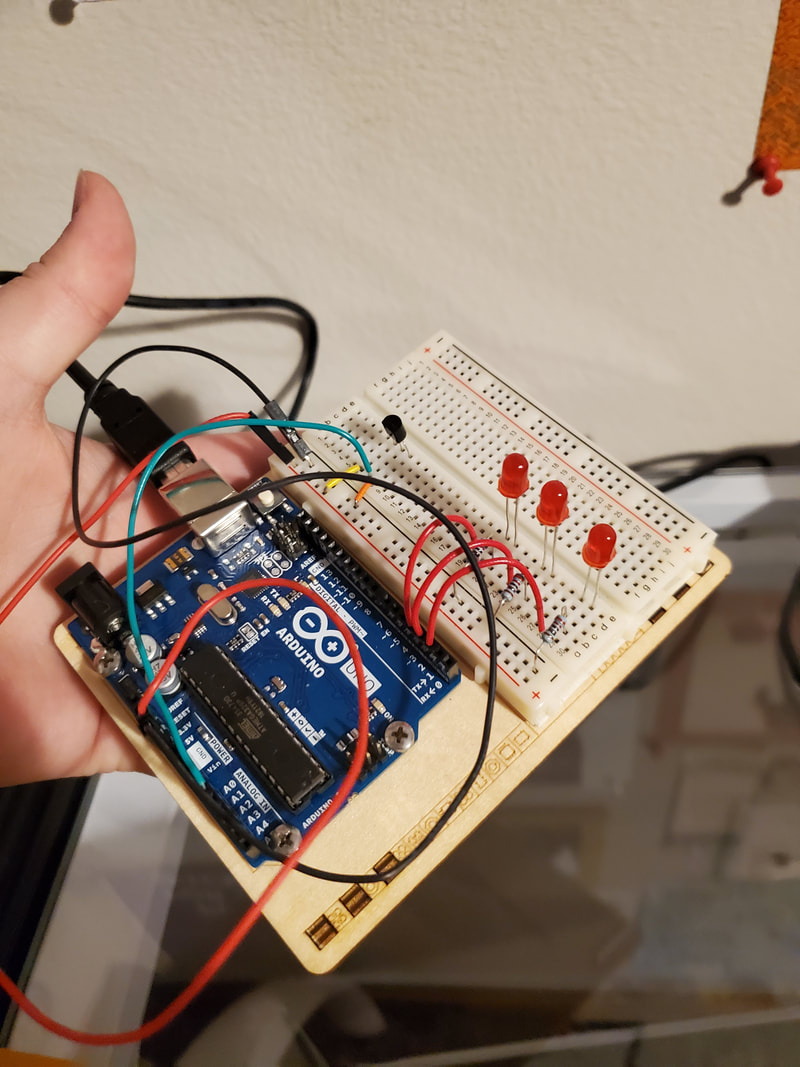
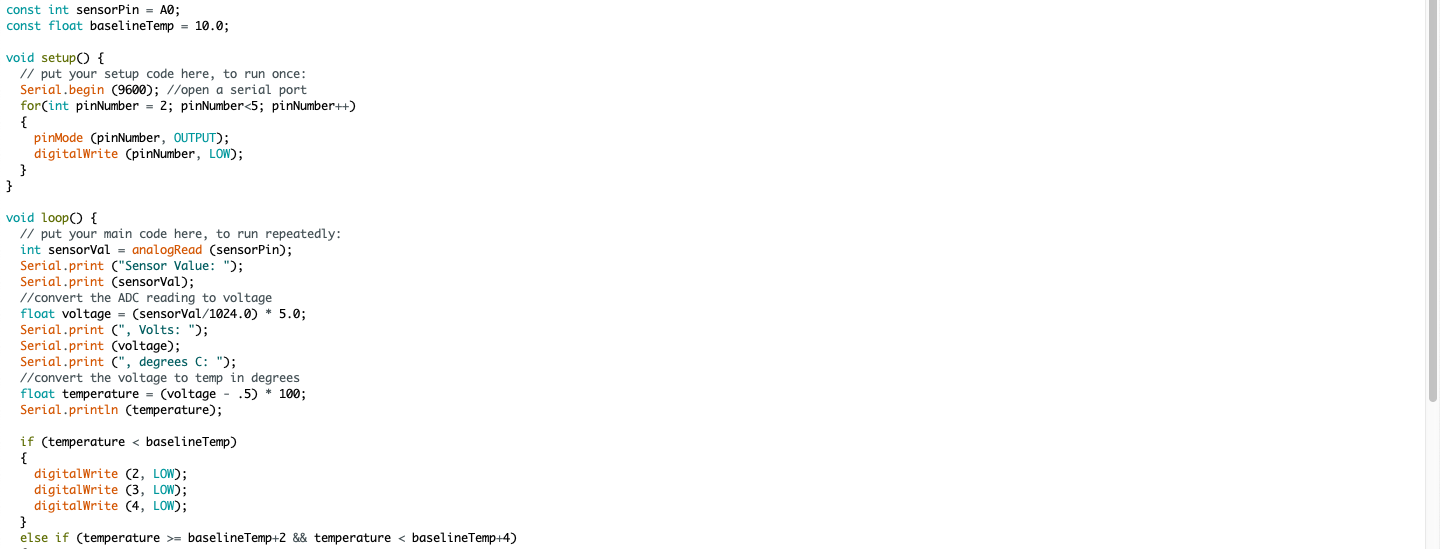
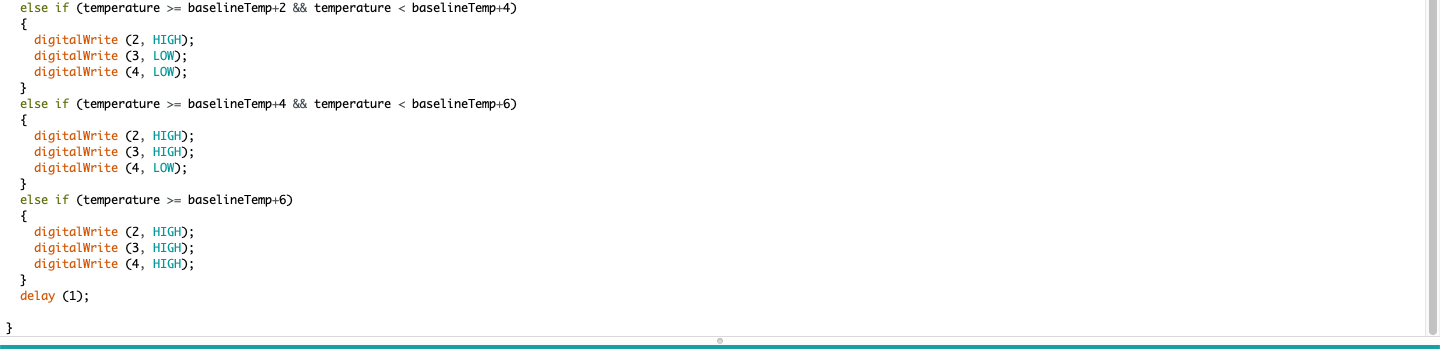
Love-O-Meter
This one I was unable to get working. What was supposed to happen was that when you touched the temperature sensor, the lights were supposed to light up in sequence based on how warm your finger is. I adjusted the temperature values a lot, and I was only ever able to get the first light working.
|
|
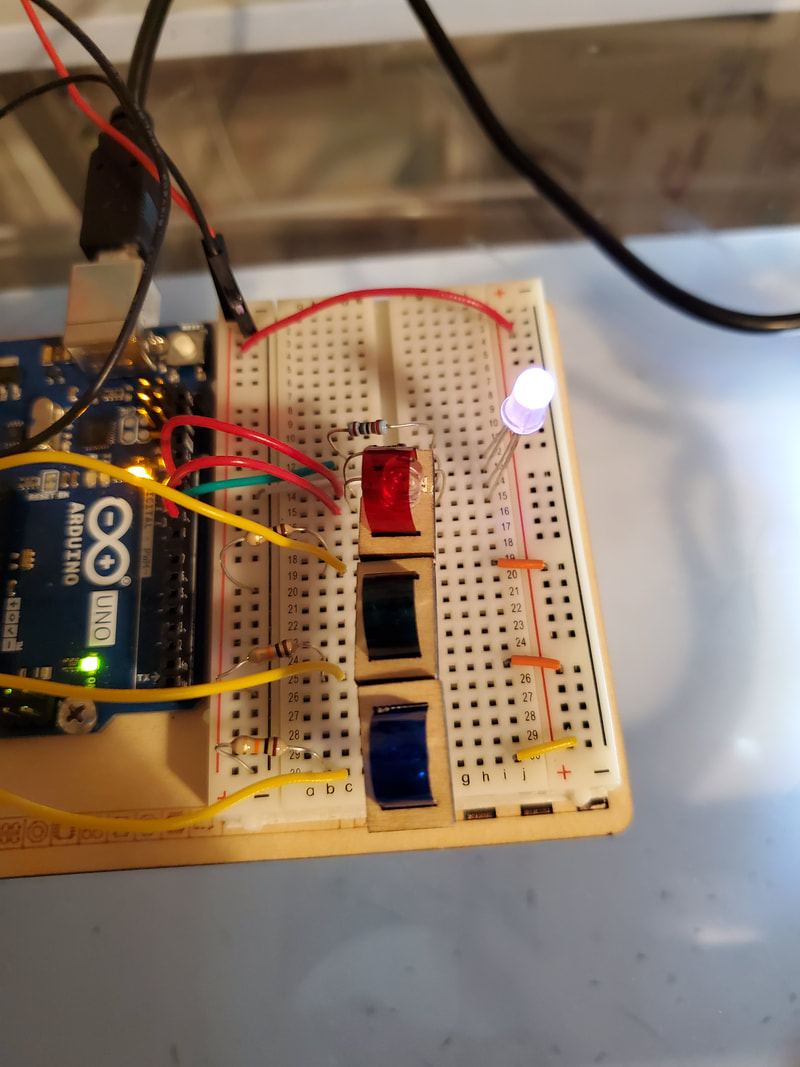
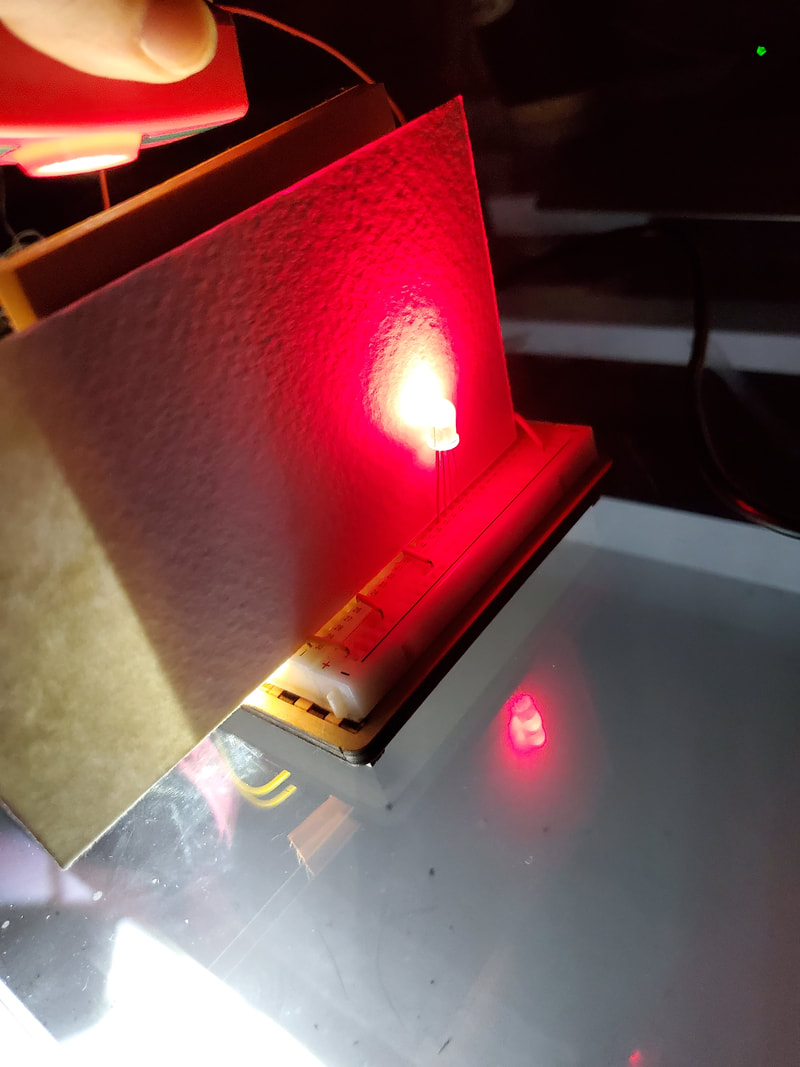
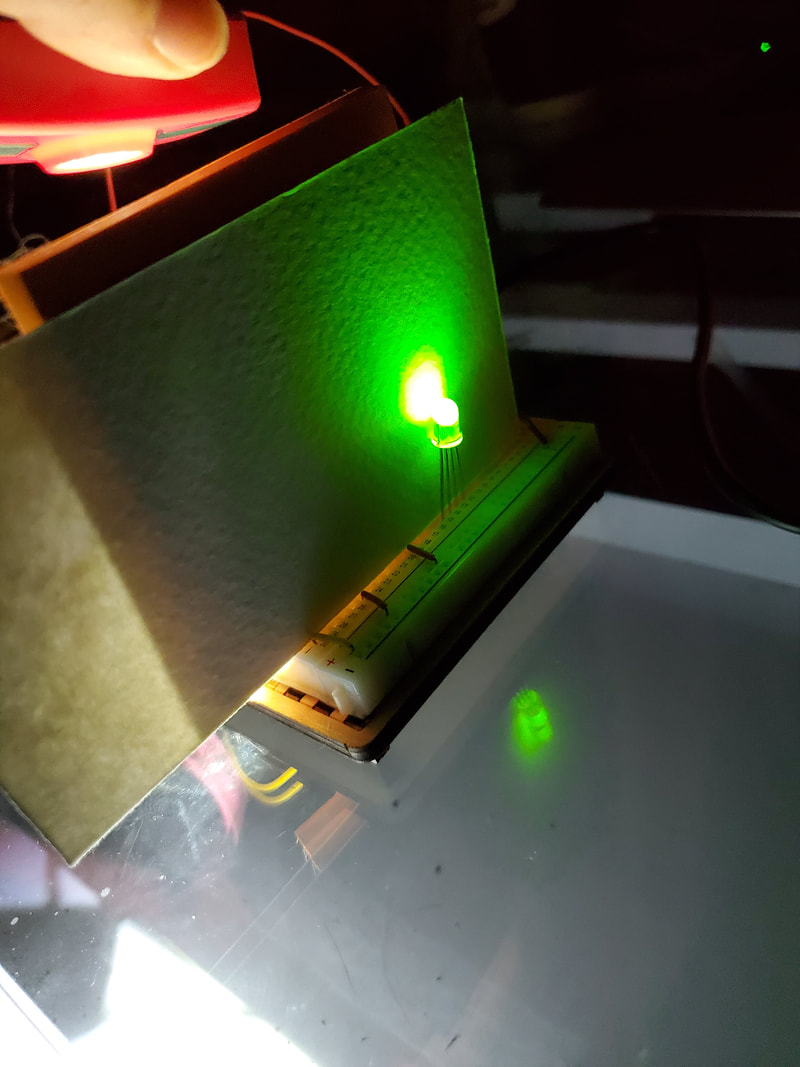
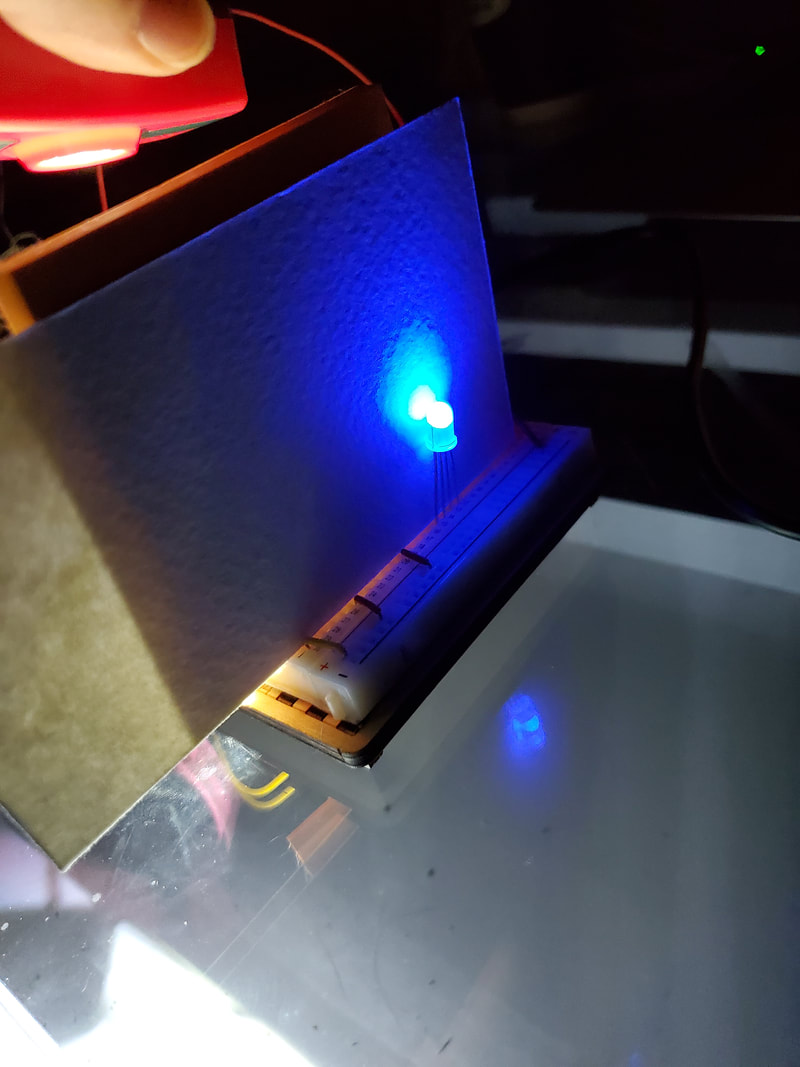
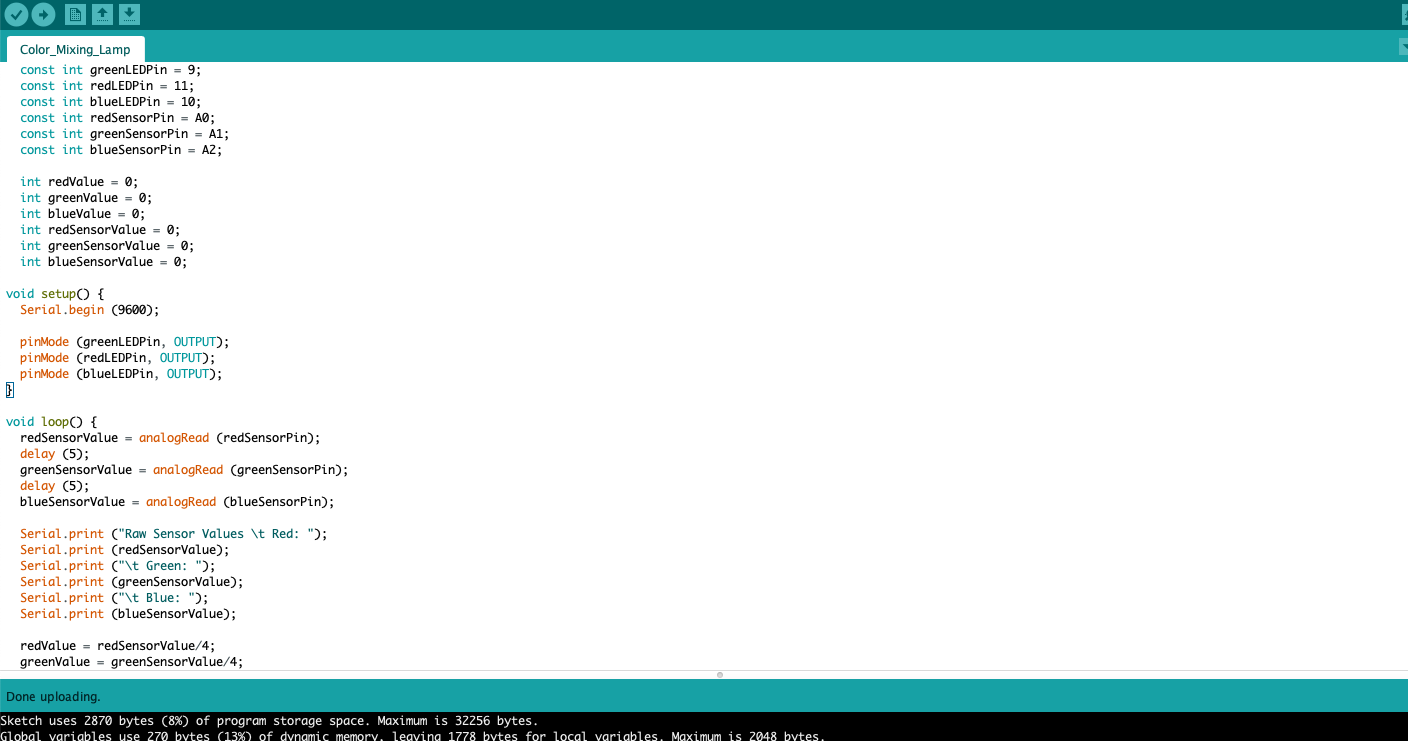
Color Mixing Lamp
This one is my favorite so far. The goal was to set up different sensors to react to light and change the color of an LED. I did made a bit of a modification with the placing of the sensors on the board because the little wood bits were too close together. I also had a bit of difficulty getting it to work at first, but I realised I had one small things wired incorrectly, and fixing that solved my problem. My video didn't cover everything, so I would like to say more about it here. I was able to get it to react with each individual color, as you can see in the photos below, but the headlamp I used in the video was bright enough that my paper didn't completely block it out. It was very funny while I was doing this one as well because when I was testing it (in the complete dark), I shone the light on the sensors and right as the LED was activated, my fire alarm went off and I thought it was the LED.
|
|
|
|
|
|
|
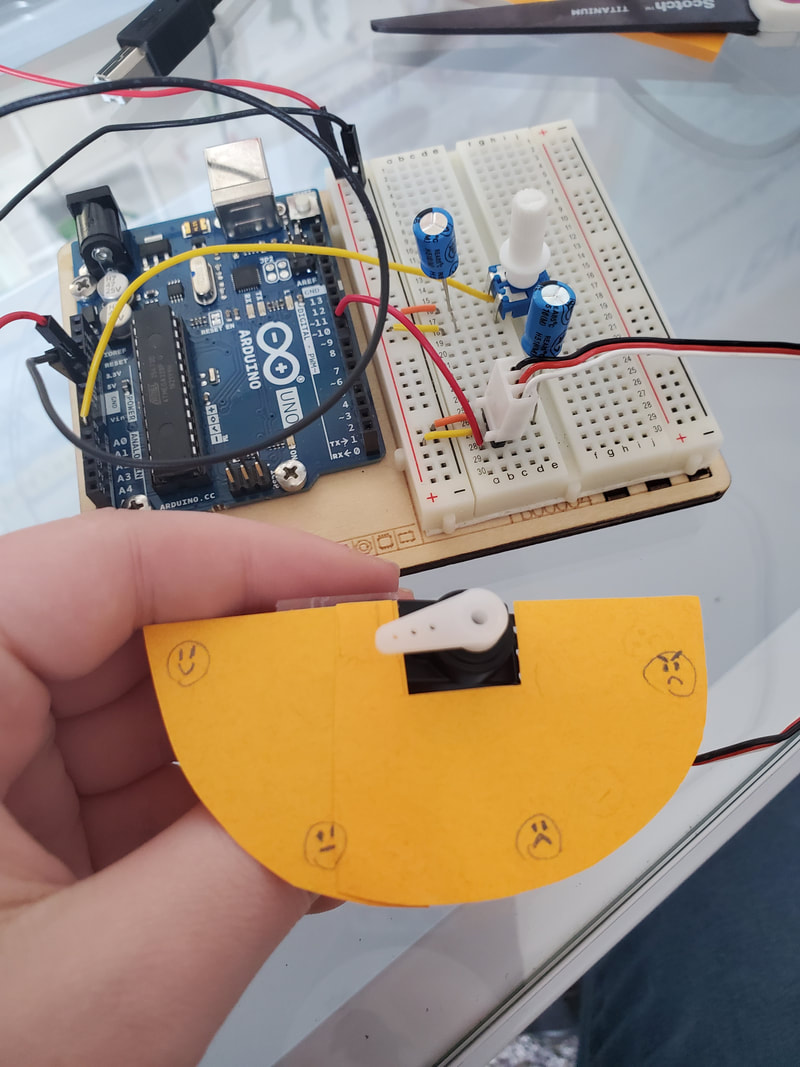
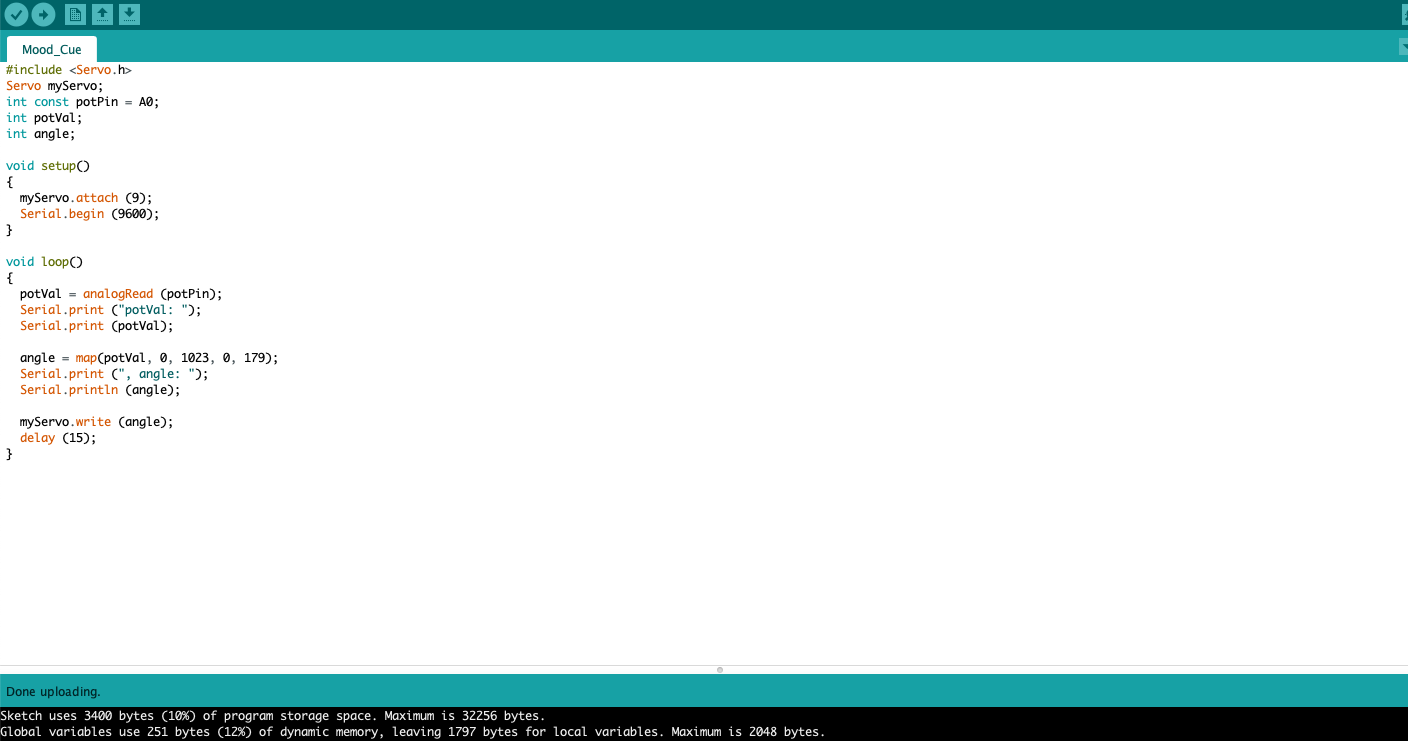
Mood Cue
I'm a bit surprised that the book said this one would take an hour, as I found it very easy. I did have to change up the placement of the potentiometer (and the connecting long yellow wire) because the way the book had it set up would have broken the pins on the base of it. I simply moved it so it bridged both sides of the breadboard, and then I had enough room.
|
|
|
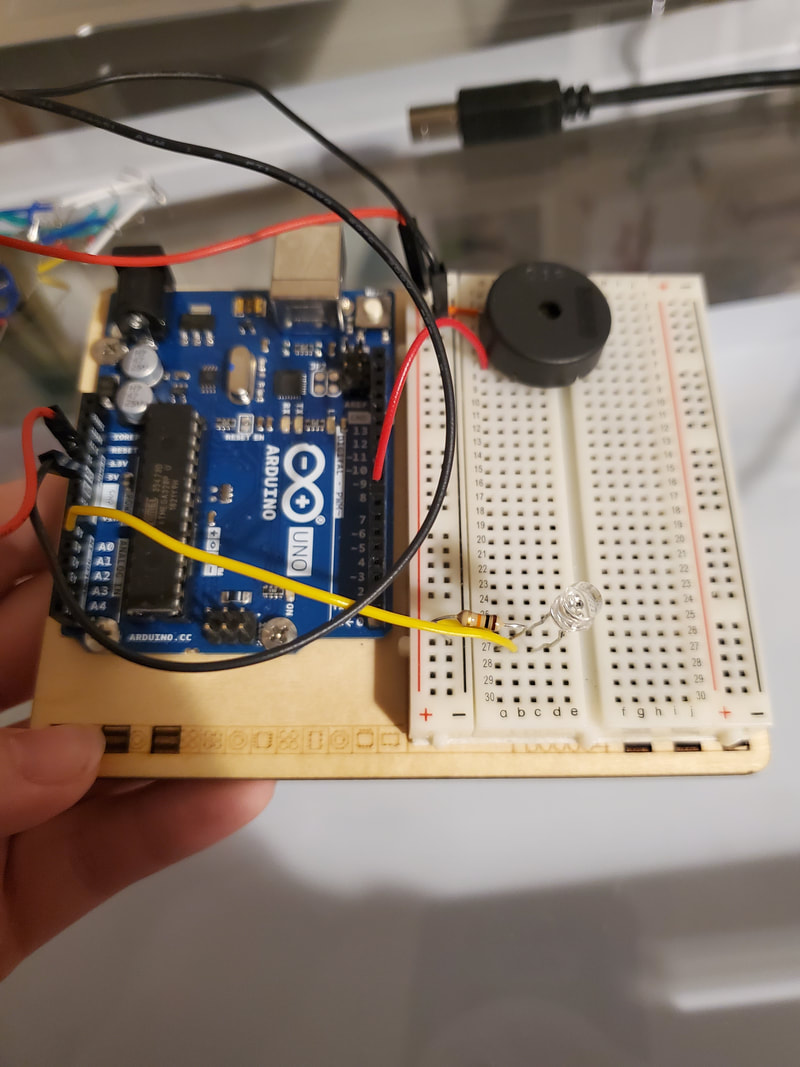
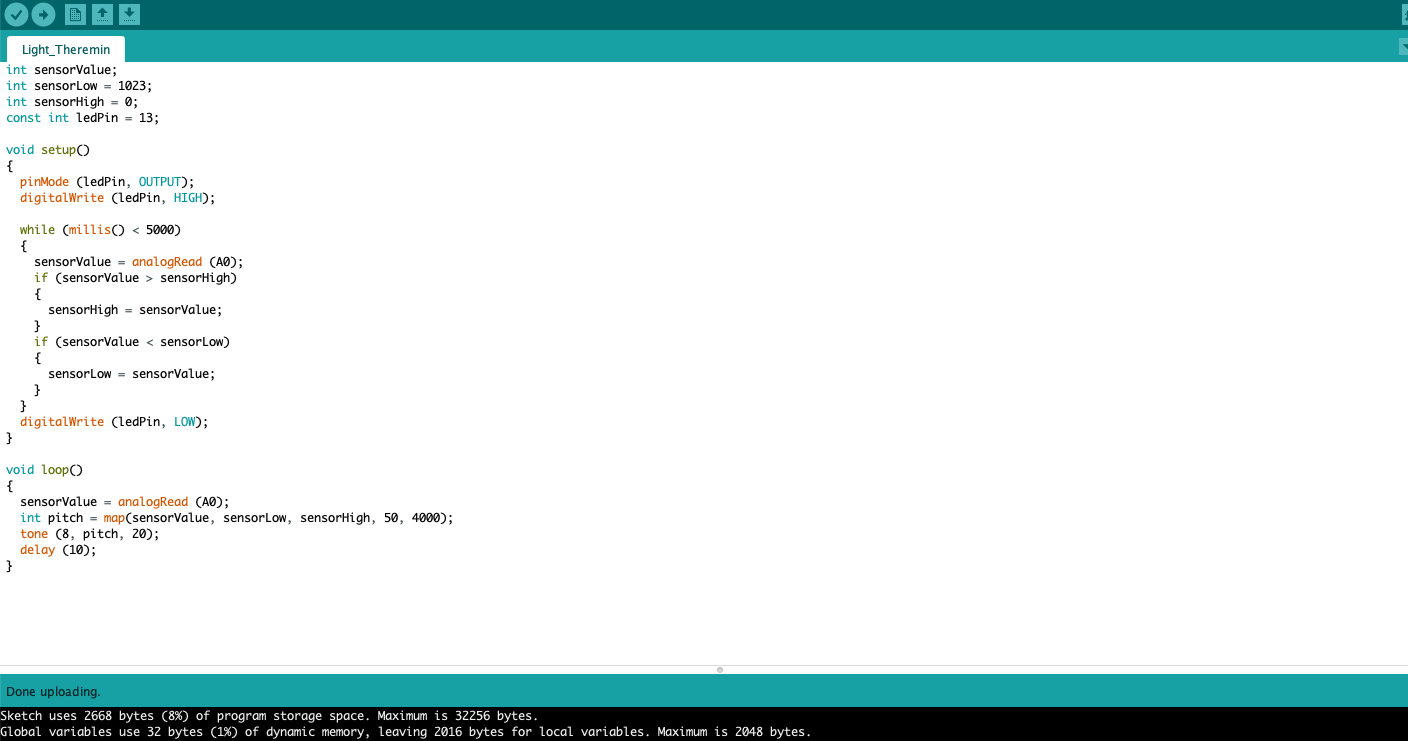
Light Theremin
This one was also very fun, if a little annoying. In case the sound in the video was too distracting, I was basically explaining that there is a sensor that picks up on light levels, and different levels of light produce different sounds in the piezo. I did move the red wire connecting the piezo to pin 8 because I didn't want to break off the prongs by forcing it to fit too close together. I thought this one was fun, because some of the sounds it made seemed like they could have been in a funky space movie. Off-screen towards the end my cat came in because he was concerned about the noise.
|
|
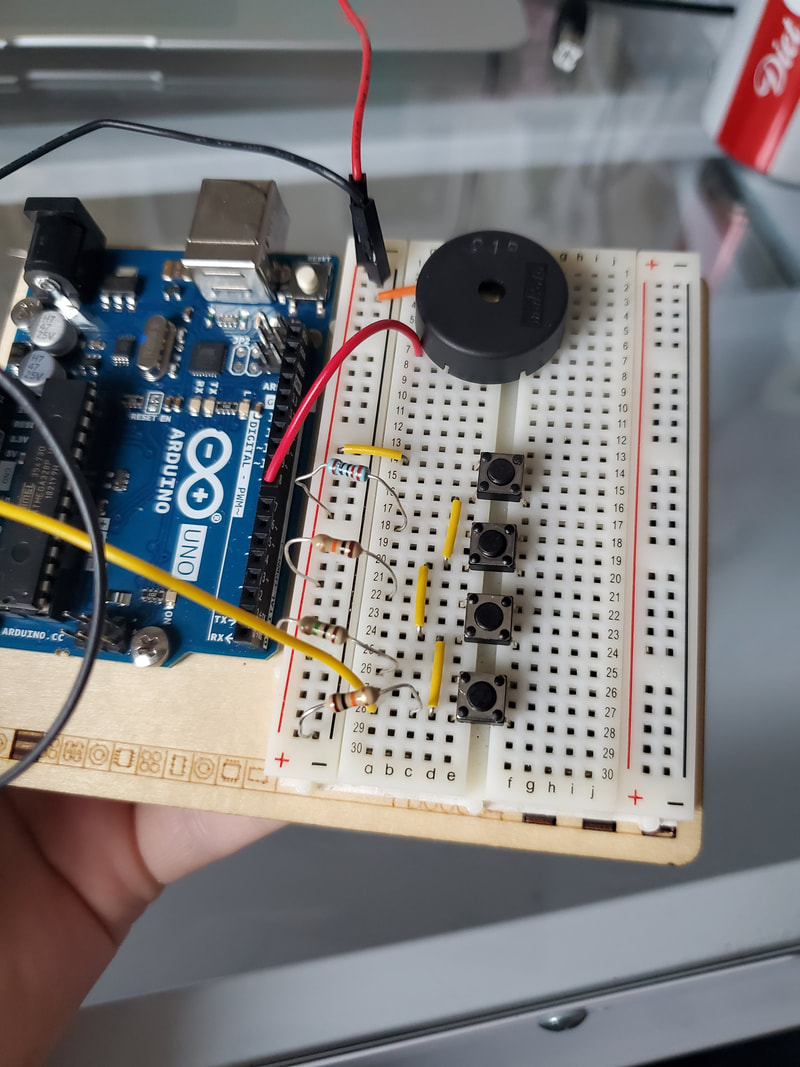
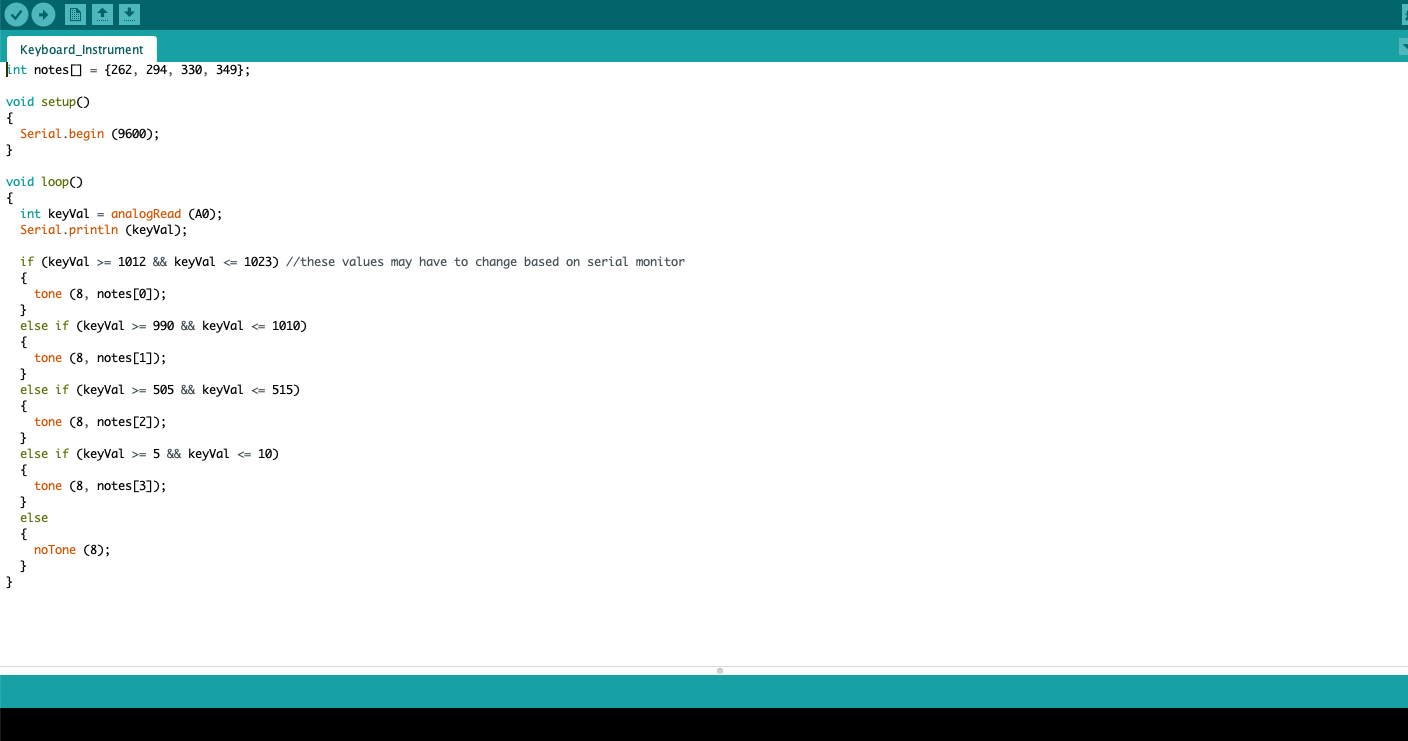
Keyboard Instrument
I found this one to be very fun, and I liked the sounds it made. I kept the piezo where it was from the last assignment, so the pin placement modifications are the same. As I mentioned in the video, I did change some of the values of the code in the first if statement in the loop() section of code, and I was able to get the fourth switch to produce sound that way. I also included a little video of me playing Hot Cross Buns. :)
|
|
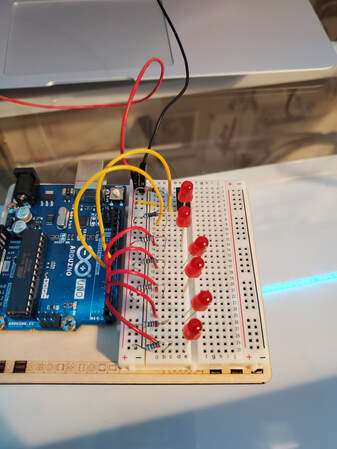
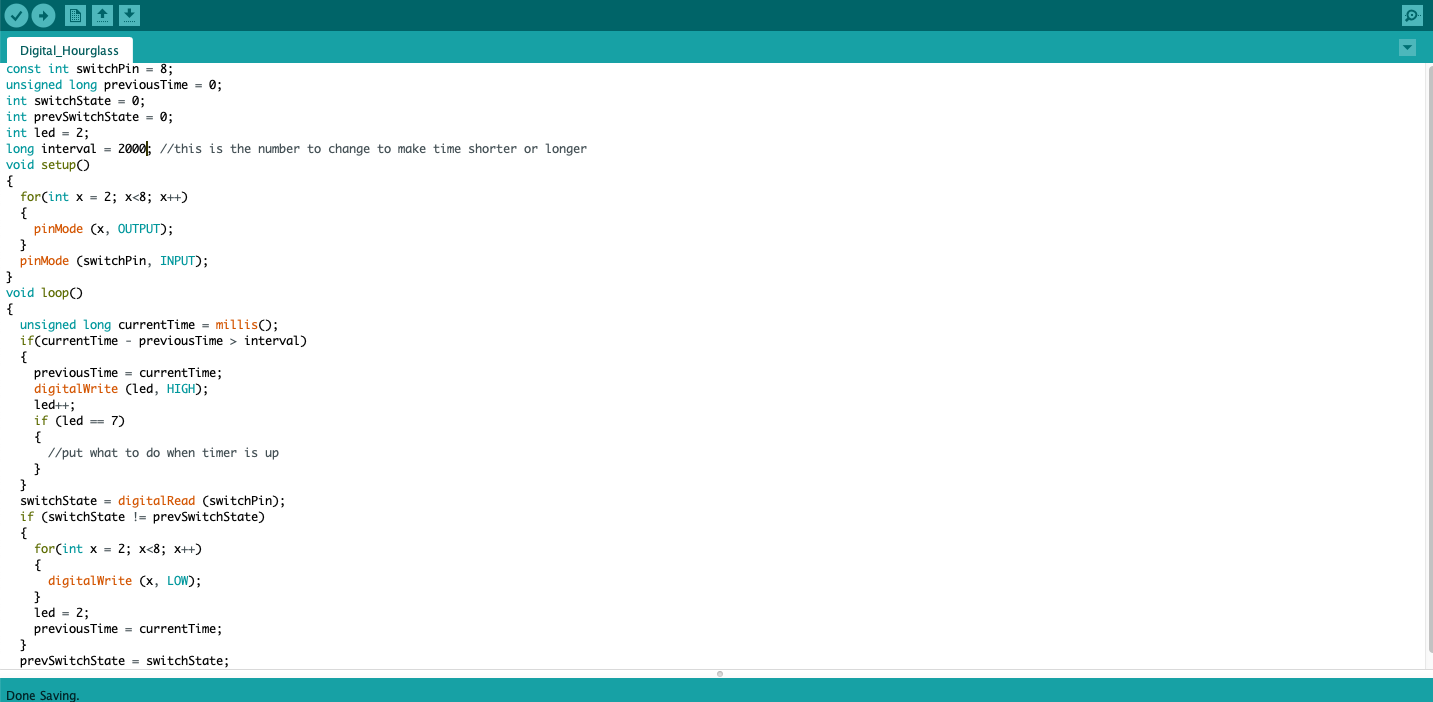
Digital Hourglass
This one was also one that didn't take very long. It was very easy to set up, easy to code, and was not much different from the parallel circuit. I find it interesting that the code had many for loops and if statements, and I feel like condensing it into a method may be helpful if you would want an hourglass that could repeat, or run different intervals.
|

|
|
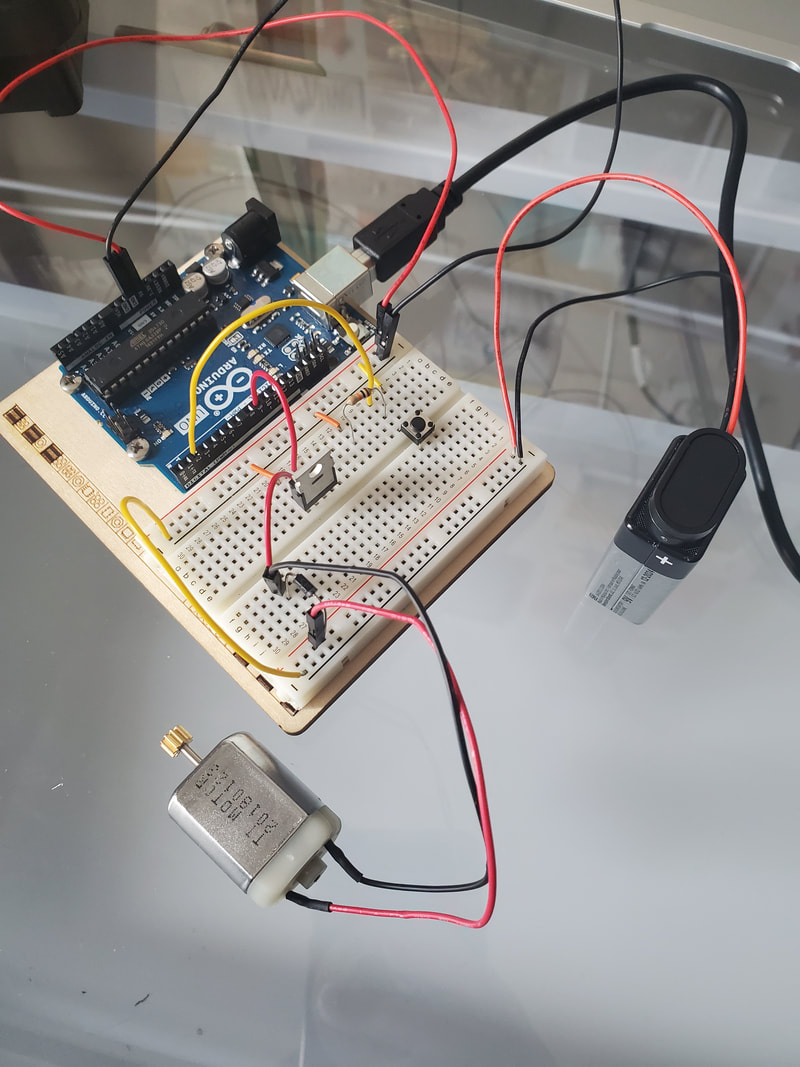
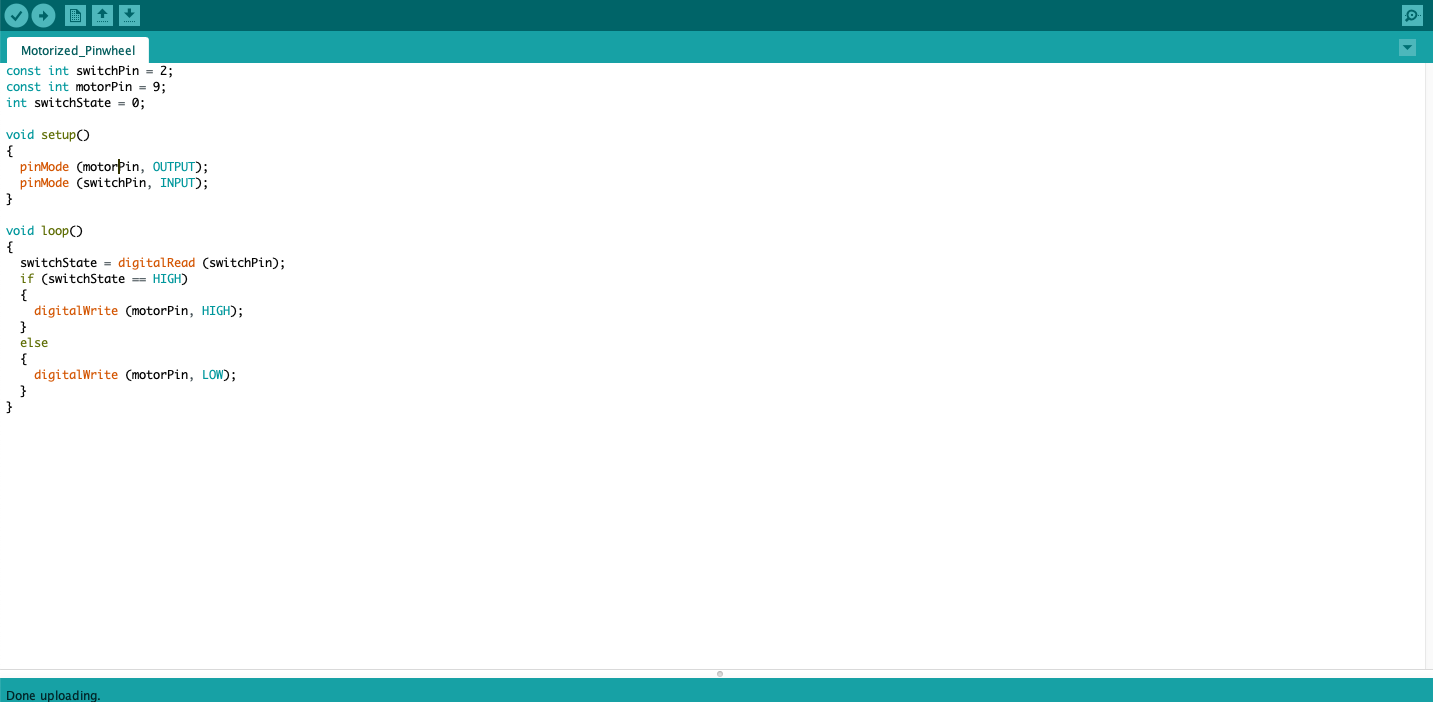
Motorized Pinwheel
To be completely honest, this one took a lot longer than it should have. I had pretty short wires before, and as I explained in the first video, it was pretty touchy and didn't want to work. I did catch an error where I had the yellow wire in pin 8 instead of pin 9, and that fixed the problem. It was a minor oversight that caused me a lot of trouble, but I fixed it in the end.
|
|
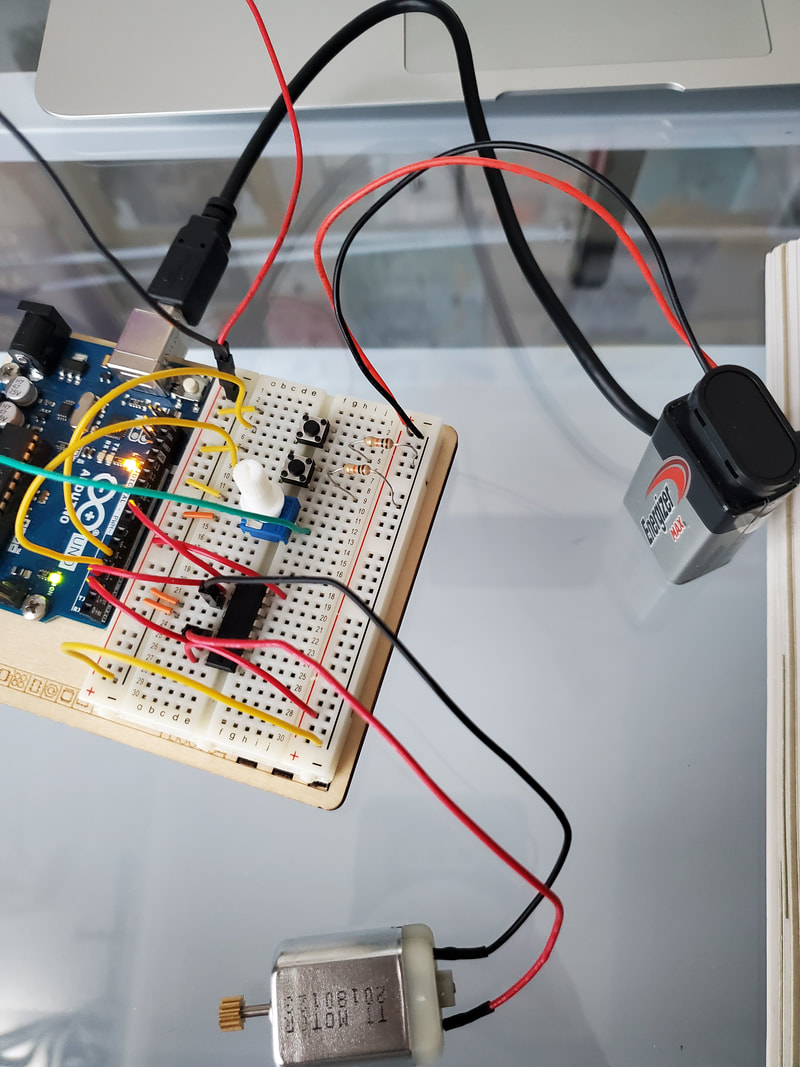
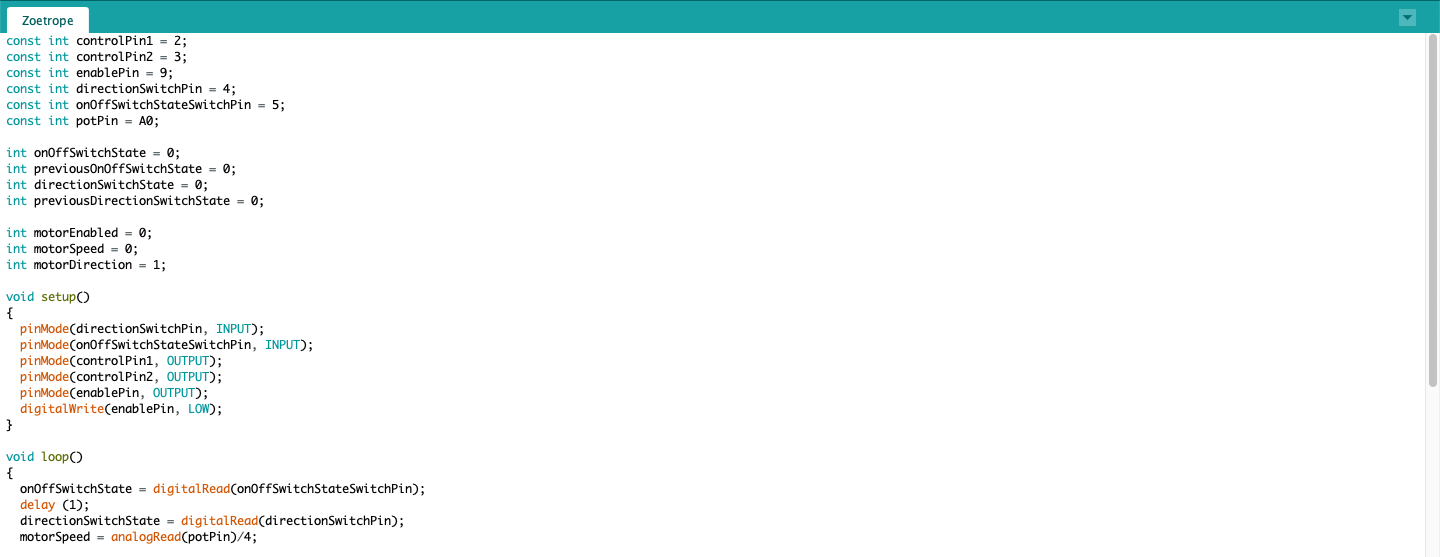
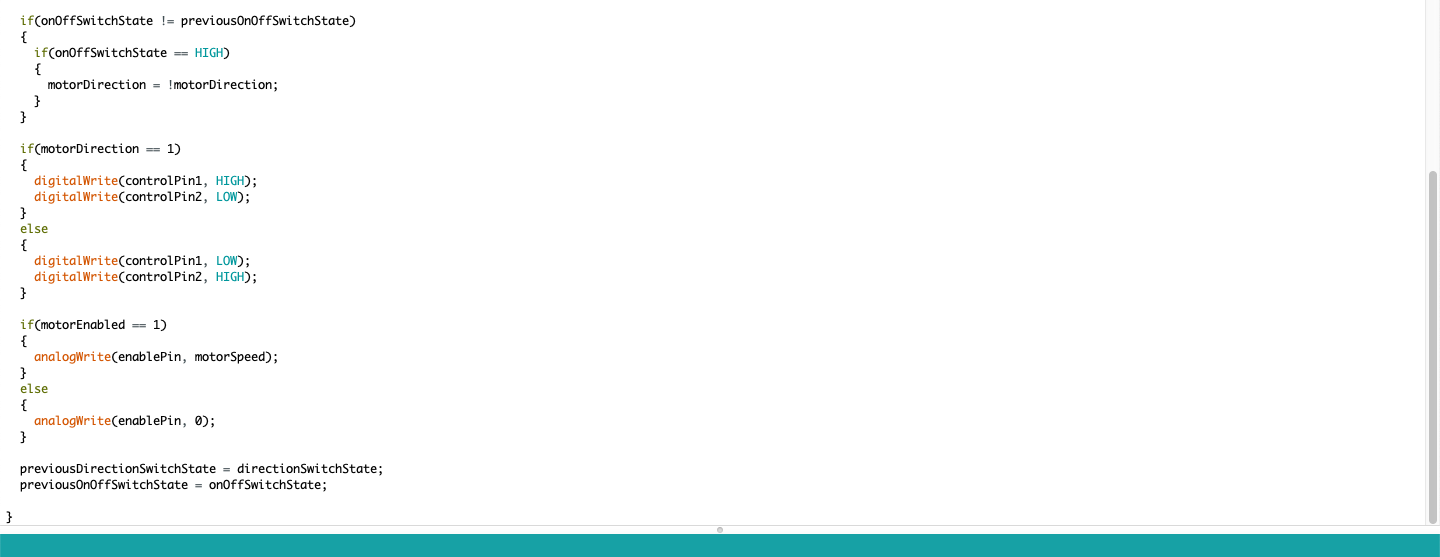
Zoetrope
I unfortunately do not have a video for this one, as I was unable to get it to work. To the best of my knowledge (and my quadruple-checking) my code and breadboard are set up correctly. What was supposed to happen is that I could use the buttons to turn the motor on and off and change the direction, and then the potentiometer would change the speed. Everything should have worked appropriately, but when I hooked it up to the breadboard, the motor would not run.
|
|
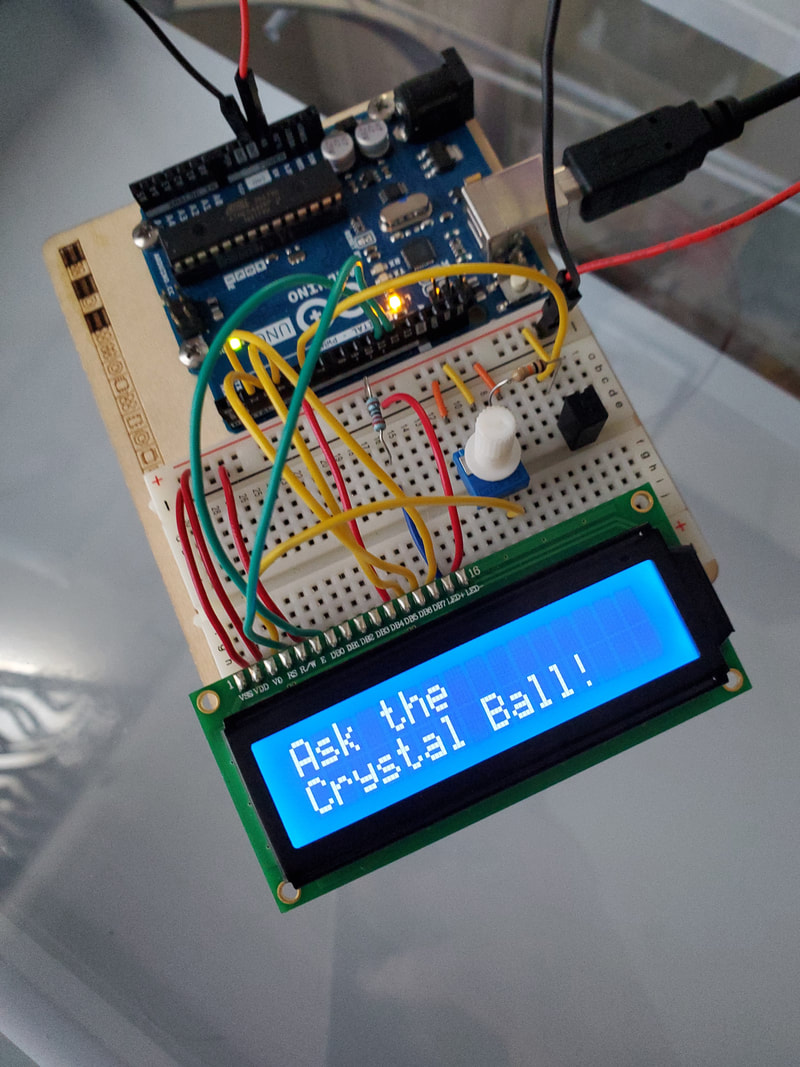
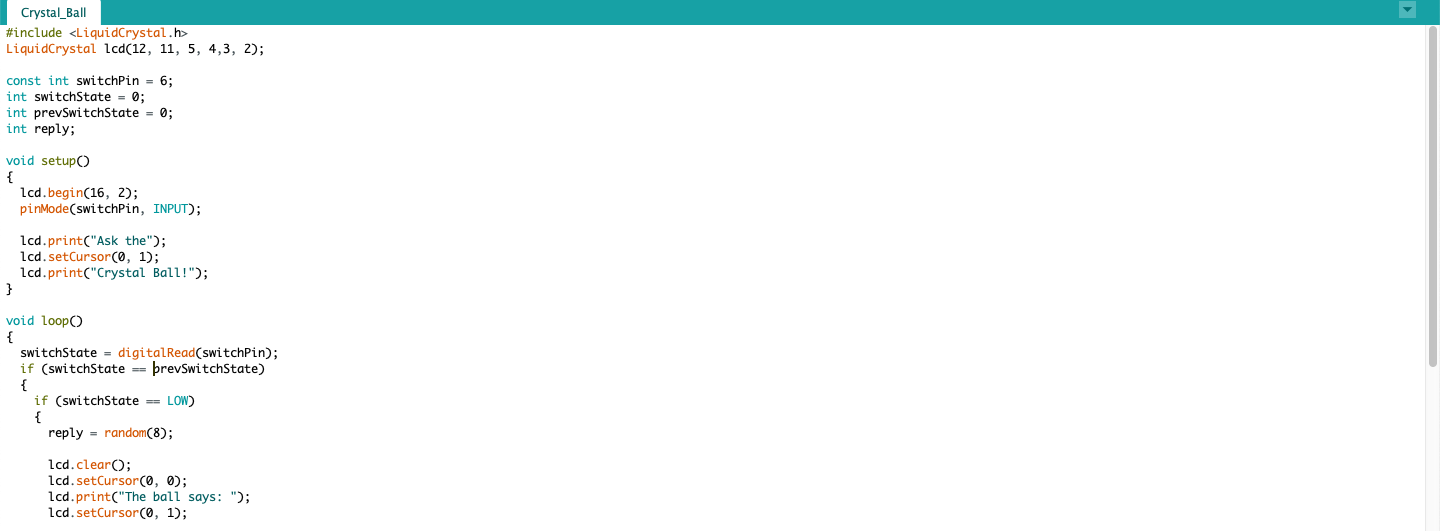
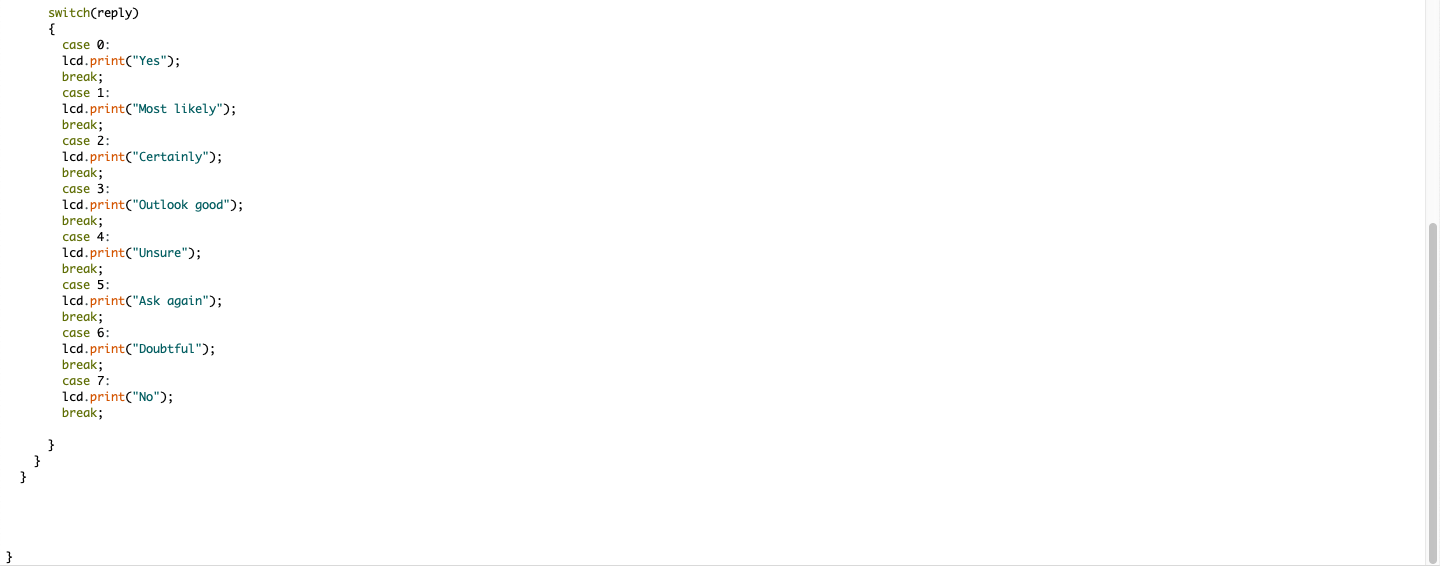
Crystal Ball
This one was very fun, and not super difficult. I spent a decent amount of time on the wiring to make sure I didn't set it up wrong, but it went pretty smoothly after that. I did have one hiccup in code where it didn't want to run, so I changed the "!=" in the first if statement to "==" and it ran perfectly. I also went back and tried the same test with the Zoetrope, but it didn't work.
|
|
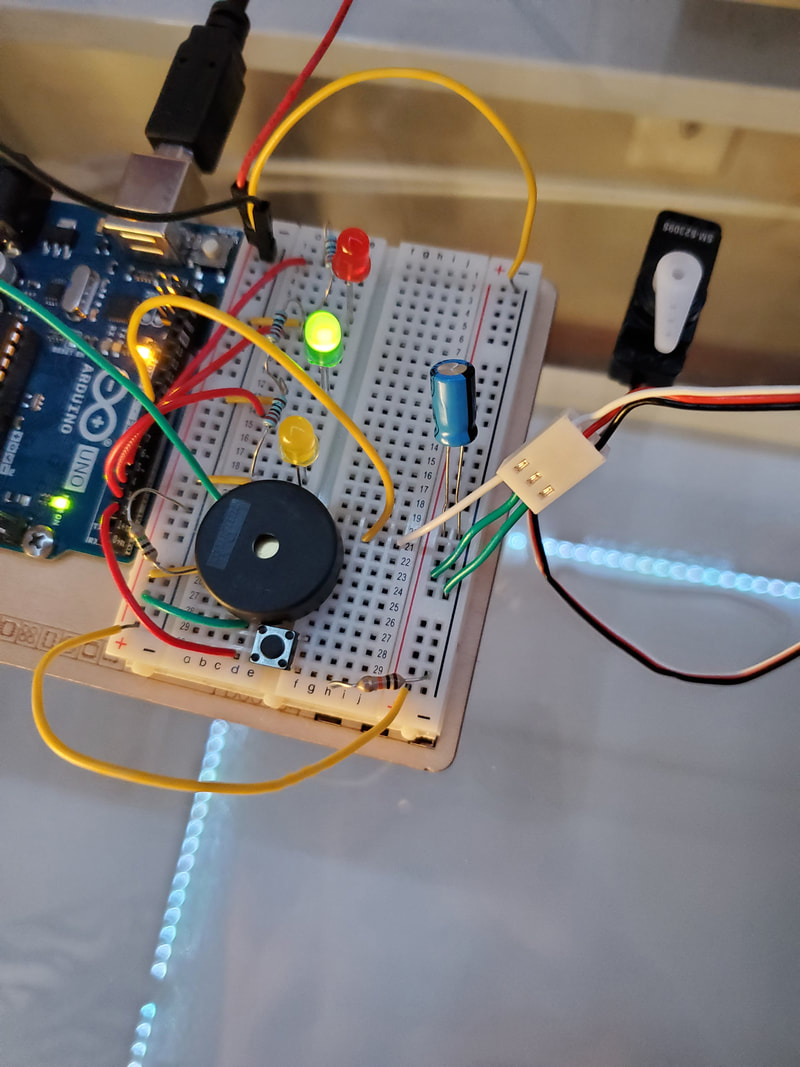
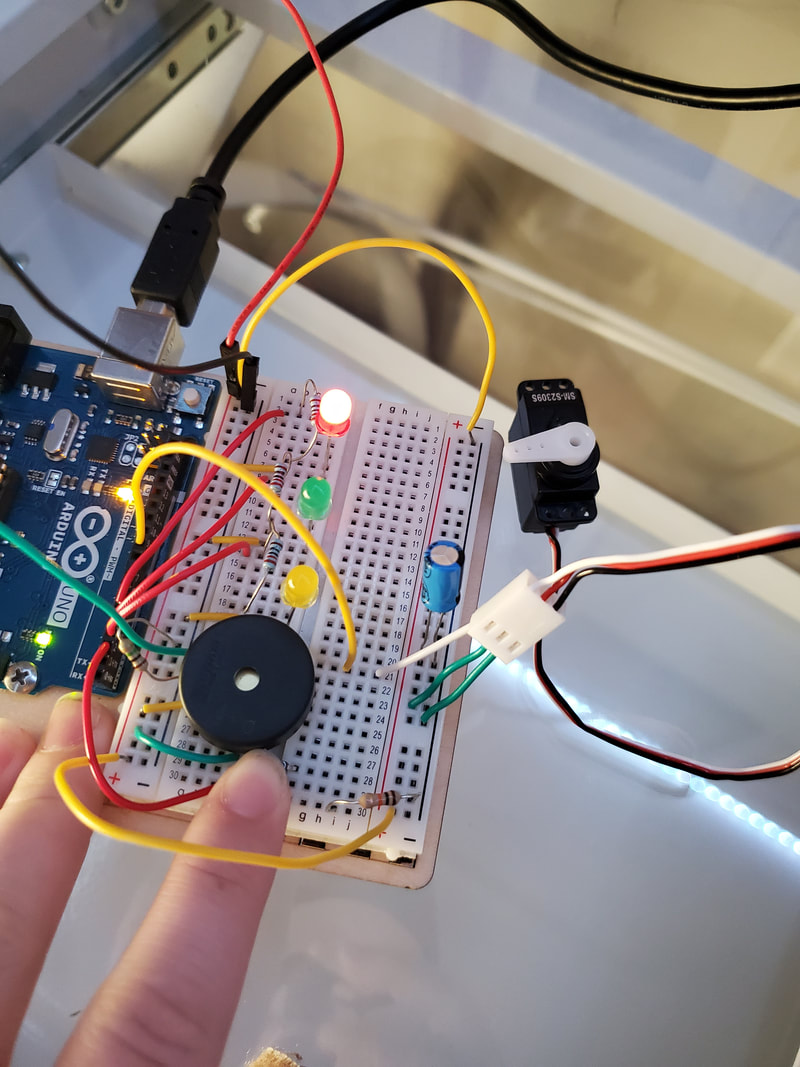
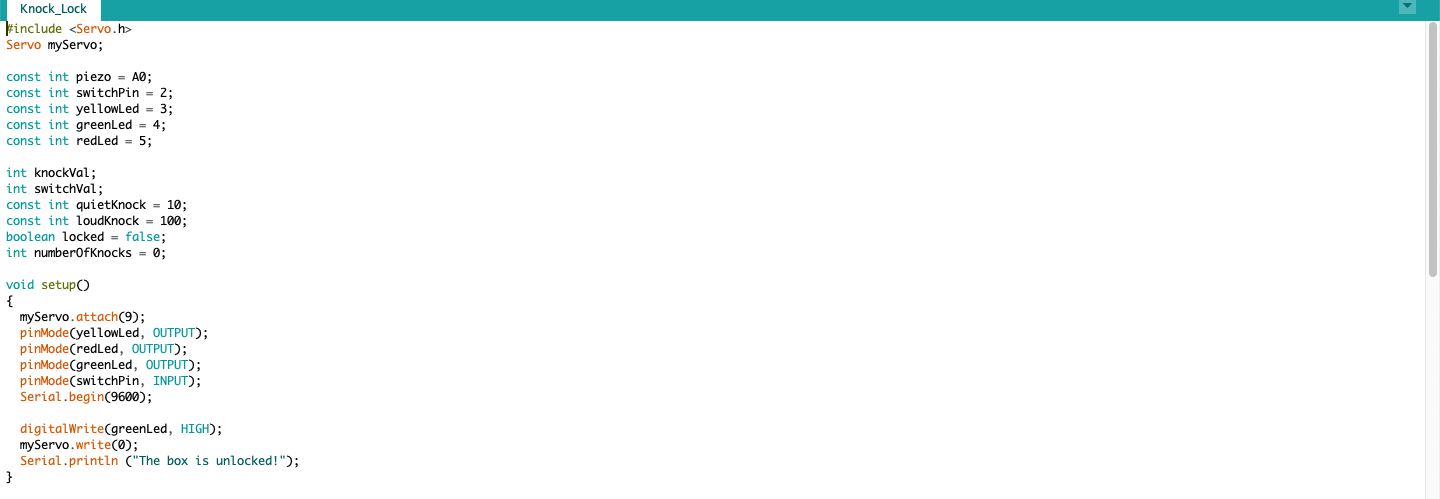
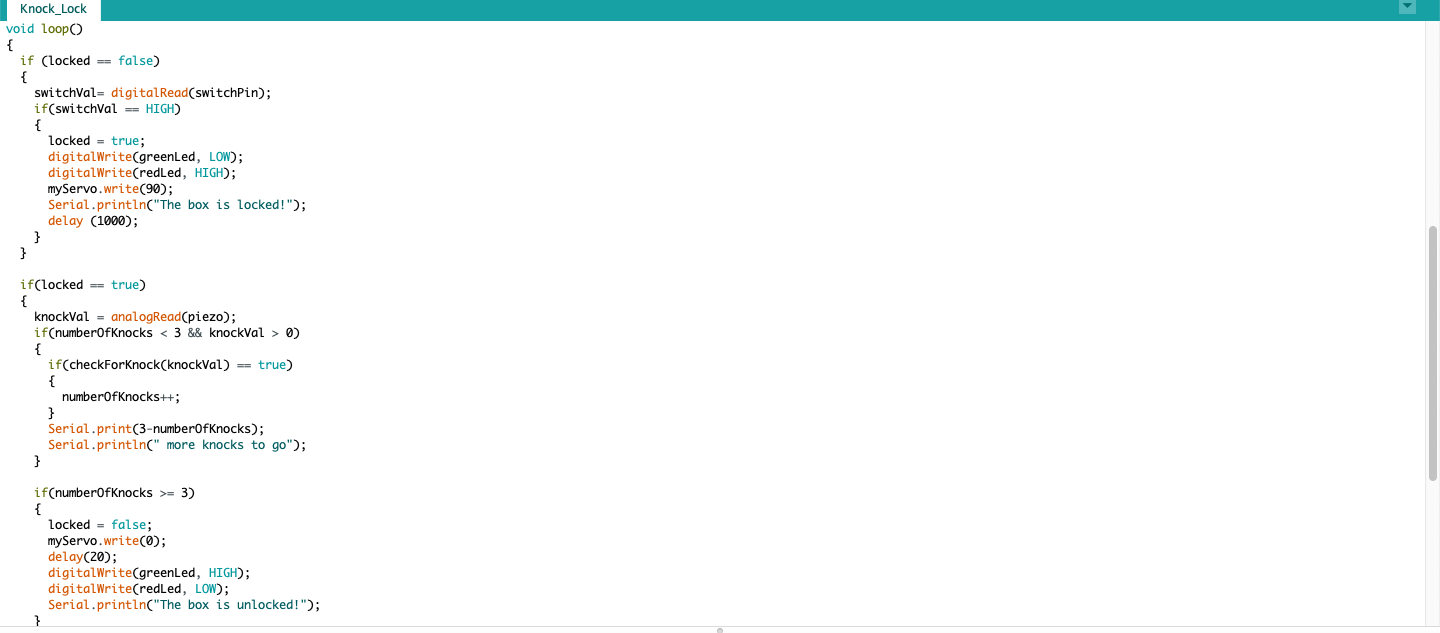
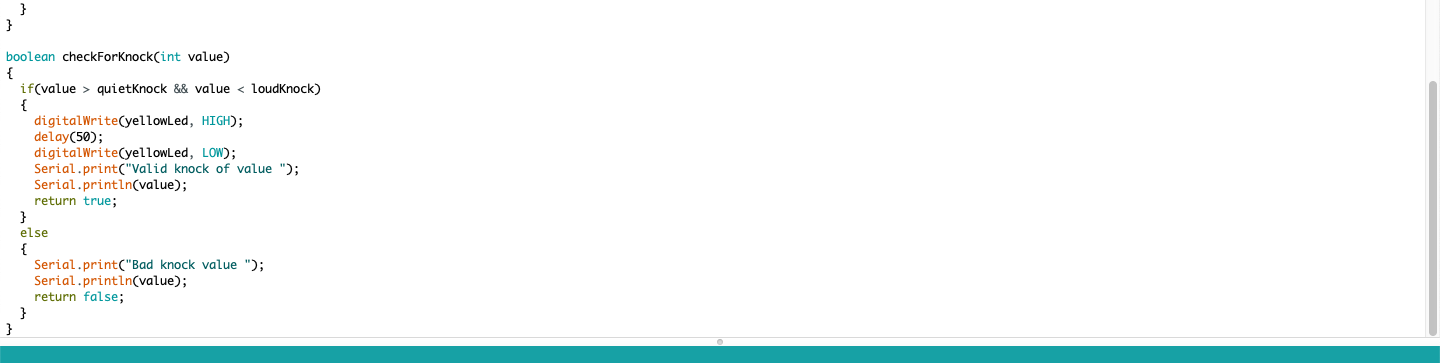
Knock Lock
|
I was able to get the knock lock partially completed. I am unsure why, but the piezo and/or code wouldn't fully register my knocks. For a brief moment it did, but somehow I lost it again.
|
|
|
|
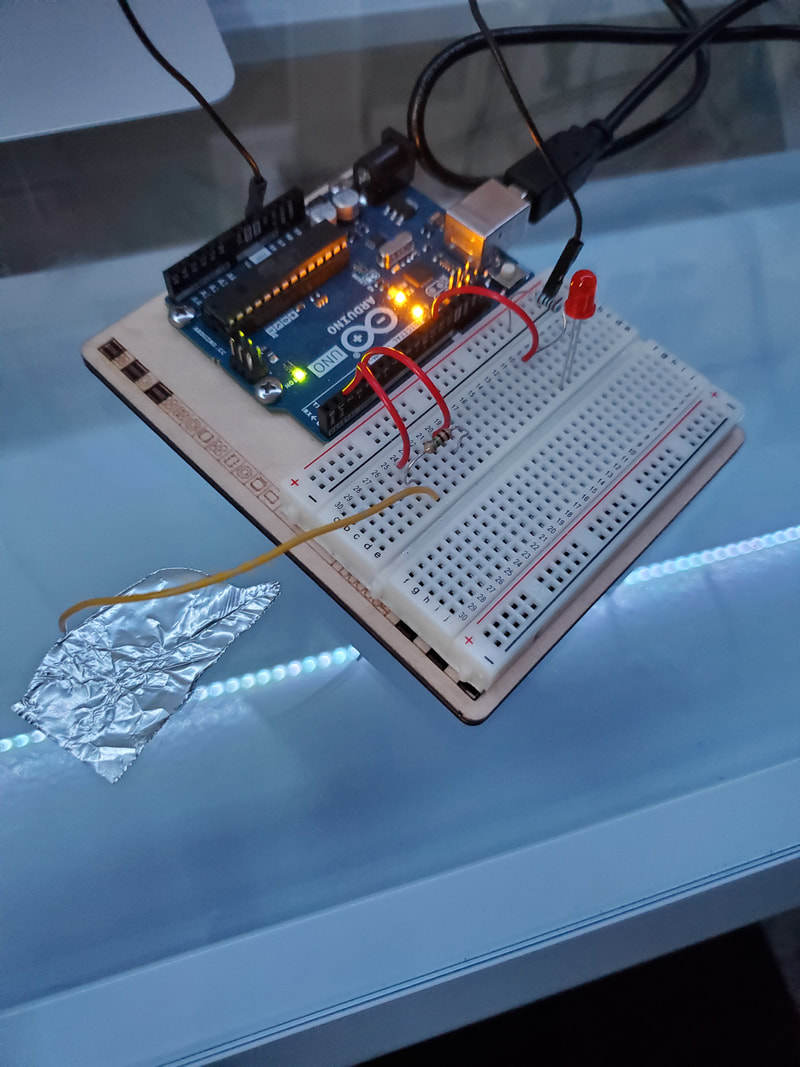
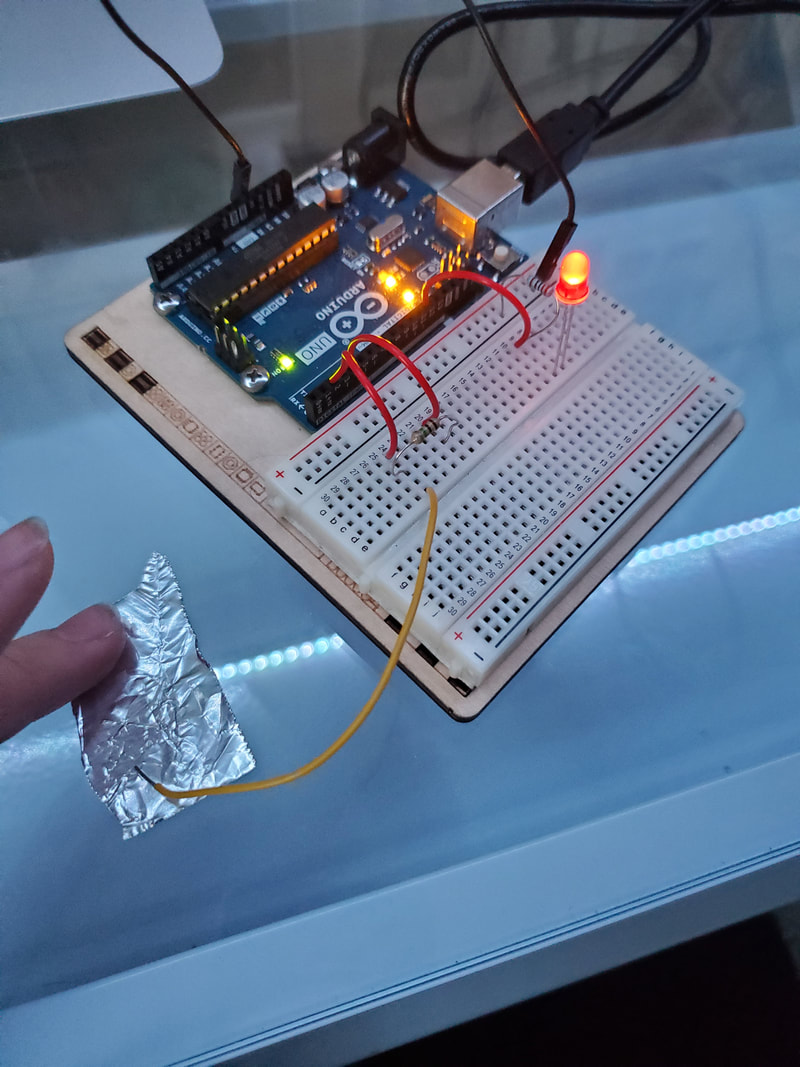
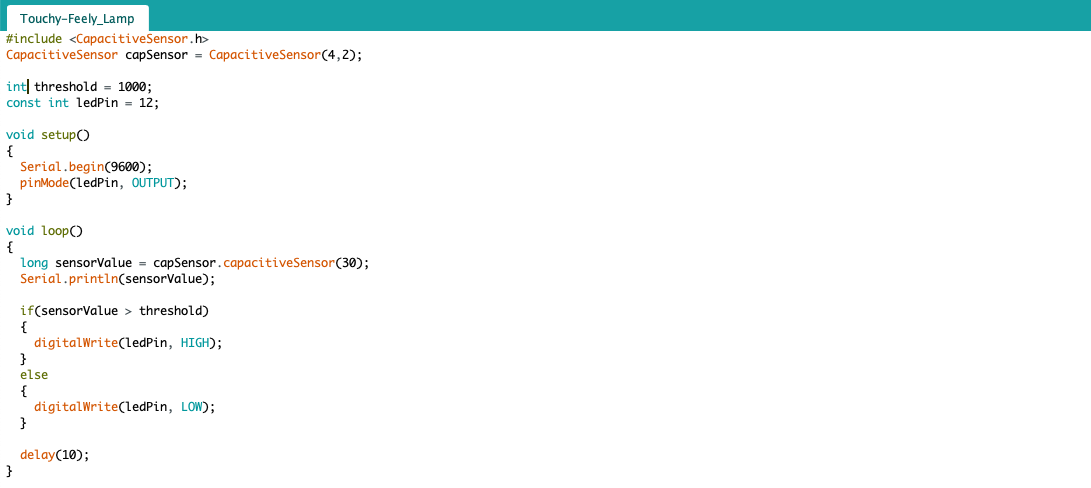
Touchy-Feely
This one was difficult only in downloading it. For some reason, I had trouble with getting the zip file set up appropriately.
|
|
Wrap Up
A lot of what I learned from this project was coding related. It was very interesting because I was taking Computer Science at the same time, so it was like being able to see the skills I was learning used in real life. I could look at the code and kind of understand what was going on in the book, and how it connected to the physical breadboard. I was able to see the practical application, and learn some new tools.
