Prep and Planning
|
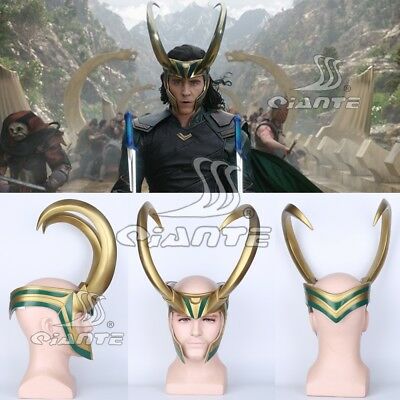
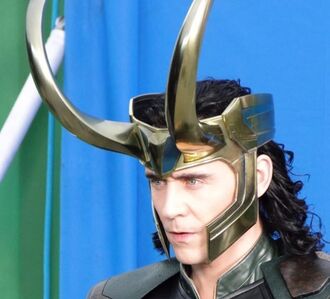
I wanted to build Loki's helmet from Thor: Ragnarok. It was somewhat difficult to find good reference screencaps from the movie that suited what I was looking for, so I ended up basing it mostly off of a model helmet on the market. The general idea was that I would make the base headpiece out of acrylic, and 3D print the horns. I most closely followed the model on the left for the headpiece, and drawing inspiration for the horns more from the right.
|
|
|
Headpiece Parts
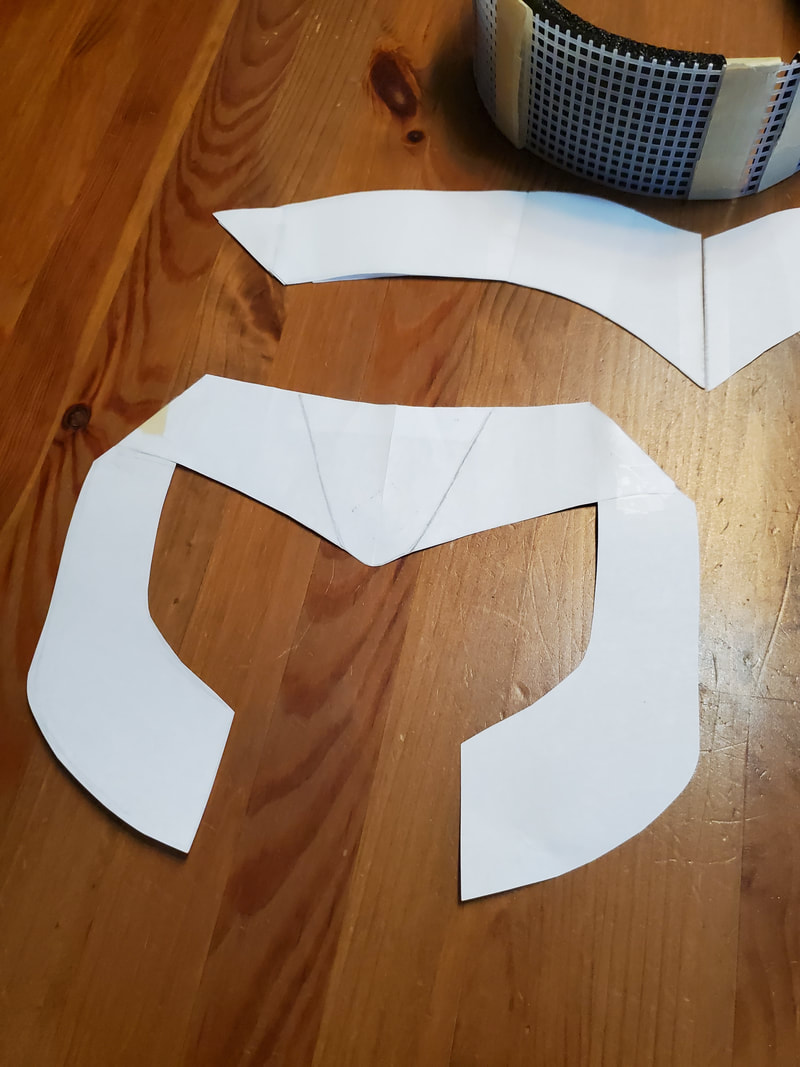
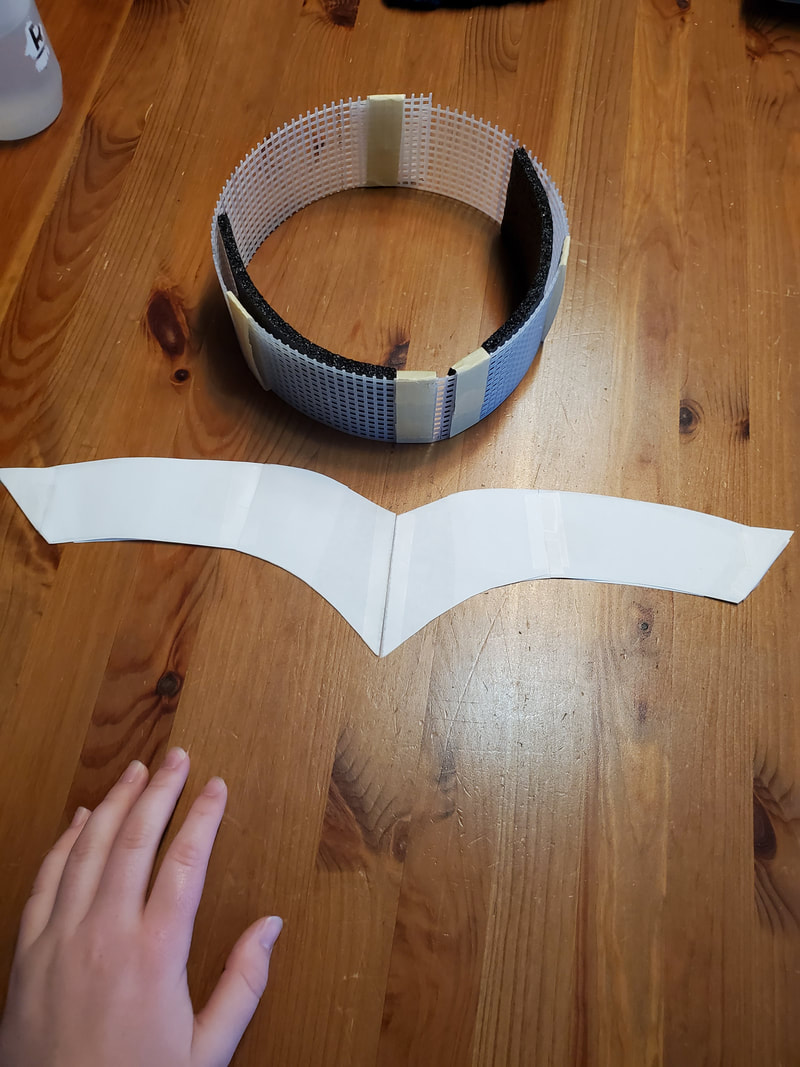
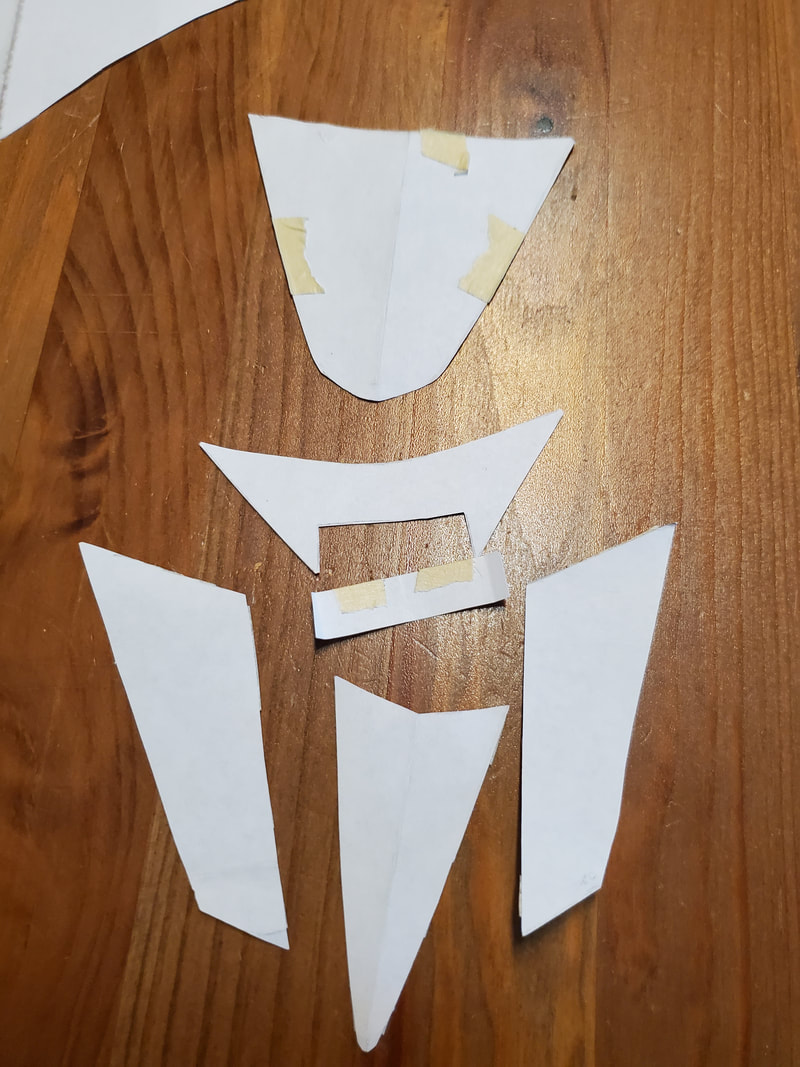
The very first thing I did was make a paper base of the headpiece. It actually took me a few days to get as close to the look as I could, given that I was basically making my own template from scratch. I had 3 major pieces - one for the front of the front and two side pieces that connected in the back. I also had smaller pieces to form the bump-out on the front of the headpiece.
|
|
|
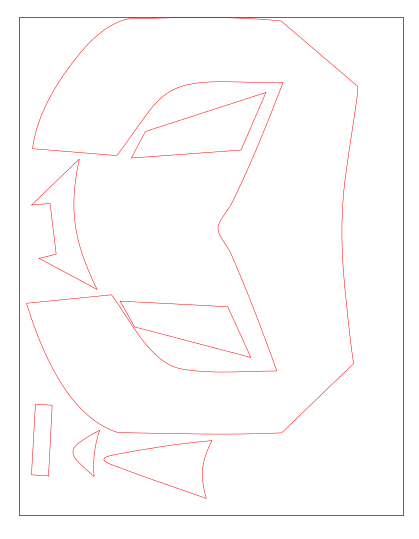
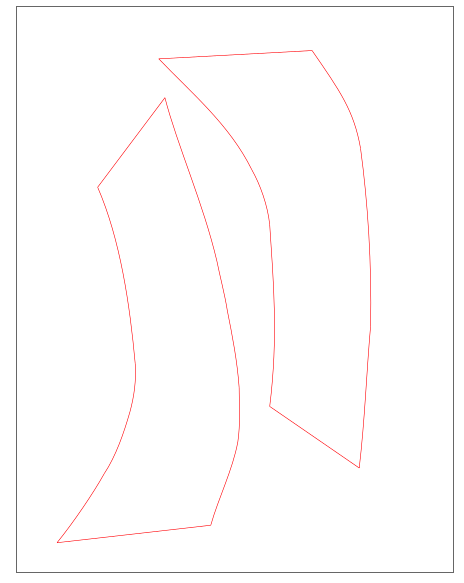
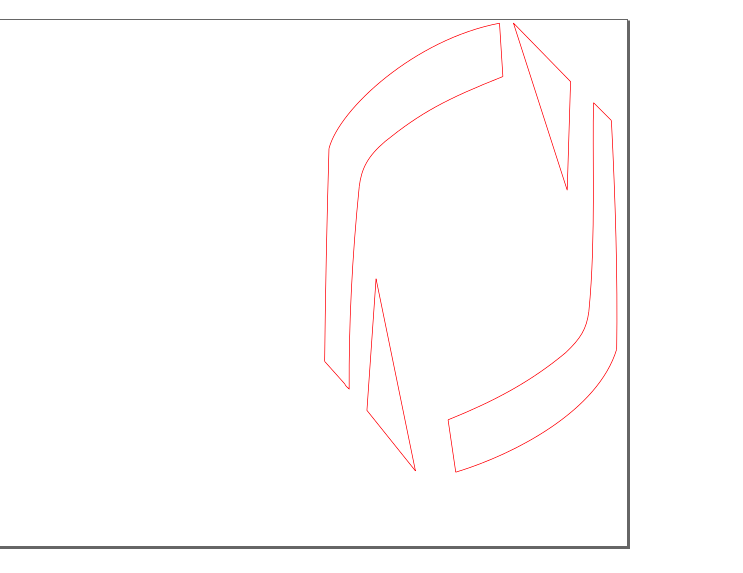
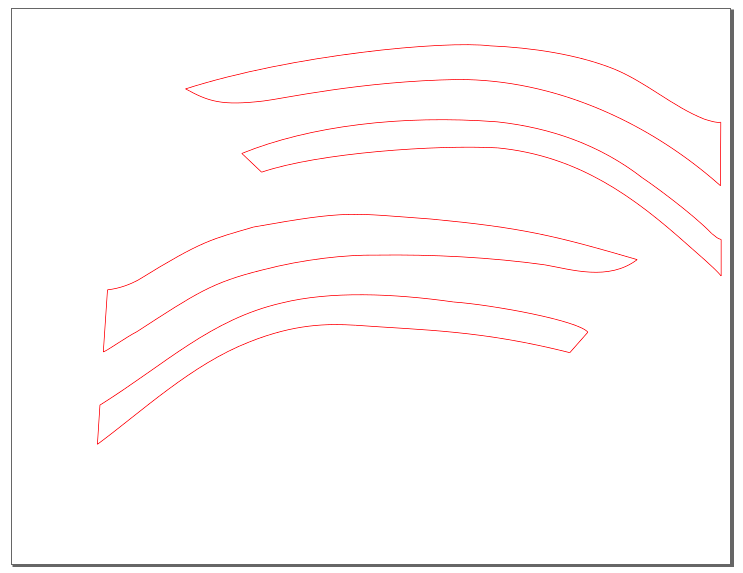
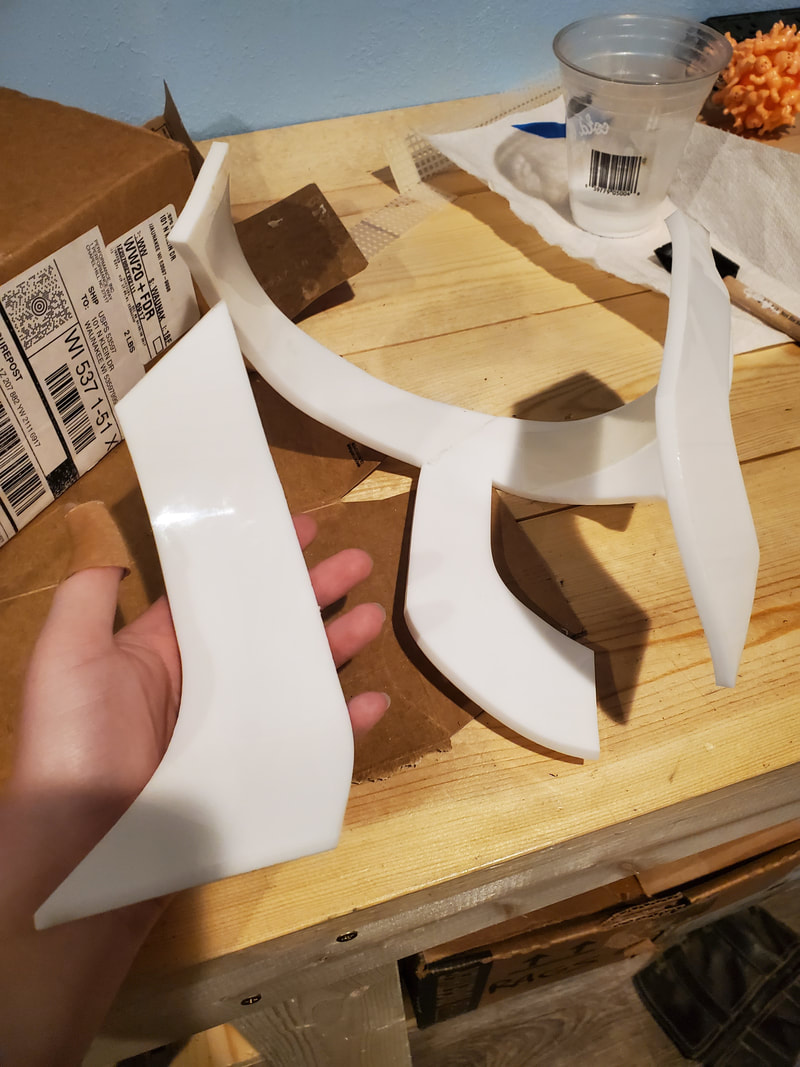
After I planned them out on paper, I scanned them into the computer and traced them in Inkscape. I was planning to use Illustrator, but was unable to access the student version of Creative Cloud, and otherwise would have had to pay for it. This is likely because two summers ago I tried to access the school account during the summer, and unknowingly messed it up. I also had a legal name change during that time and got a new school email, and my login was connected to the old email. Inkscape was a good free alternative. Once I traced the shapes, I fiddled with them just a bit to make sure they lined up mostly appropriately, and then I was good to go. The two on the left were to cut out of acrylic, the right two are vinyl decals.
|
|
|
|
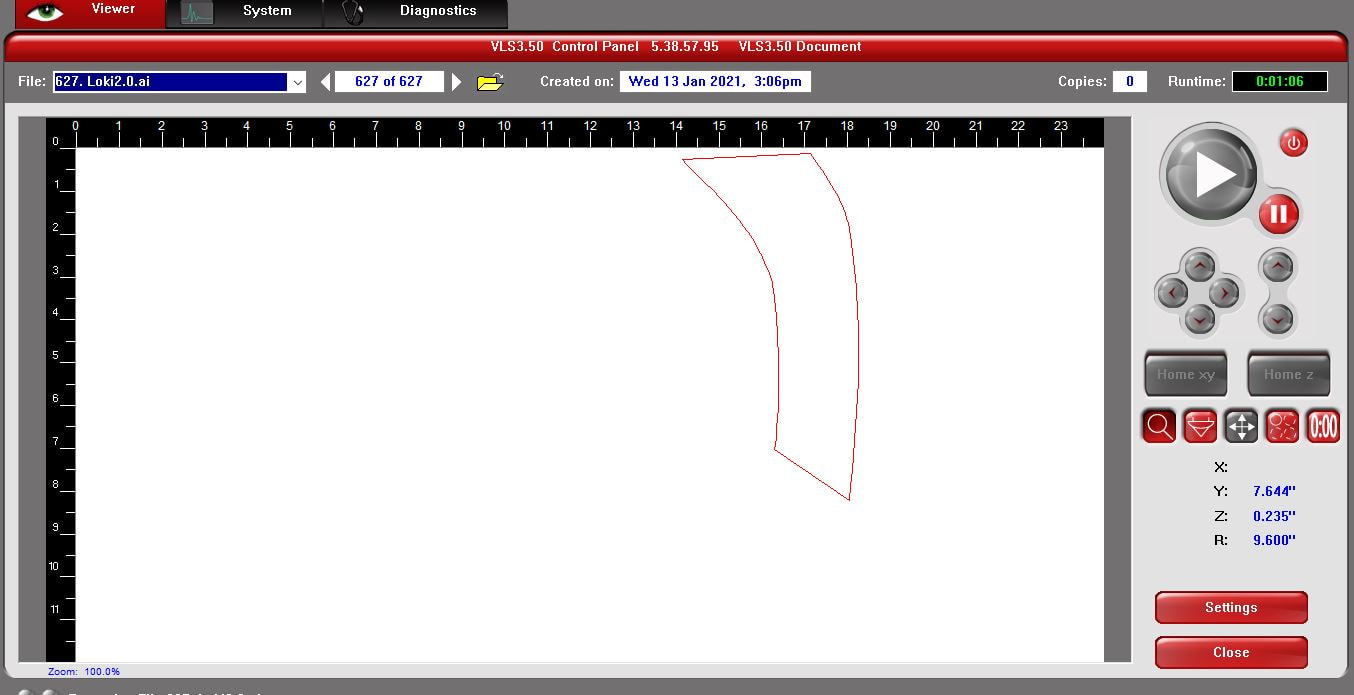
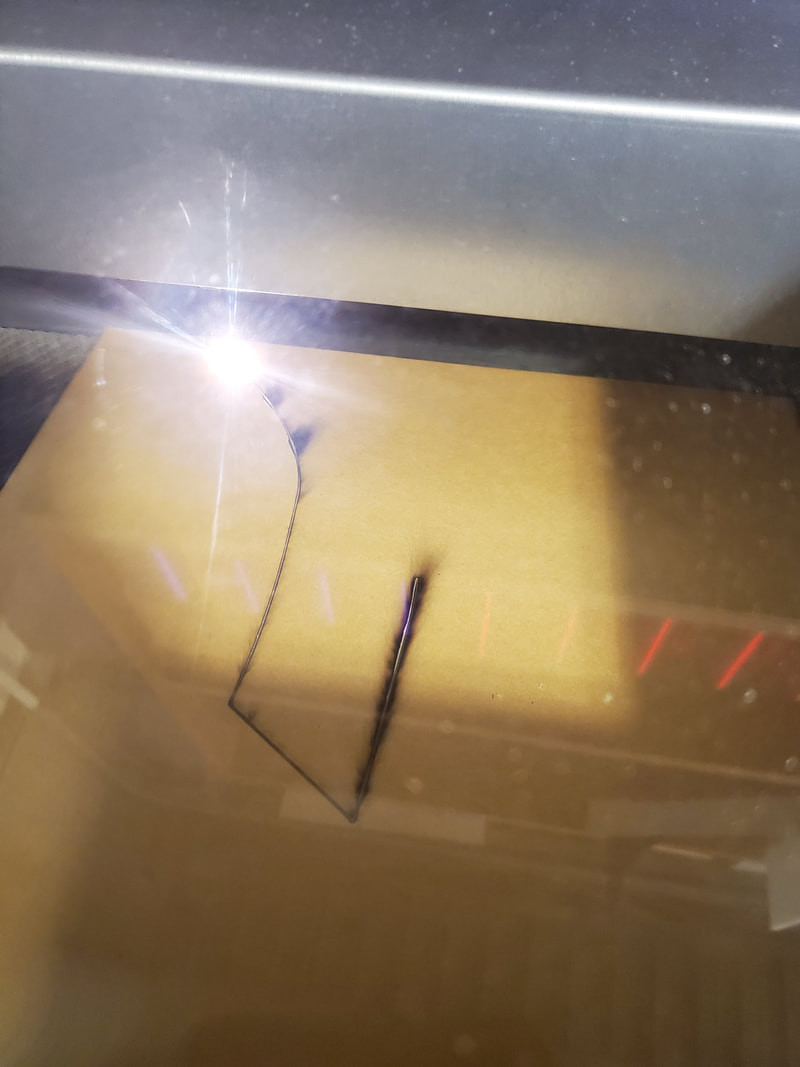
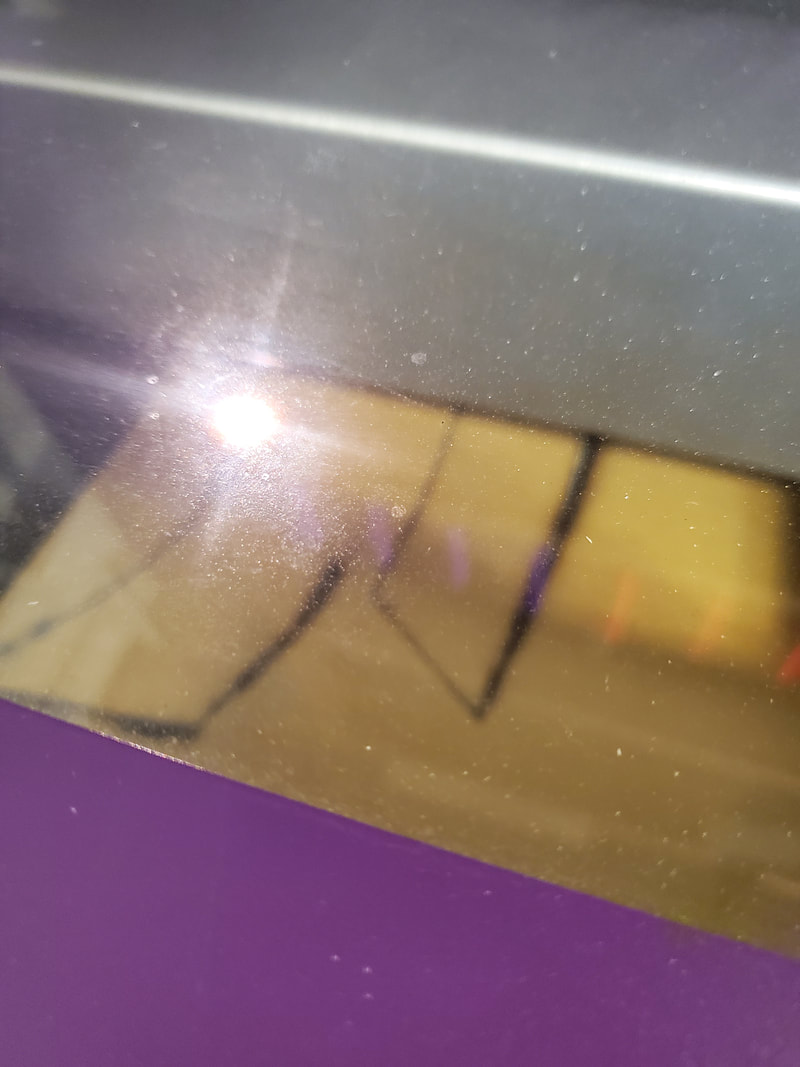
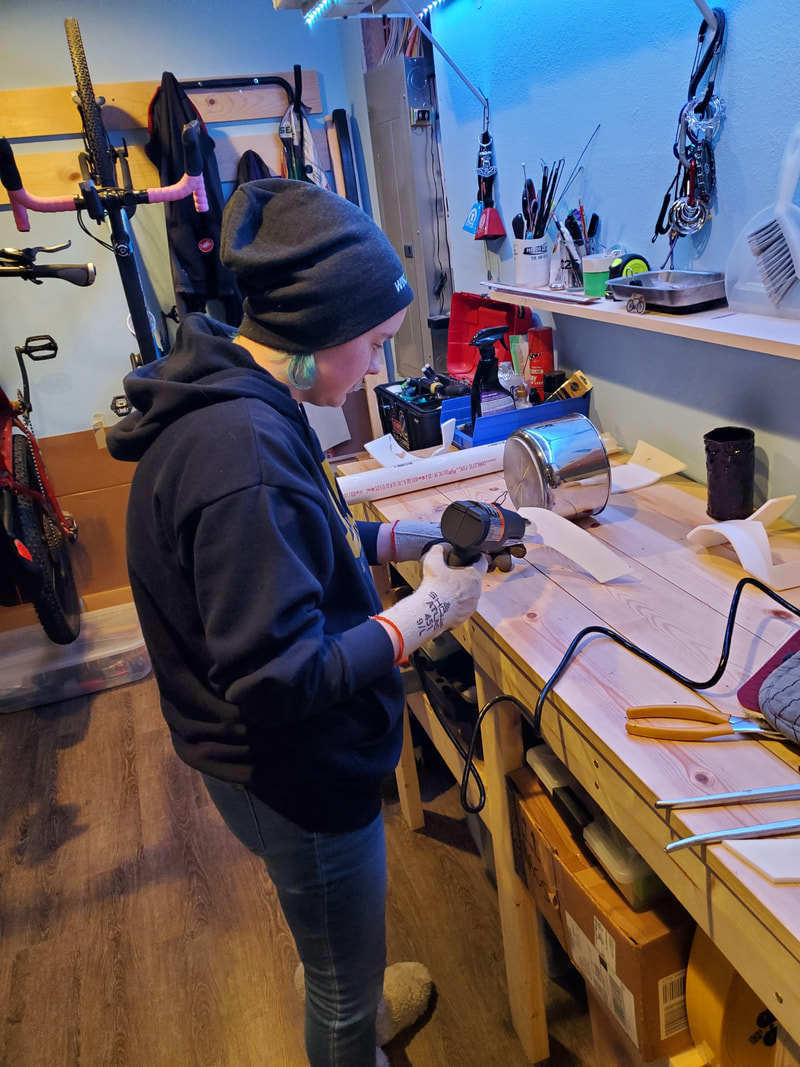
This was my second day in the lab (the first was for my redesign project) and the goal was to laser cut my acrylic. The screencaps to the right are of the laser program while they were being cut out.
|
|
|
|
|
Here are some pictures of the laser in progress. It was my first time using the lab machinery since freshman year, so it took a bit of a refresher but I think I got the hang of it pretty quickly.
|
Horns
|
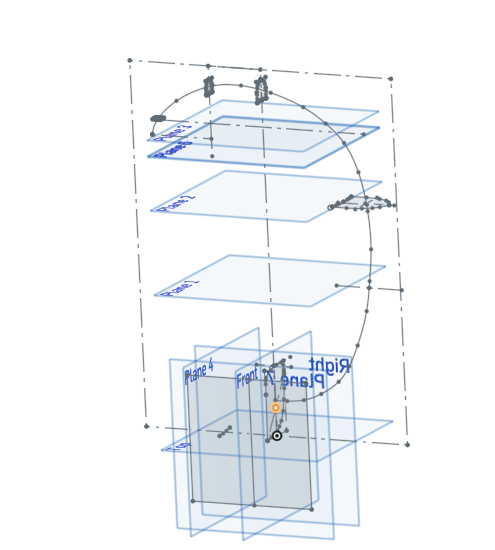
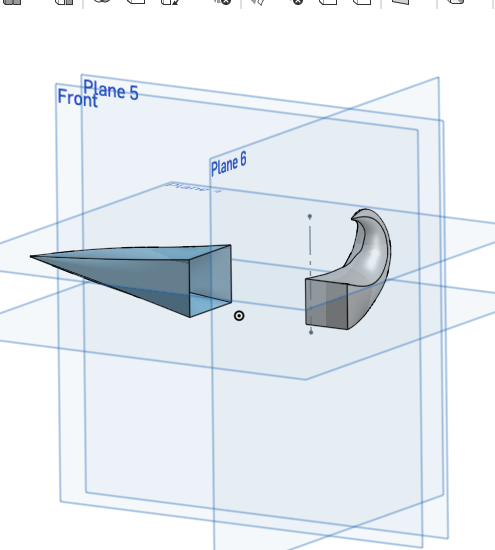
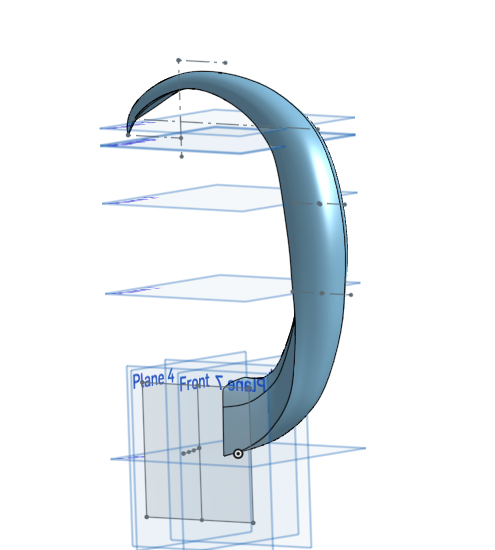
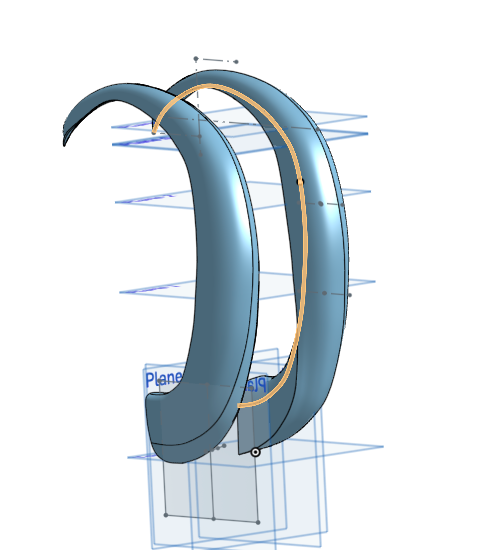
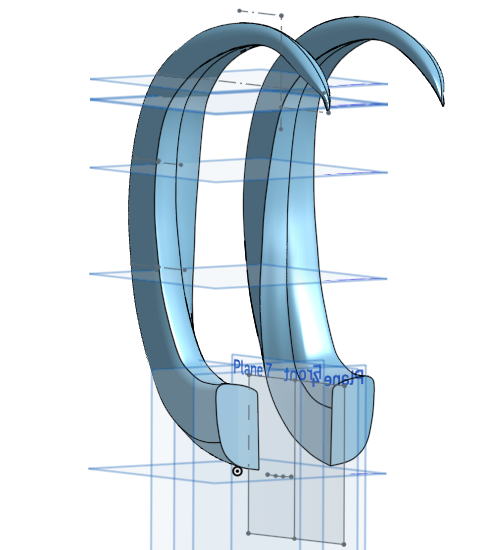
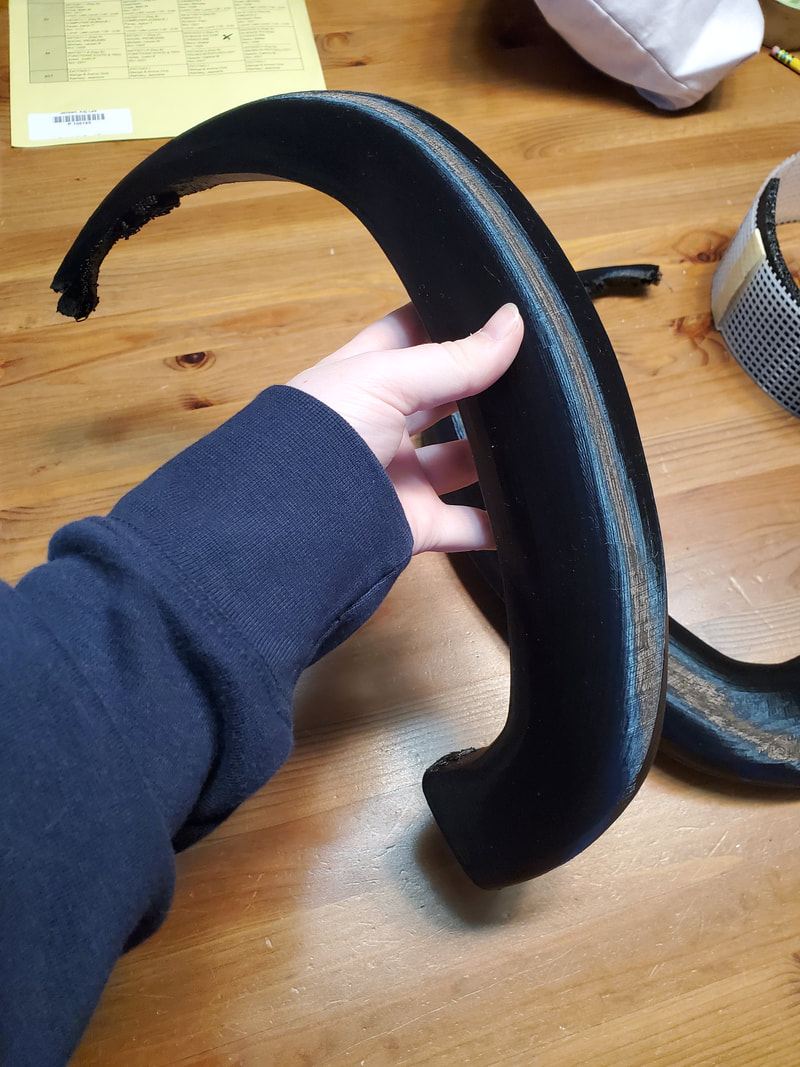
For the horns, I took inspiration more from the square base model. I wanted them to transition relatively smoothly from four sides to three, coming together in a point. There weren't super defined measurements for this. I knew approximately how big I wanted them to be, and I kinda sketched out measurements on a photo of the horns. This was by far the most complex thing I've ever designed in 3D software, but that's not saying much because I don't model things that often. The program I used was Onshape, a free web alternative to Inventor because, once again, I seem to be a bit locked out of that software, at least from home. The picture on the right is some practice pieces I did with the loft feature that I found on accident. It ended up giving me a look pretty close to what I wanted, so I kept it.
|
|
|
The loft feature was an actual lifesaver, because I had been agonizing over how to shape the horns. I had actually gone through the tutorials on Onshape, and was interested when they mentioned it. As you can probably see in the sketch, it's basically extruding through different planes while following a base path (the line in the middle). I'm not entirely happy with how the shape turned out in the middle, but correcting it would have meant I had to redo almost half of the sketch, and I was going into the lab for the last available time the next day. I was mostly satisfied with it, but I should have left myself more time to make it better.
|
|

|
|
|
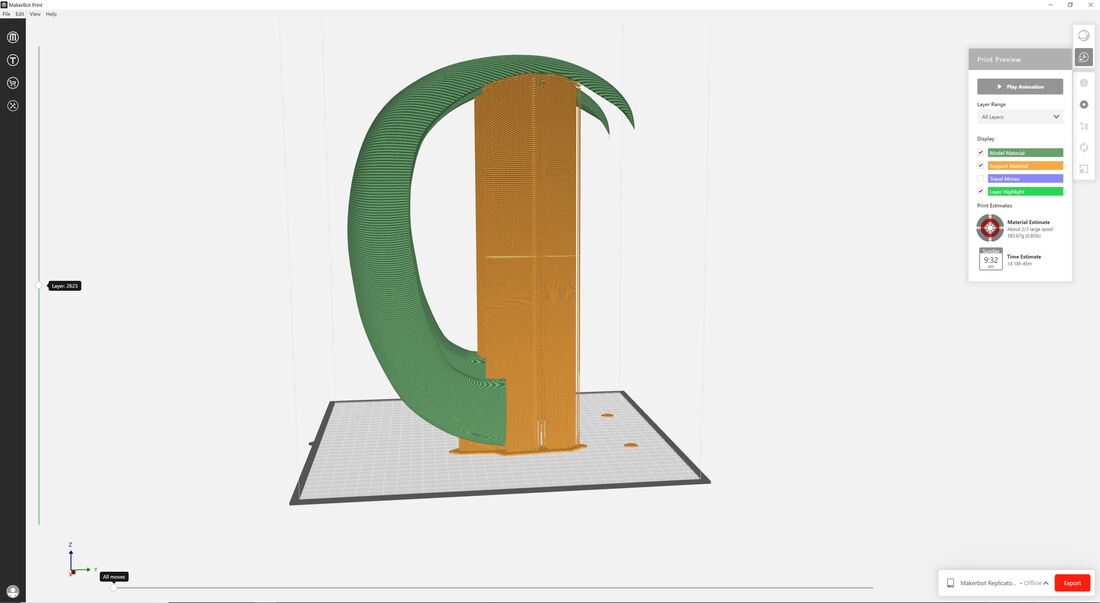
I was in the lab for the last time, to 3D print the horns and cut my vinyl (I don't have any pictures of the vinyl production because my flash drive was at the printer). The print made me nervous but it was also entertaining because it was such a large file. When I was setting it up in MakerBot on the computer, the preview froze and actually crash the computer, so we loaded it up on Mr. Willauer's beefy computer. The print was set to take almost 43 hours, which is by far the largest print I've ever done (my biggest freshman year was I think maybe 6). I really like working in the lab, and I'm disappointed I wasn't able to do much of that this year.
|
|
|
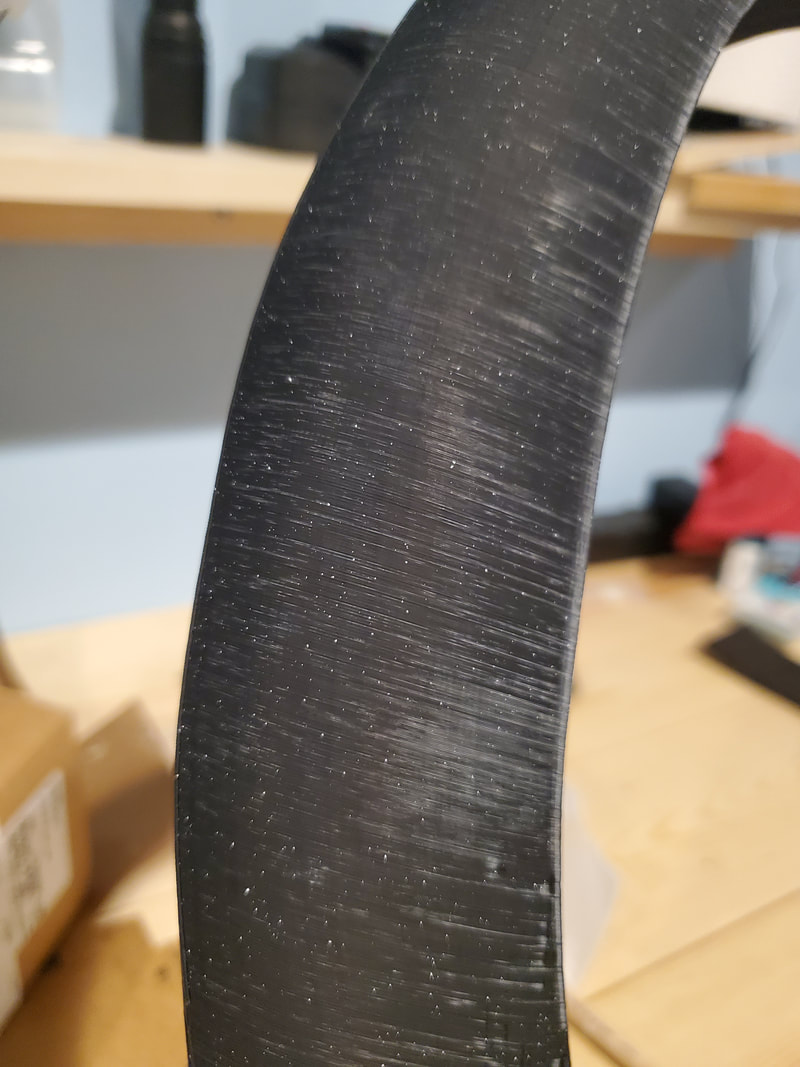
While waiting for the print preview to load, Mr. Willauer told me that to get a nicer finish on the print, I should coat them with very diluted wood glue before sanding. I did, and it made a BIG difference. I'm almost a little disappointed I have to paint over them, because the speckling after the first coat looked like stars. I think it would be neat to do something with a space motif, but not this year.
|
|
|

|
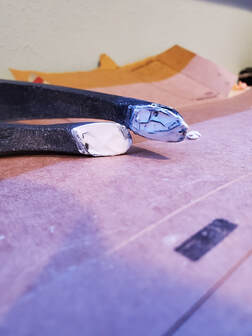
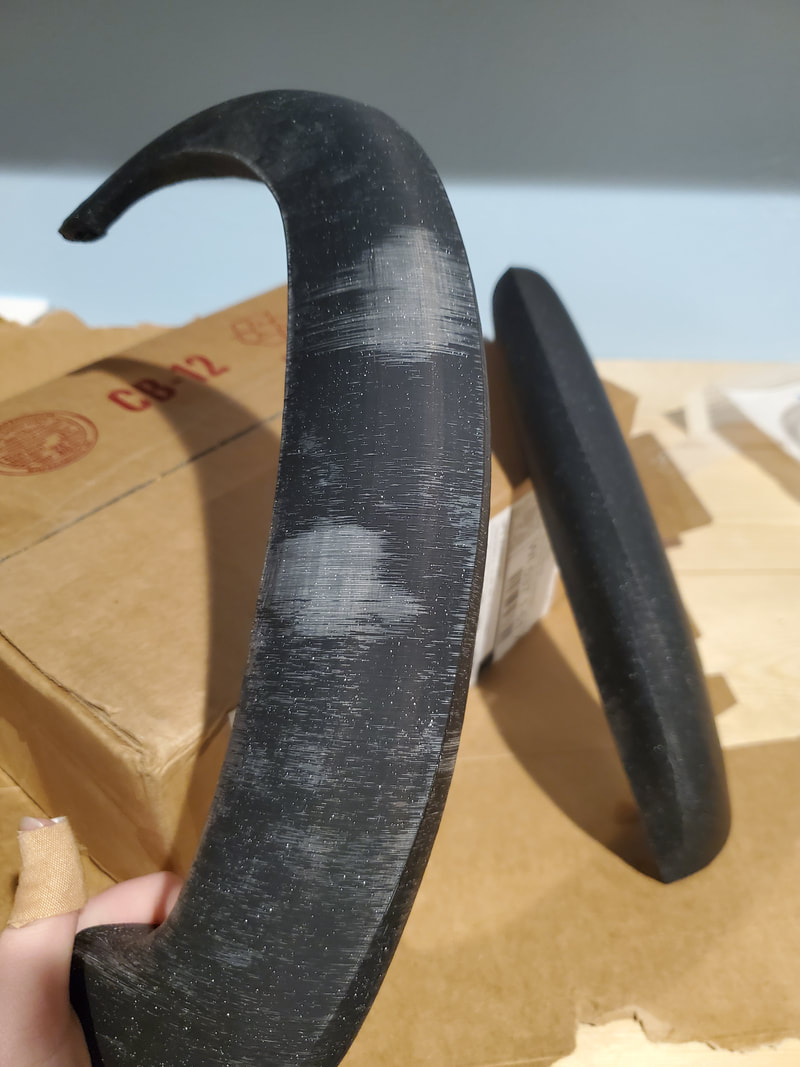
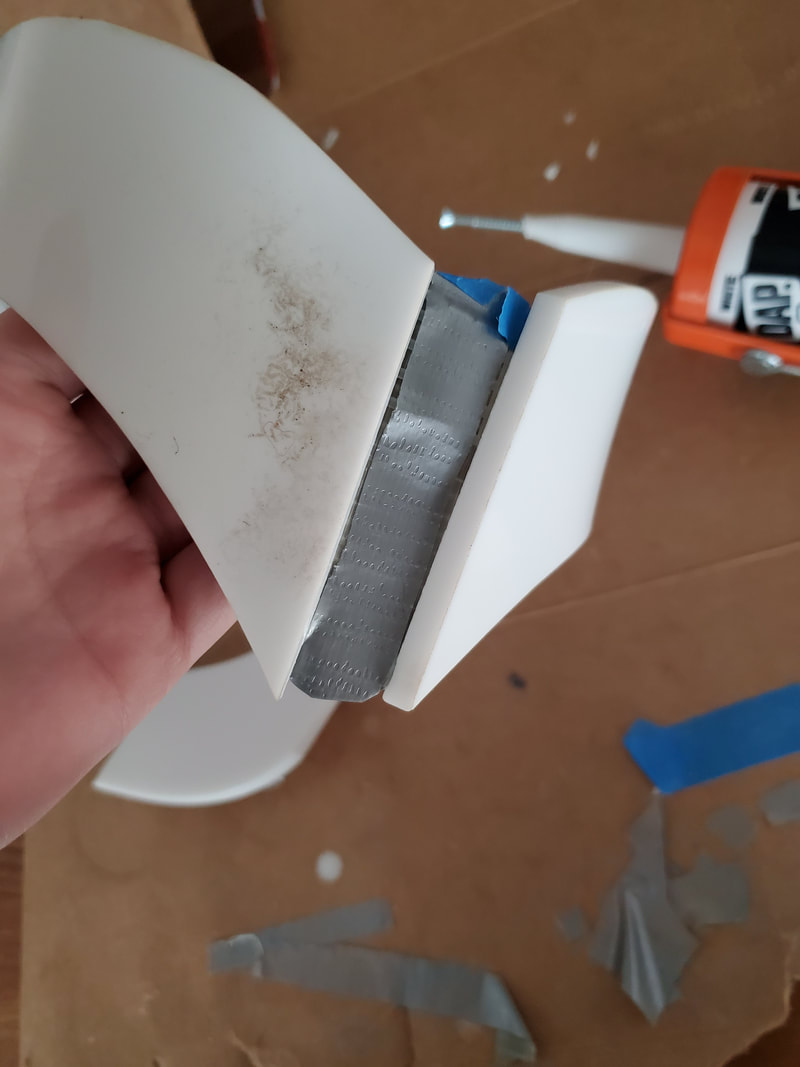
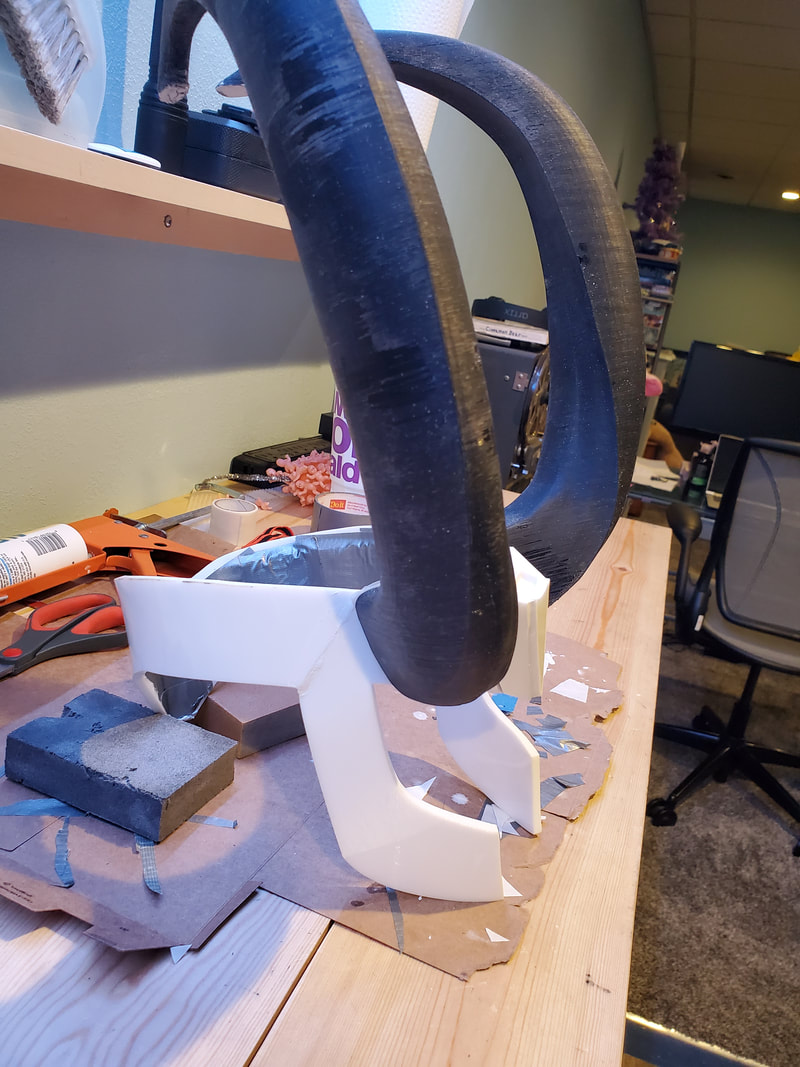
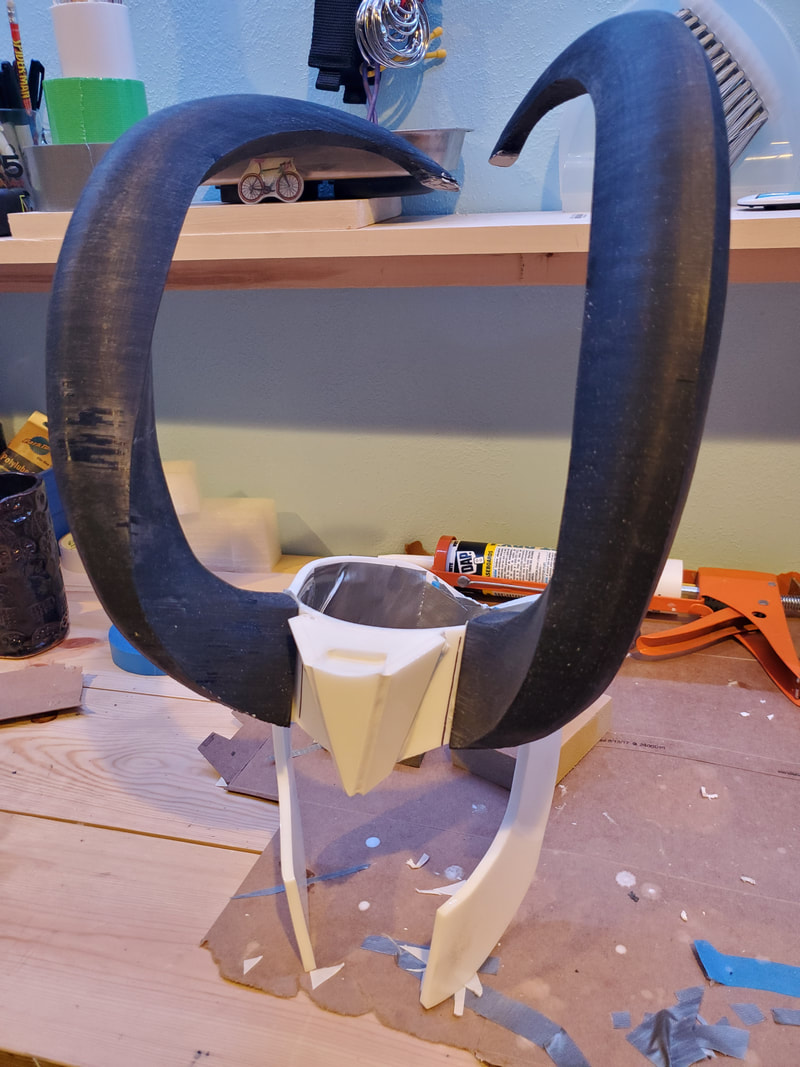
The tips of the horns unfortunately fell apart while printing, so I while I was caulking the headpiece I filled in the gaps a little bit.
Assembling the Helmet
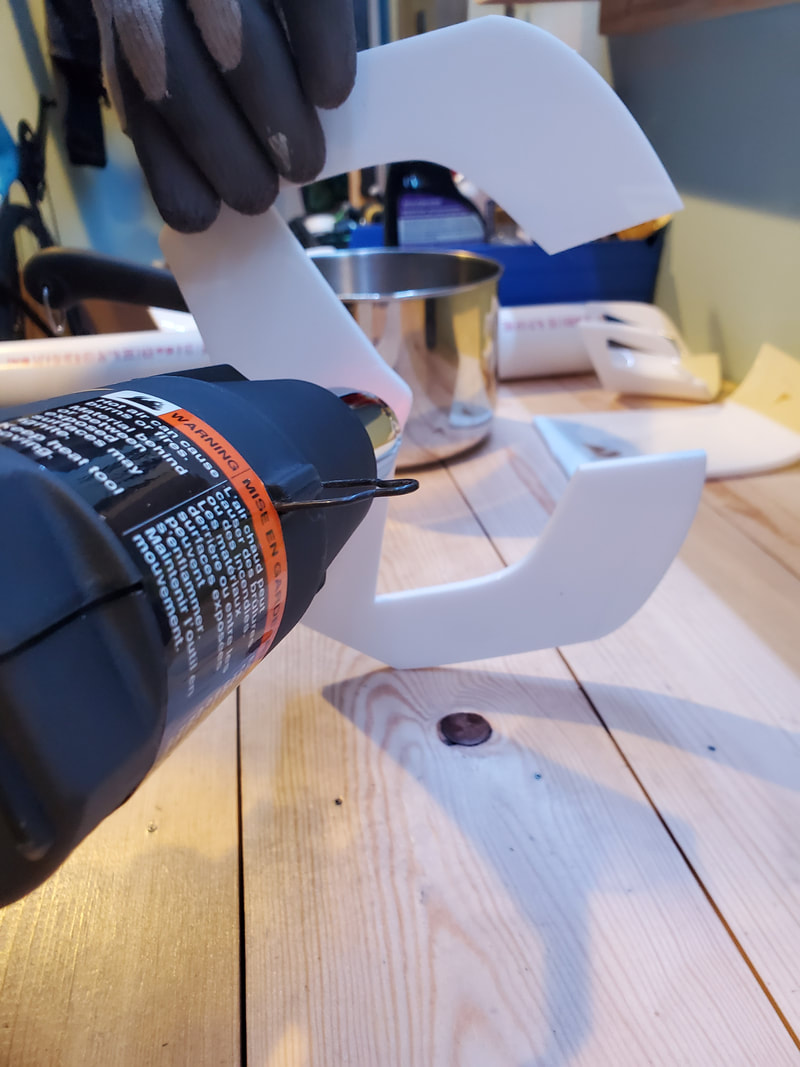
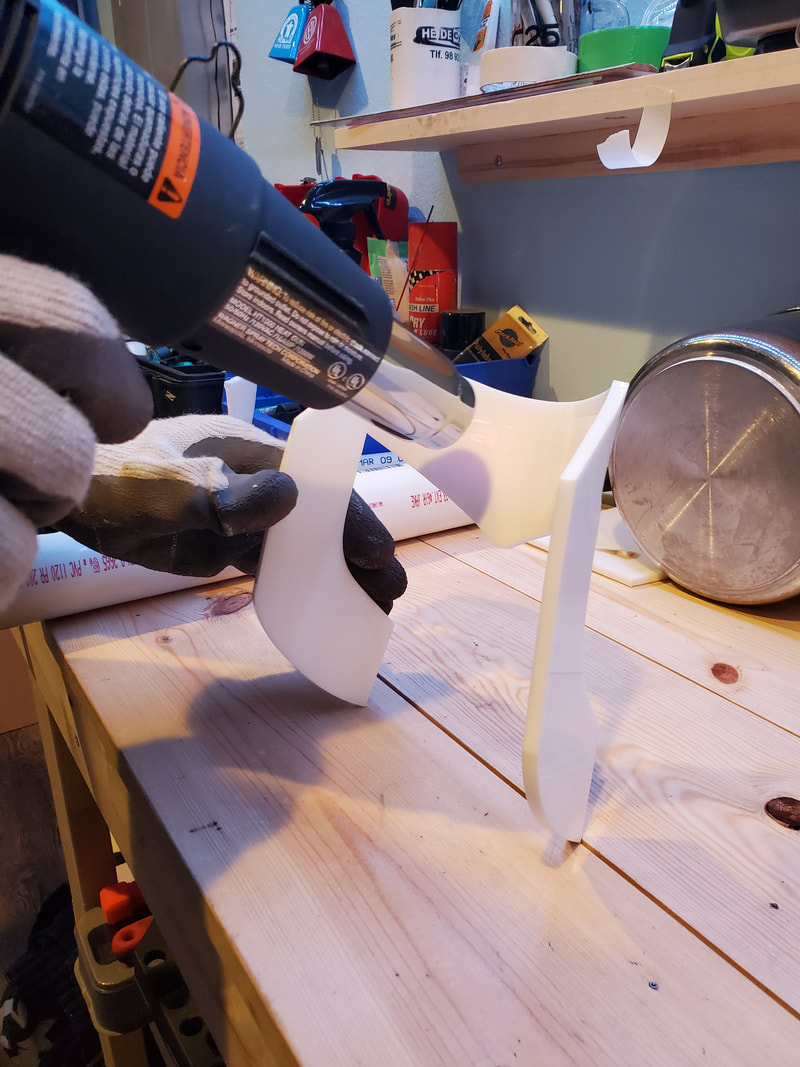
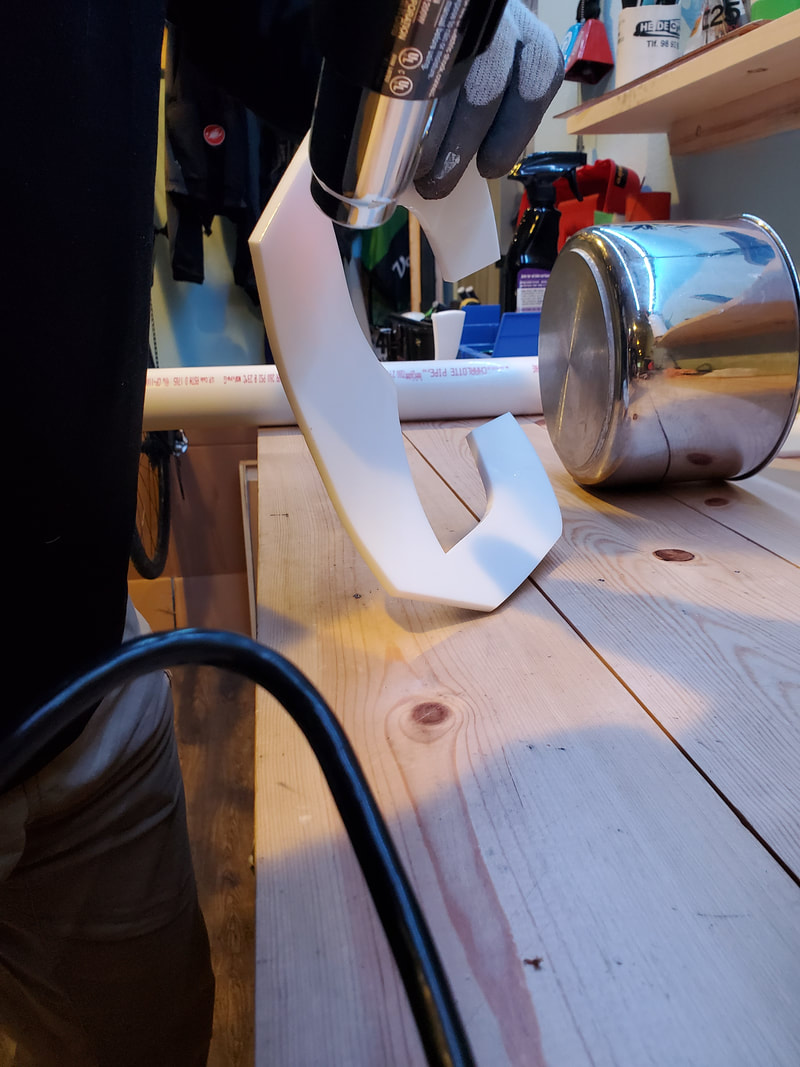
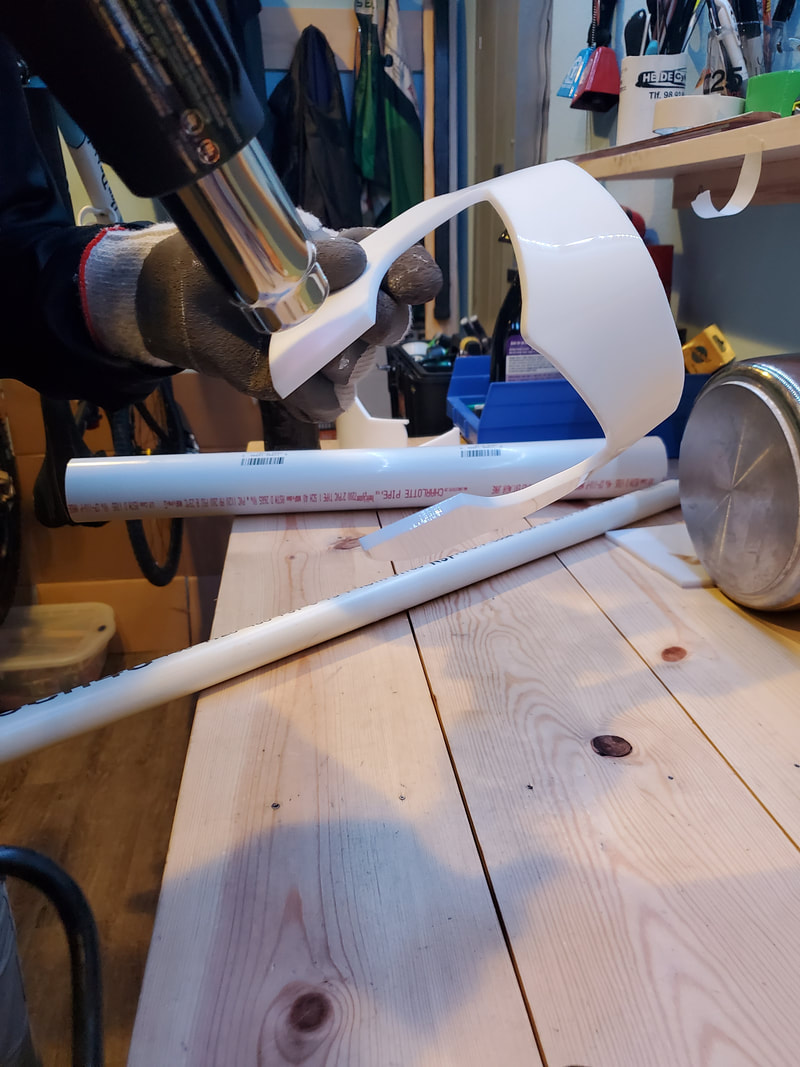
This part was difficult, but I really enjoyed it. From here on out I had my dad help me, as there were a lot of techniques we used that I was not at all experienced with, like the heat gun we used to shape the headpiece. My dad told me that he's had it for years (he used to use it with his metal hockey sticks, to glue in the blade) but hadn't had much of a use for it, and I'm glad he kept it because it would have been much more difficult without it. We heated up sections at a time and bent it around PVC pipes and a pot that happened to be roughly the size of my head. The more delicate bits we shaped by hand.
|
|

|
|
The issue with gluing rigid pieces is that they don't really flex very much. It was glued everywhere but the back because the back was a little small, and didn't actually meet up. That ended up being a good thing because it wouldn't have fit on my head otherwise. However, the edges in the back didn't really line up when we glued them, so I tried to flex it a bit and it snapped at the glue. We did reattach it in better alignment, but it was more time spent.
I also didn't notice this at the time but in the back of the picture is my Baby Orb, which is a hollow core with little plastic babies glued to it. It started as a running joke when my dad went on a business trip a few years ago, and my mom and I got a bag of plastic babies to hide around the house and confuse him. We would hide them again once we found them, and soon lost track of how many there were. Once we finally found them all (we think), I retired them to the Baby Orb. |
|
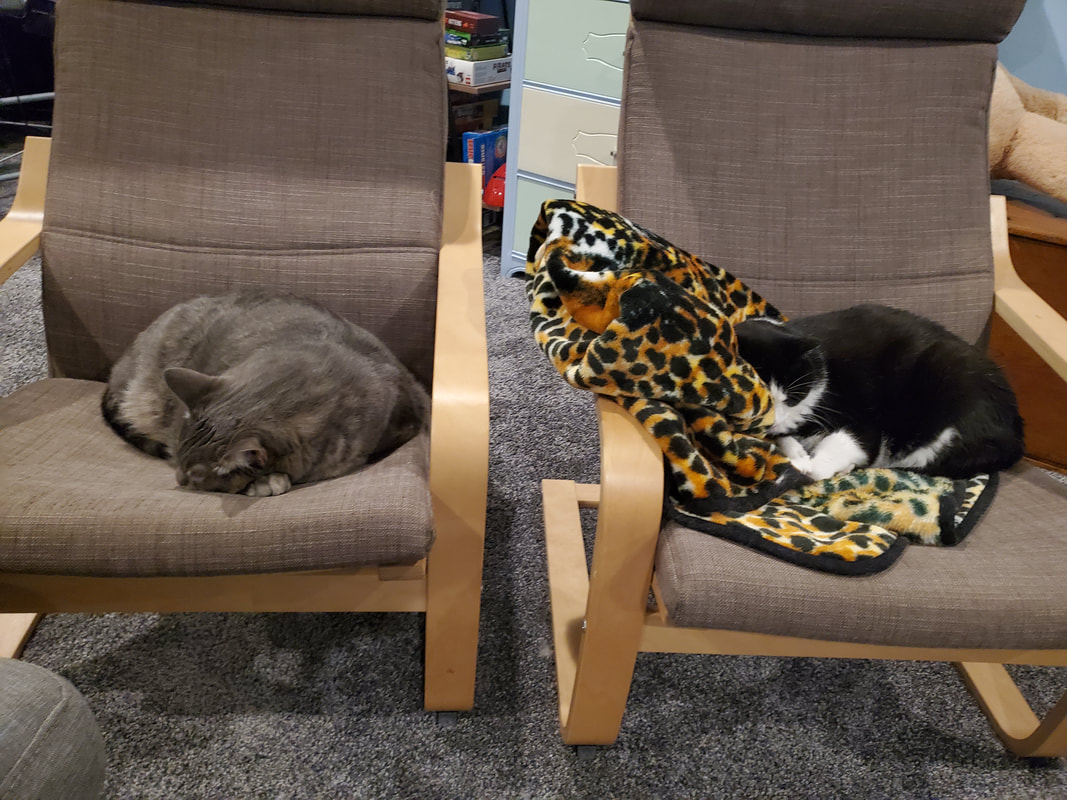
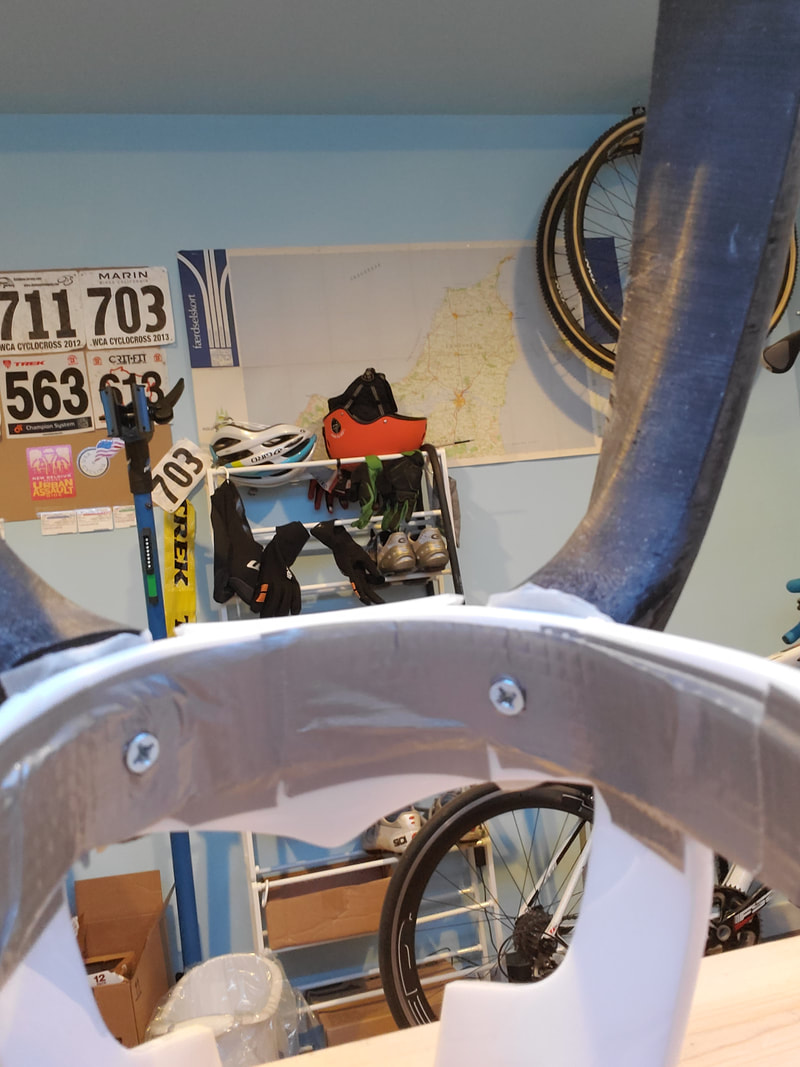
After the glued headpiece finished drying (again), we fixed it to a mesh headband the size of my head to both prevent it from slipping when I put it on and keep the pieces together. Theres also a picture of my cats (Auggie on the left, Buehrle on the right) because they were napping while I was working and are very cute.
|
|
|
|
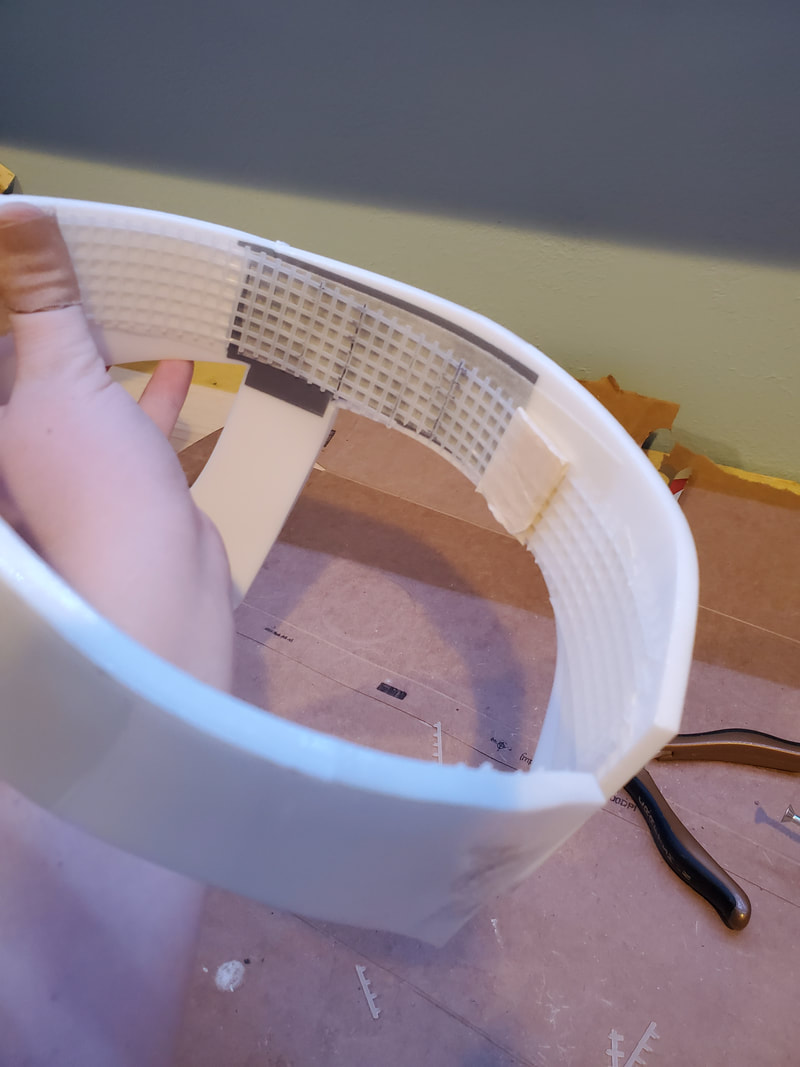
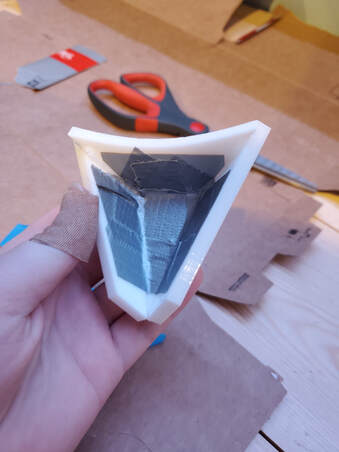
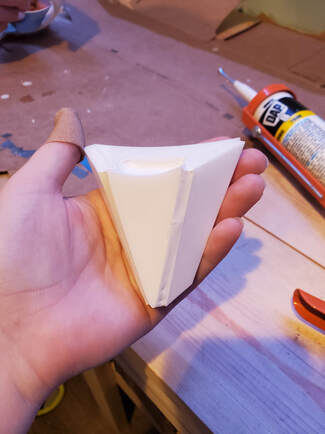
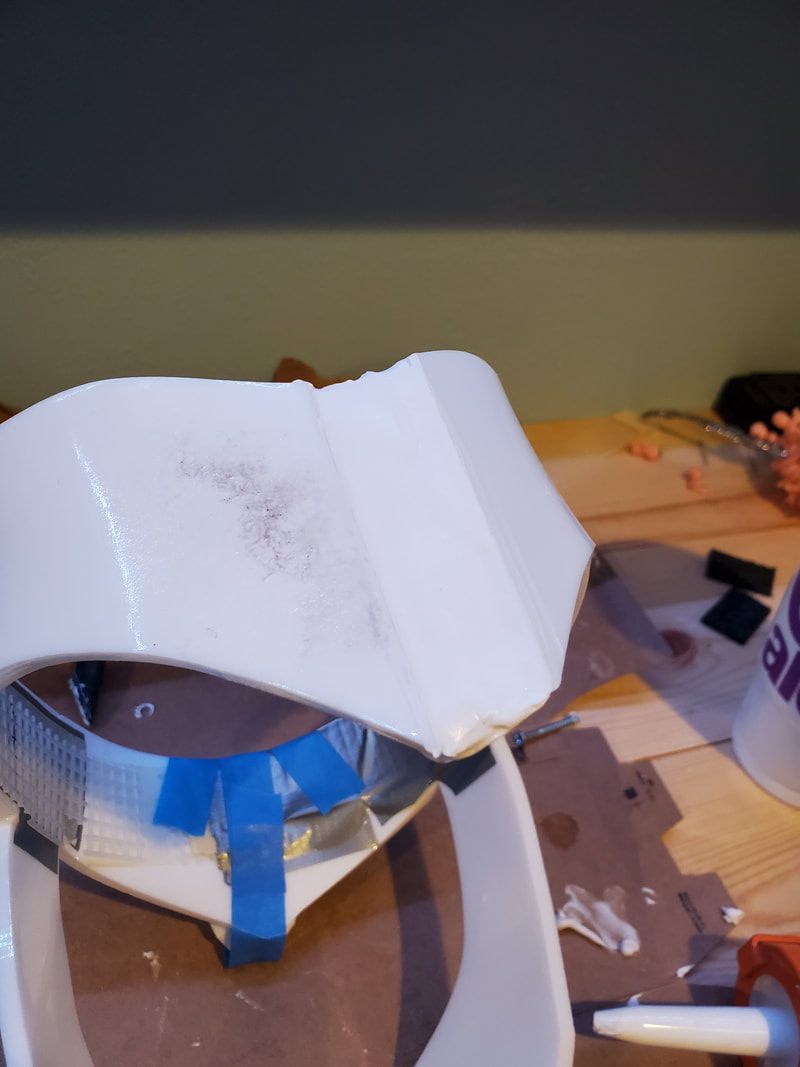
This part was very tricky. We had to make the bump-out - that we so cleverly named the triangle - out of the pieces I made. The issue was that with the way they were cut, they didn't line up at all and that's 100% due to my error. None of the edges lines up the way they were supposed to, so we taped up the back and glued as best we could, then I caulked the outer edges. At this point, it looks pretty decent.
|
|
|
|
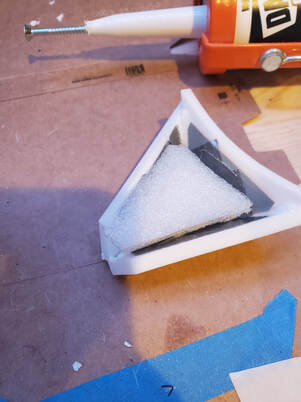
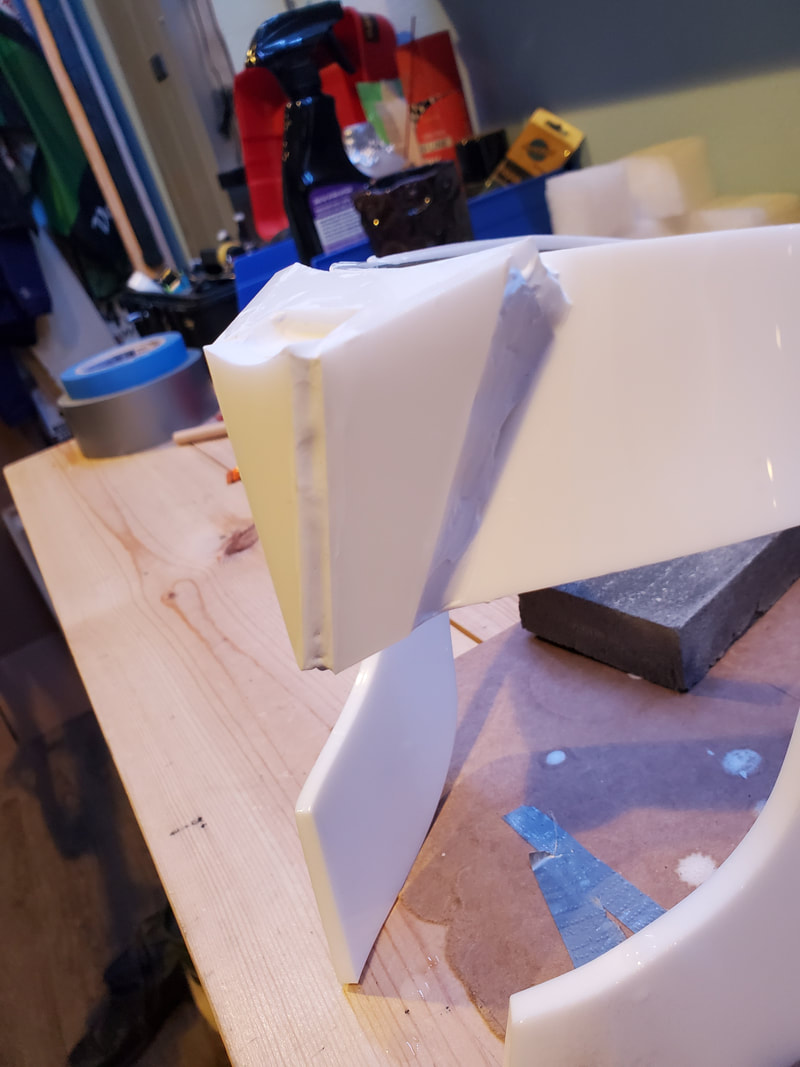
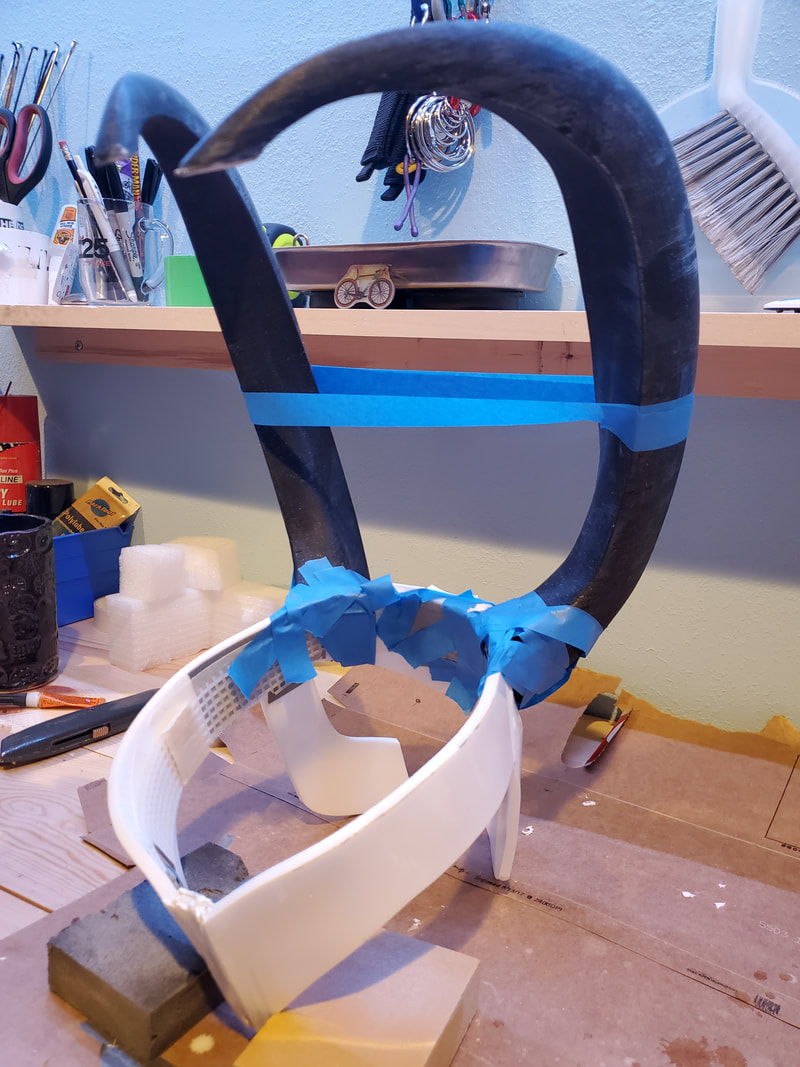
The issue with the pieces not sitting right with themselves is that they don't sit right on the headpiece, either. To get around that as much as possible, we glued a block of foam on the inside as a sort of bolster and taped it down to let it dry, essentially hoping for the best. The bottom right picture kinda shows that beyond the foam, it was really only connected in two small places, with a lot of gaps.
|
|
|
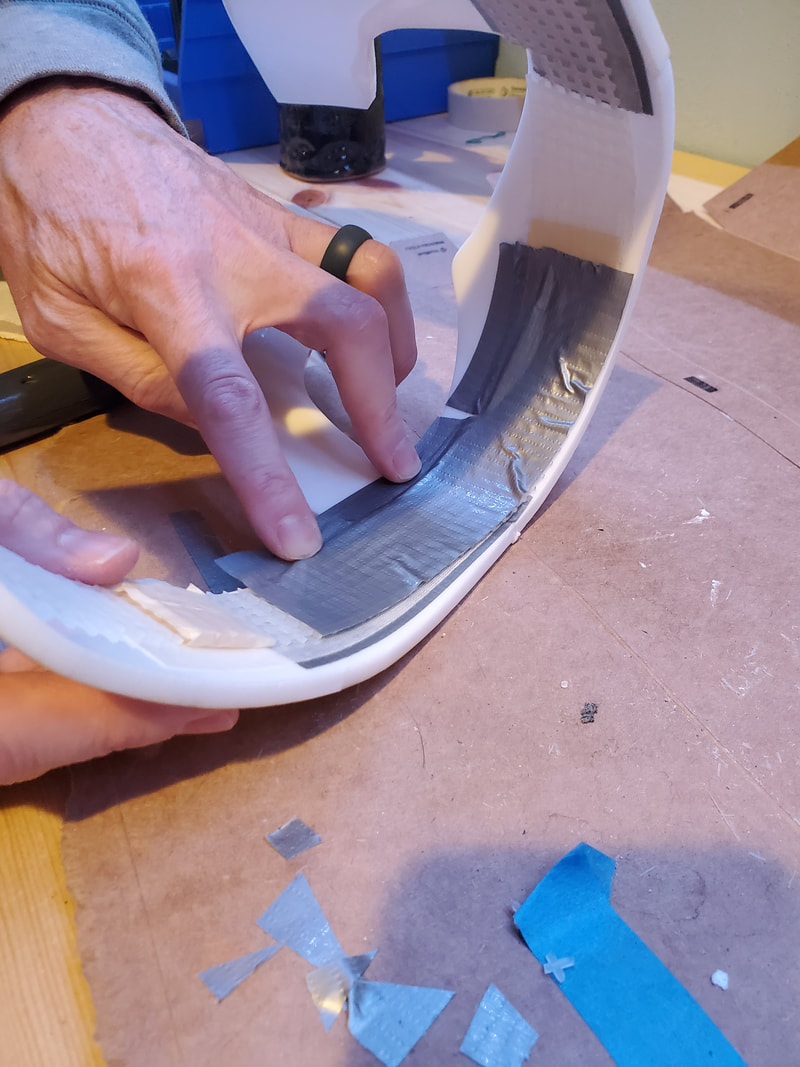
Once the front was more stable, I caulked the gap in the back. I put down a layer of tape to give it something to stick to, and just kinda filled it in with a few layers. By no means does it look perfect, but it's adequate and will hold, which is kinda the vibe of teh project at this point.
|
|
|
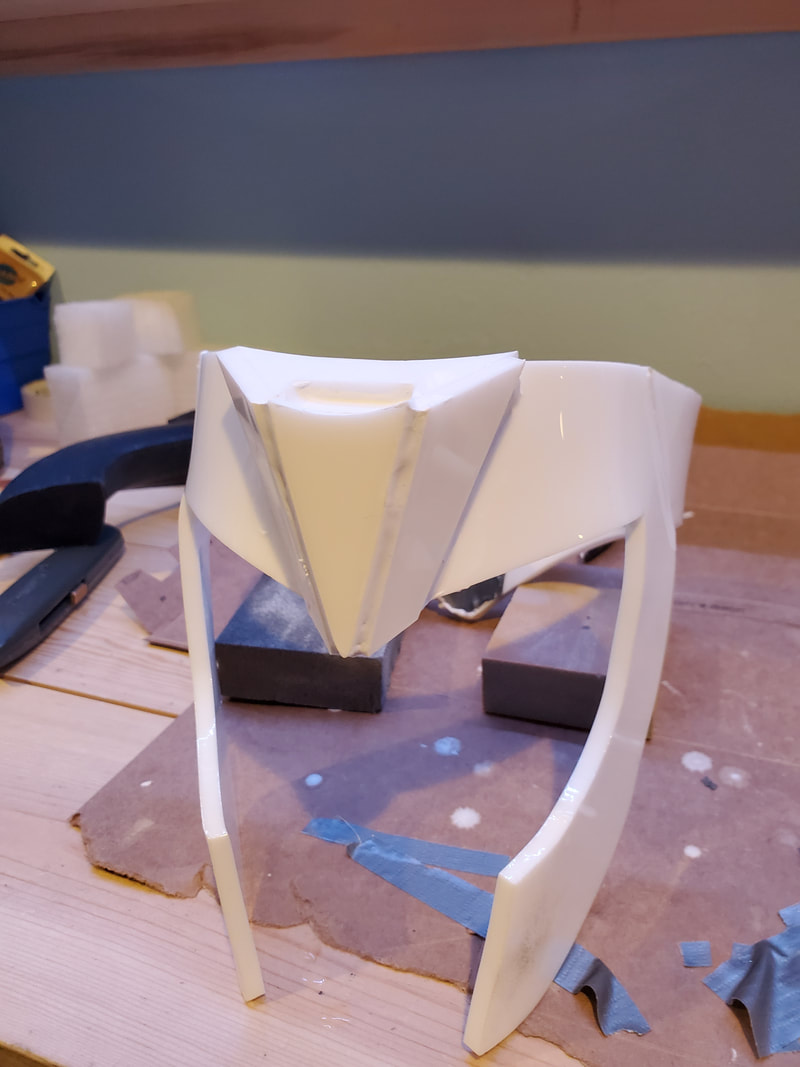
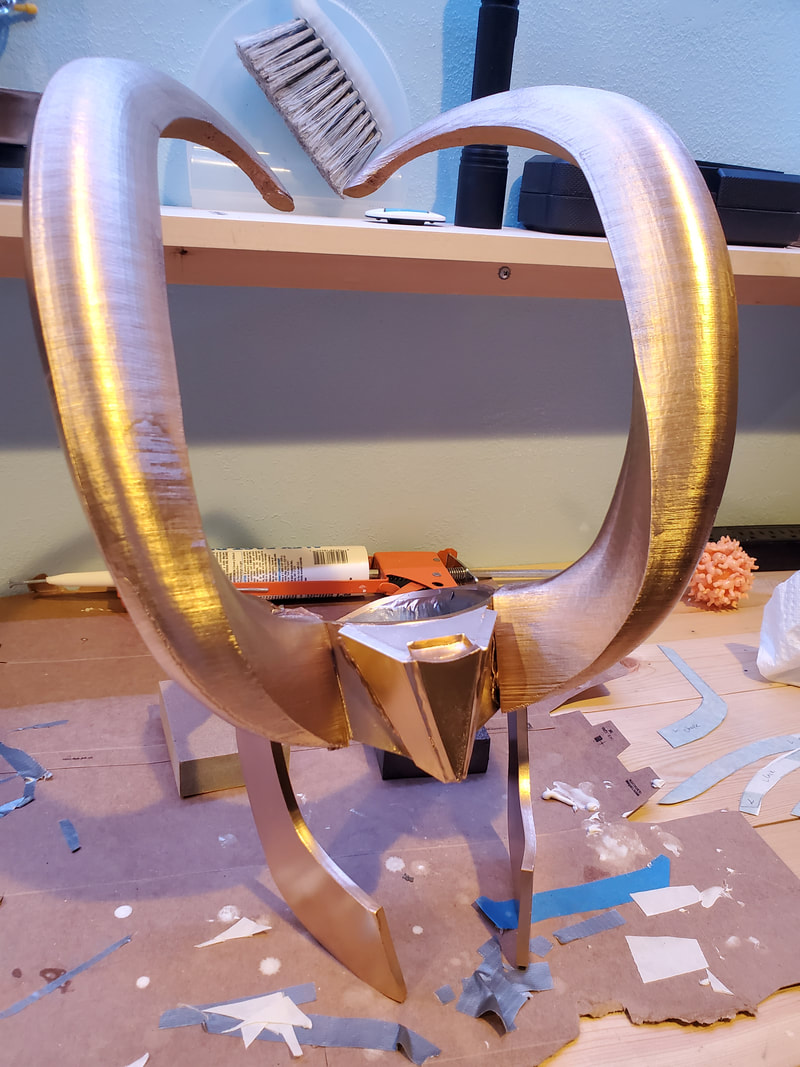
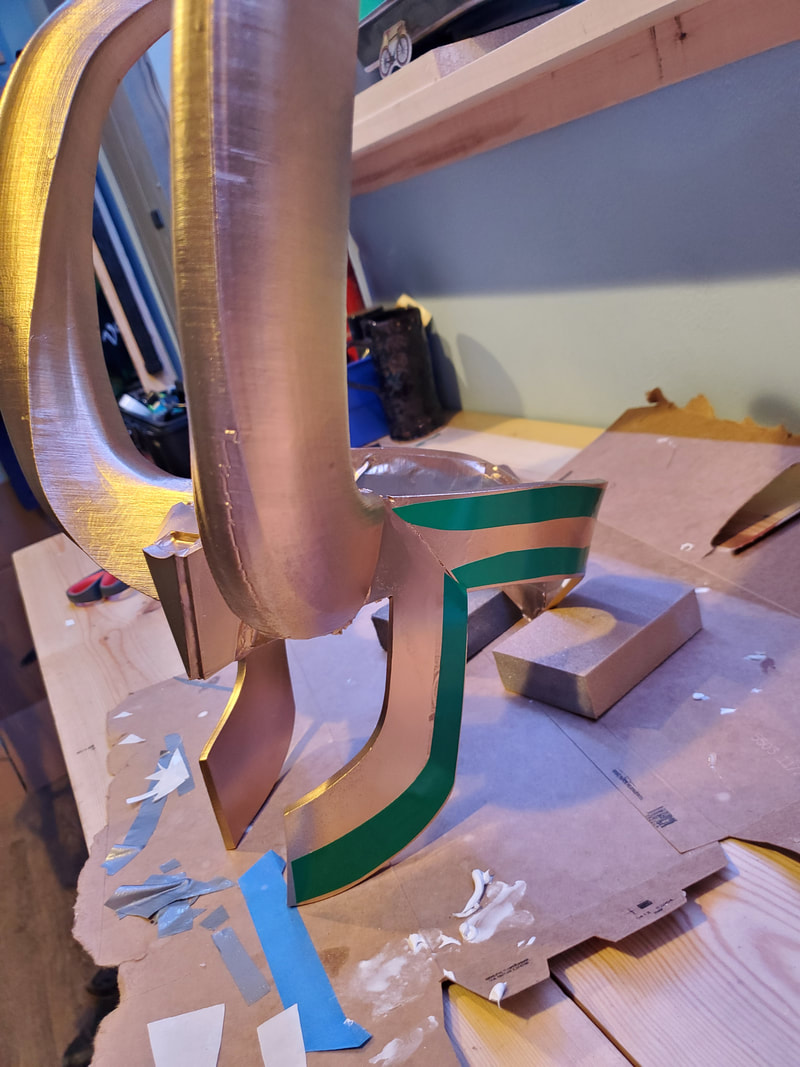
The triangle was glued on enough, so I caulked the outer edges to fill in the gap a little bit. To be honest, I kinda hate it. It looks very sloppy and underdone, but at this point I was in a bit of a time crunch to finish it, and the horns were more important.
|
|
|
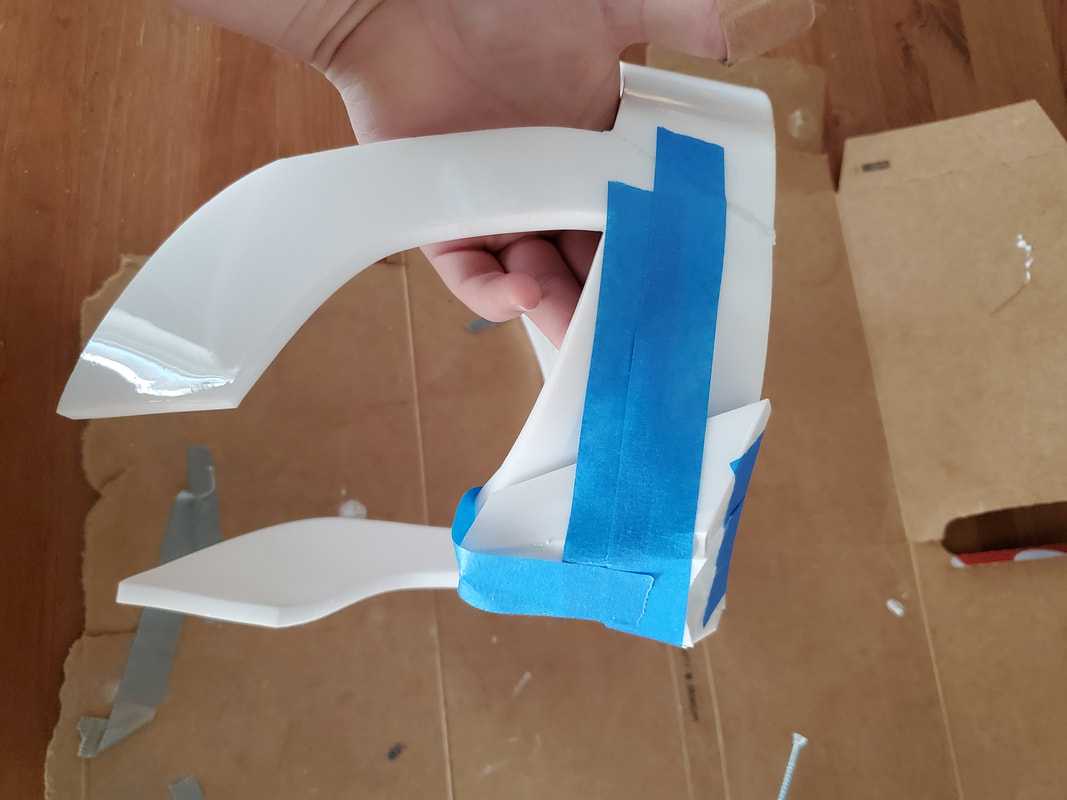
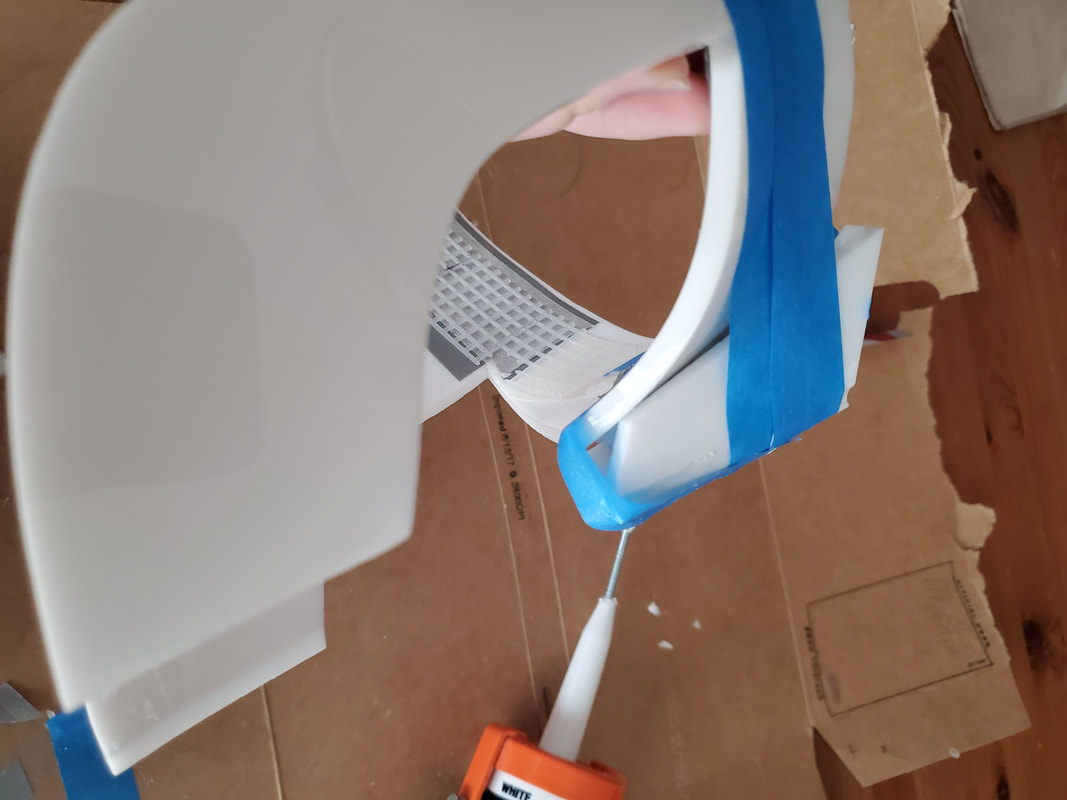
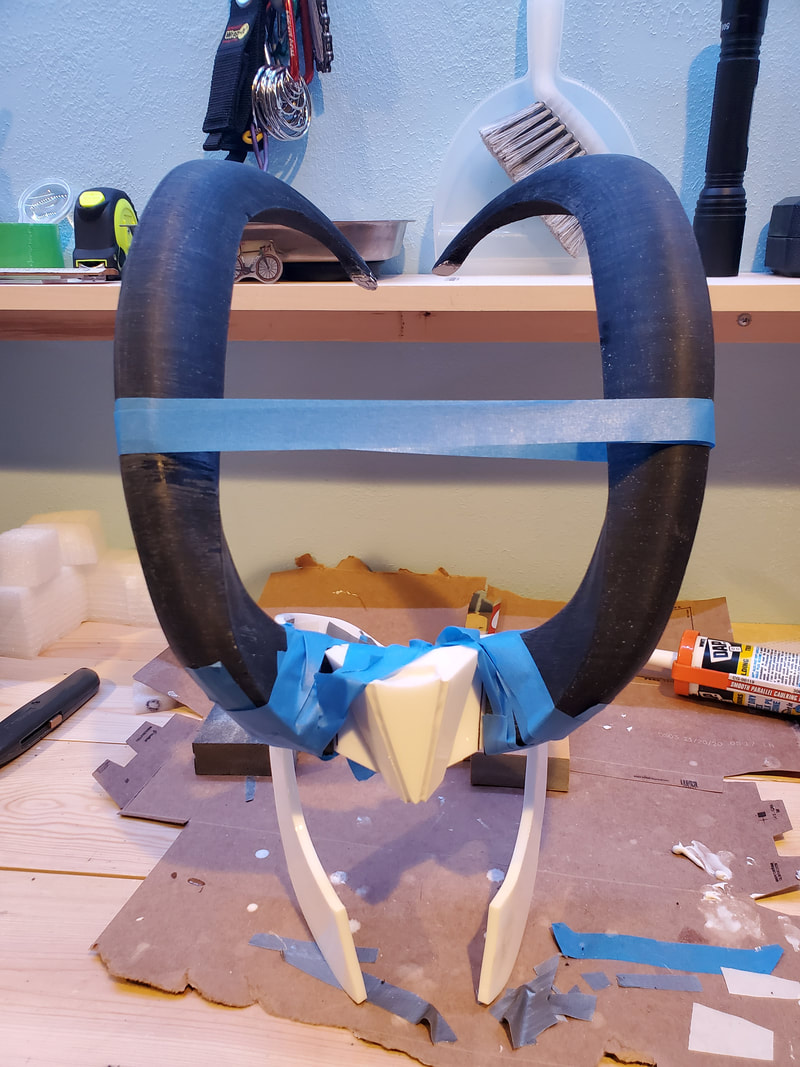
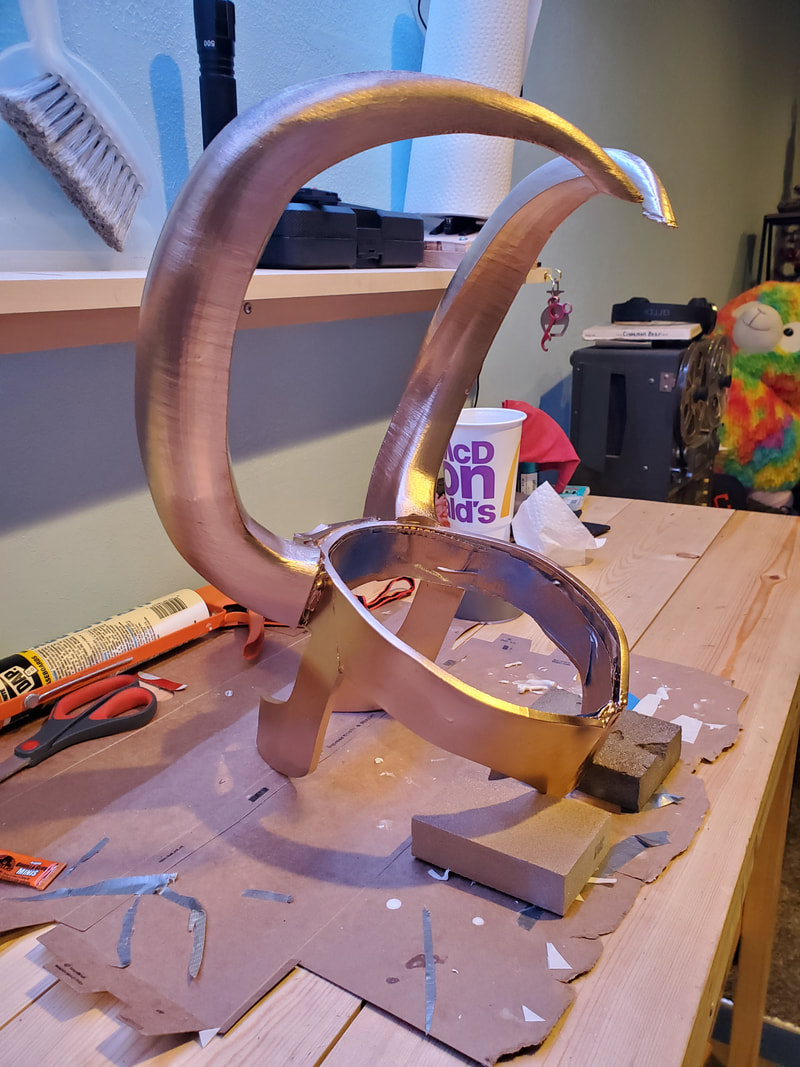
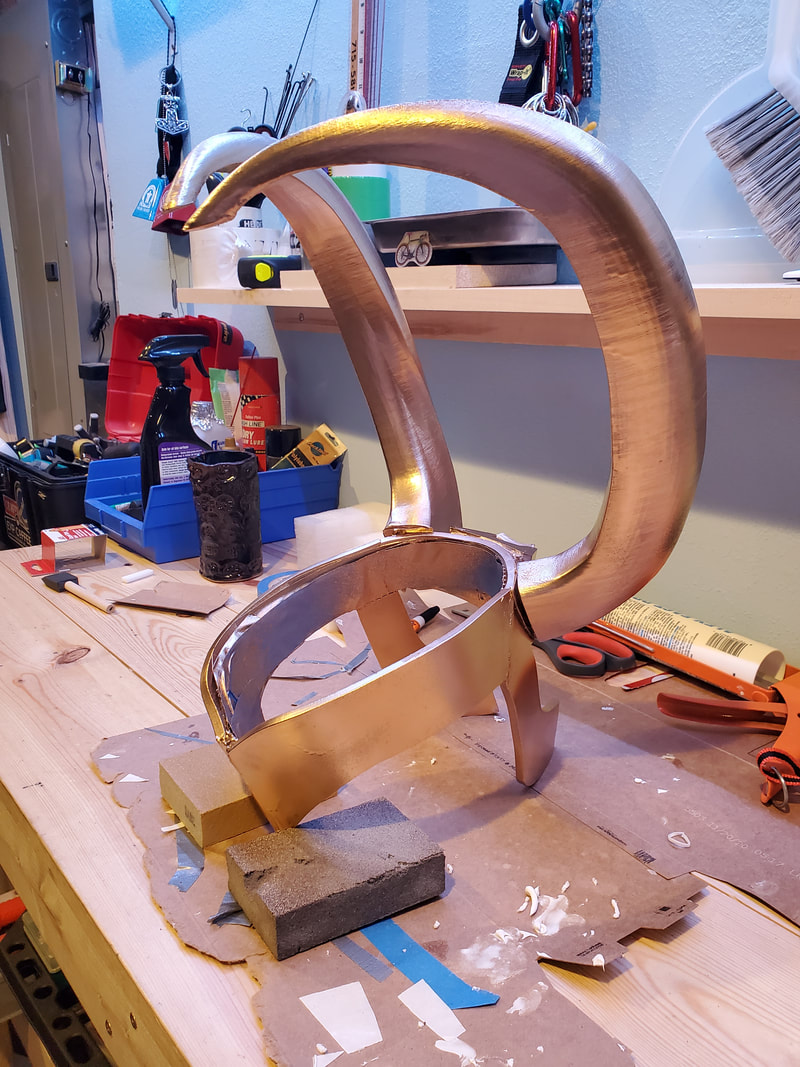
I really think the horns make it look better. In my opinion, they look a bit like ram's horns, but I think that's okay. A bit bulky, but on there. We did a similar thing with gluing them on as we did with the triangle, because it was a flat face being glued to a curved face. There was also a lot of tape that went into it in some weird ways, because the caulk on the triangle slipped a little bit when we were attaching the horns.
Slight issue with the glue is that it straight up didn't work. It fell apart almost instantly, it just didn't hold. We tried to take some heavy duty tape to it, but that didn't hold up either. What we did end up doing was drilling holes through it and screwing it into place, and it didn't budge. At this point it's starting to really look like his helmet.
Slight issue with the glue is that it straight up didn't work. It fell apart almost instantly, it just didn't hold. We tried to take some heavy duty tape to it, but that didn't hold up either. What we did end up doing was drilling holes through it and screwing it into place, and it didn't budge. At this point it's starting to really look like his helmet.
|
|
|
|
Last Touches
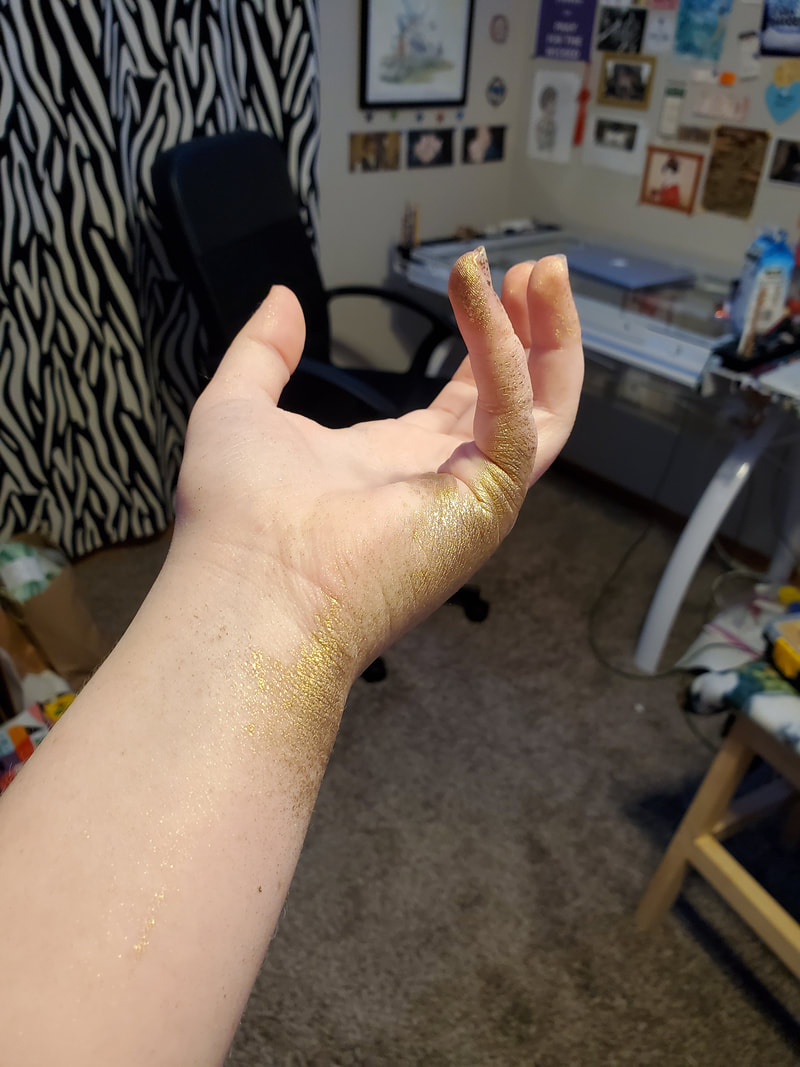
I took it out to the garage to spray paint it (and my hand), and I'm actually very impressed by it. It's really starting to come together.
|
|
|
|
The next step was to cut out the vinyl. I made a mistake when uploading it to the vinyl cutter, and the pieces cut too large, so I had to trim them down to usable sizes. The lines aren't entirely straight and they don't entirely line up or stick in the back, but the color is spot on.

|
|
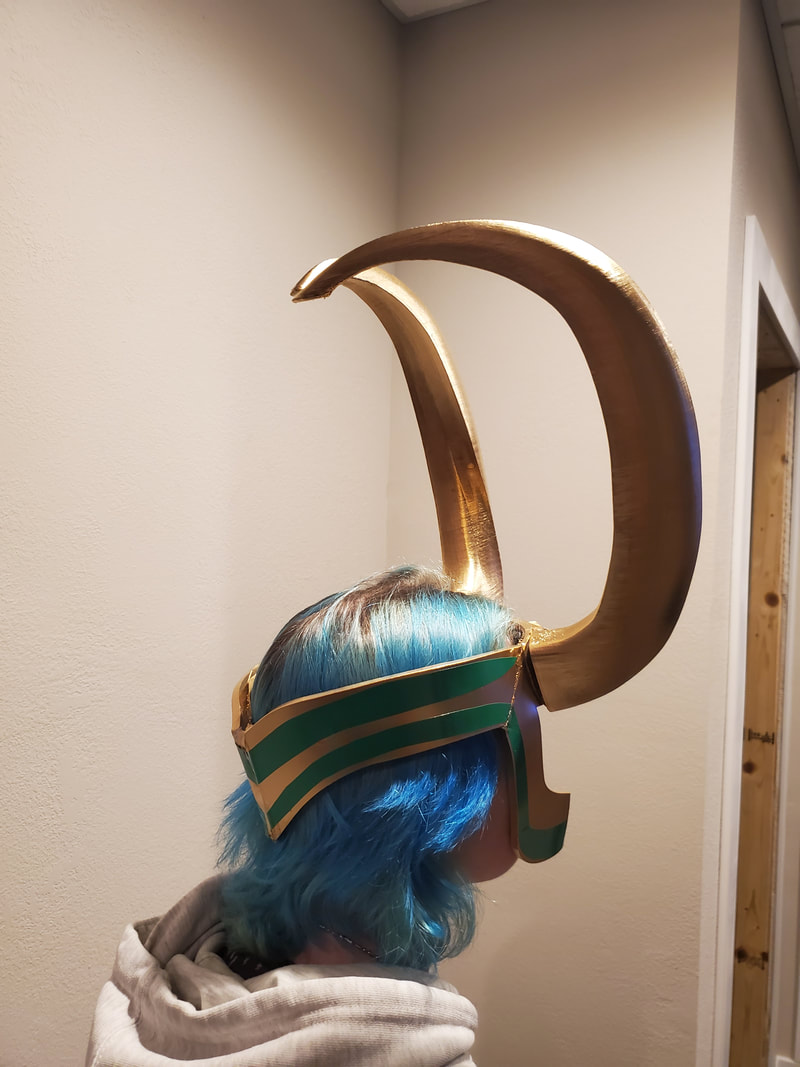
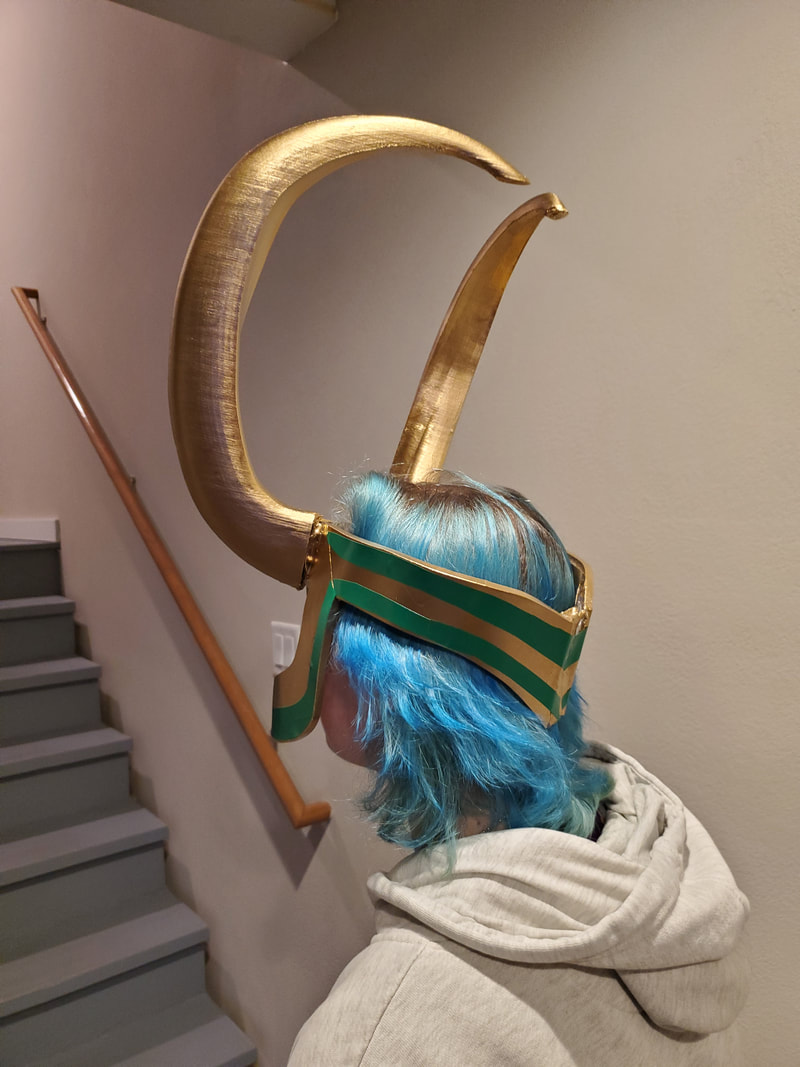
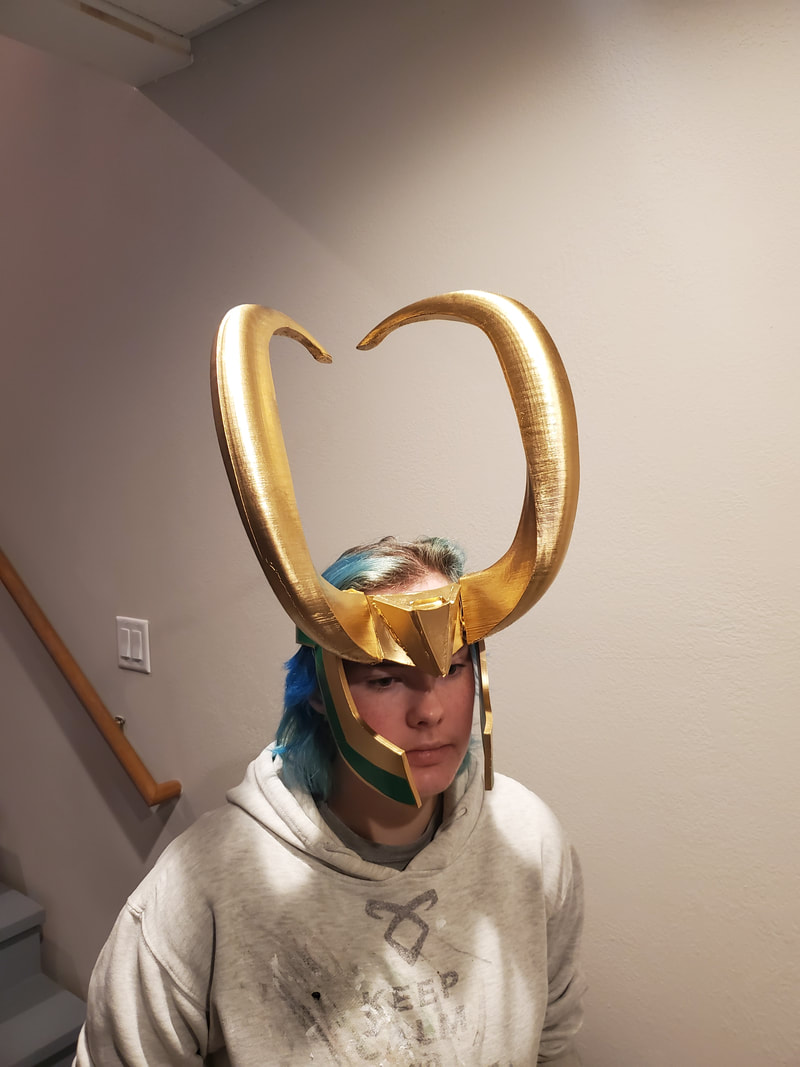
End Result
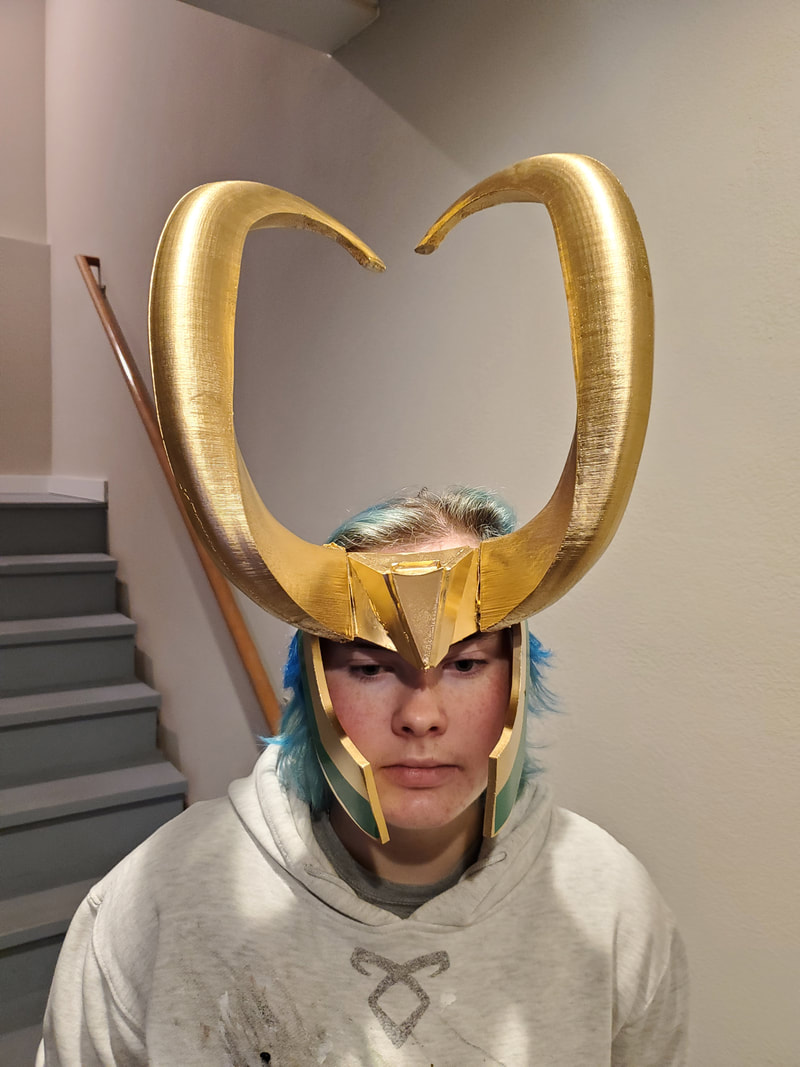
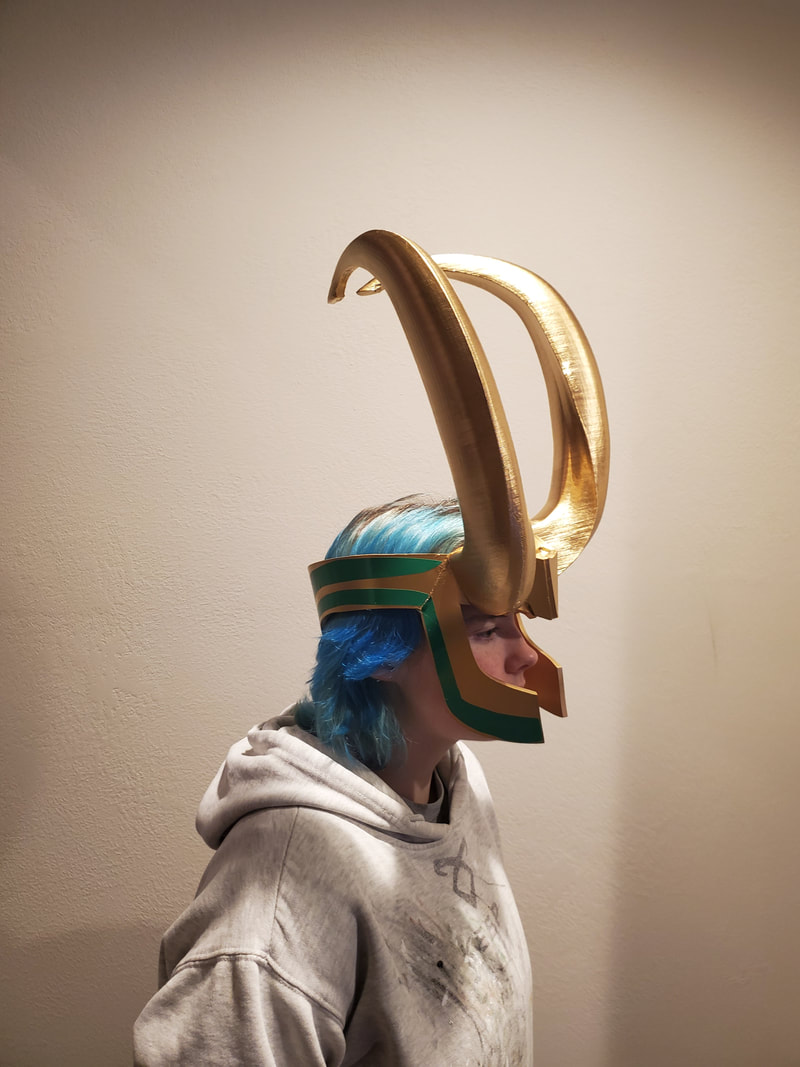
And this is the final result! I'm not 100% happy with it, but I think I did the best job I could have done with the time and restraints I gave myself. The front looks a little sloppy, as does the area around the base of the horns, but overall I think it looks pretty good!
|

|
|
|
|
|
Summary
One of the major takeaways from this is time management. I put this project off for the end I think in large part because I was afraid to do it. I gave myself a pretty daunting task, and I would have been able to handle it a little better if I had started working on it sooner. Progress for it was slow going for a long time, and I should have set myself stricter deadlines. As it was, I did this whole project in about 3 weeks.
That said, I think part of it was the nature of learning from home. Without the lab, there were a lot of things that would have been fixed or designed better if I had access to some of the materials available, but I made it work pretty well with what I have. I also need to have a realistic ideation of my skill. I underestimated my technological capabilities to design, and I perhaps overestimated my actual construction ability.
There were a lot of shortcomings on my part, and I had to make a lot of compromises with my vision. I am disappointed in myself for not giving myself more time. I do think that given what I had, I made it work pretty good. It's by no means an exact replica, but it is definitely recognizable, and I'm proud of what I made in this class.
